How to Troll Crankbaits Without Snagging Bottom
Oh, the sheer frustration! There's nothing quite like the sudden, jarring stop of your trolling rod, followed by that sickening thunk as your prized crankbait wedges itself firmly into the lakebed. We've all been there, especially when exploring the diverse and often challenging bottom structures of North Dakota's fantastic fisheries. It’s a common heartache, but fear not, fellow angler, because this guide is all about helping you master the art of trolling crankbaits without constantly donating your lures to the underwater gods.
Understanding Why Crankbaits Snag in North Dakota Waters
Let's be honest, those crankbaits aren't cheap, and losing one to a snag feels like a punch to the gut. But before we can prevent snags, we need to understand why they happen. North Dakota's lakes and rivers offer incredible fishing, but they also boast incredibly varied and sometimes treacherous bottom terrains.
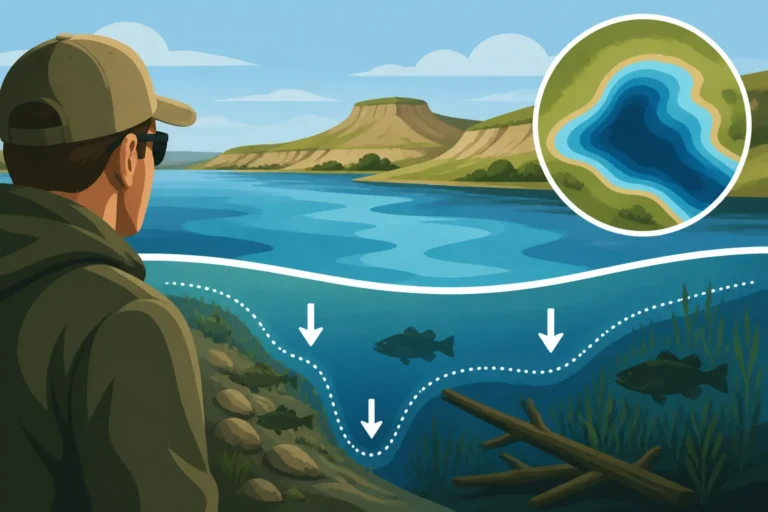
Reading the Bottom Contour and Structure
Imagine trolling along the massive expanse of Lake Sakakawea, where the bottom can change from a smooth, sandy flat to a jagged rock pile in a matter of yards. Or perhaps you're on Devils Lake, navigating acres of flooded timber and old roadbeds. These underwater features, while prime fish habitat, are also crankbait magnets.
- Rock Piles and Rubble: These are notorious for grabbing hooks. Walleye love to relate to them, but crankbaits, especially those with treble hooks, can easily wedge into crevices. A sharp dive by your lure over a sudden rise can embed it instantly.
- Weed Beds and Grass Lines: While many crankbaits are designed to "rip" through weeds, thick, matted vegetation can foul hooks and sometimes even trap the entire lure. This is particularly true for shallower-running crankbaits in areas like the bays of Lake Ashtabula.
- Submerged Timber and Brush Piles: Oh, the dreaded trees! Old stumps, logs, and brush are common in reservoirs like Lake Oahe and certain areas of Devils Lake. If your crankbait dives too deep and hits a branch just right, it’s often game over.
- Sharp Drop-offs and Ledges: When you're trolling along a contour line and your lure unexpectedly drops off a ledge into shallower water, it can sometimes dive straight into the face of the ledge, getting stuck. Conversely, if it hits a sudden rise, it can instantly snag.
Understanding these structures is the first step. You need to visualize what your lure is doing down there, even when you can't see it.
The Role of Lure Choice and Diving Depth
Not all crankbaits are created equal, and their design plays a huge role in how likely they are to snag. Each crankbait is engineered with a specific lip (or bill) that dictates its action and, crucially, its maximum diving depth.
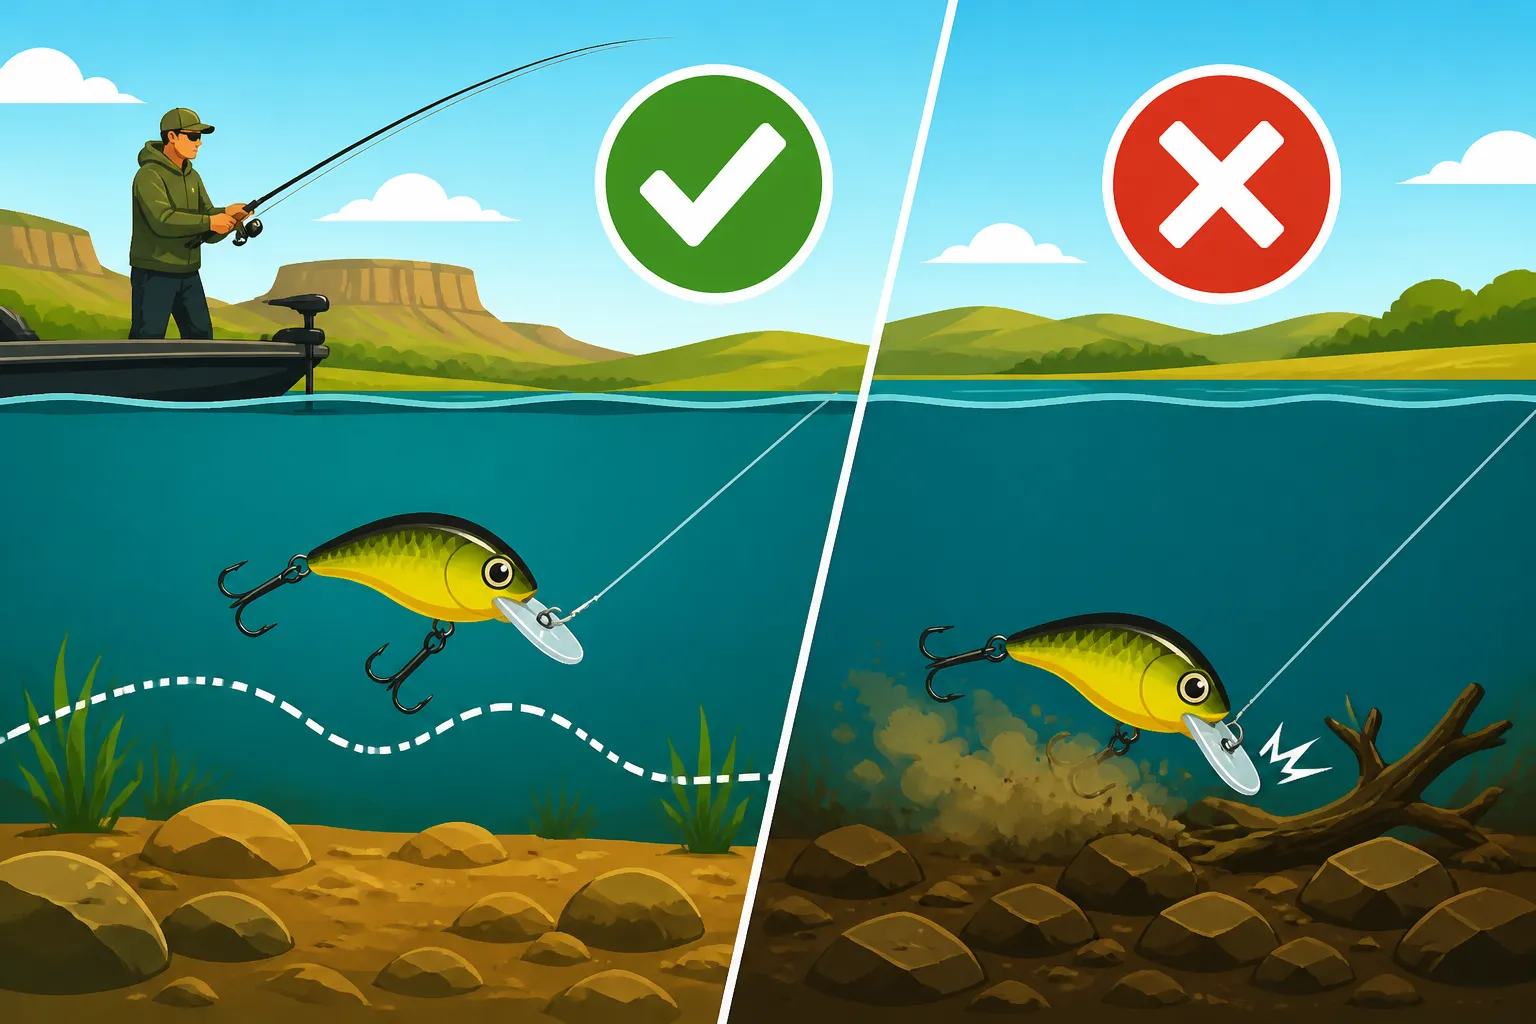
- Too Deep for the Water: This is the most common culprit. If you're running a deep-diving crankbait, like some of those big Rapala or Berkley models, in only 8-10 feet of water, you're practically asking for a snag. The lure will consistently dig into the bottom, especially if it's rocky or has debris.
- Aggressive Lip Angles: Some crankbaits have very steep, aggressive lips that make them dive quickly. While great for reaching deep fish fast, they can also wedge more easily into structure if not carefully managed.
- Lack of "Bottom Bouncing" Ability: Some crankbaits are designed to deflect off structure, like the popular Shad Raps. Others, with a different lip angle or body shape, might just dig in harder when they encounter resistance. Knowing your lure's characteristics is key. You need to match the lure's designed diving depth with the actual depth you want to fish, plus account for how much line you're letting out (more on that in a bit).
Impact of Line Diameter and Trolling Speed
These two factors might seem minor, but they significantly influence how your crankbait behaves and its running depth.
- Line Diameter: Thicker fishing line creates more drag in the water, which reduces the diving depth of your crankbait. Conversely, thinner line allows the crankbait to reach its maximum advertised depth, and sometimes even a bit deeper, because there's less resistance. If you're using a heavy mono or fluorocarbon line when you usually use a thinner braid, your crankbait might not be running as deep as you think, or it might dive deeper than expected if you've switched to a very thin line. This is a crucial detail when you're trying to keep that lure just above the bottom.
- Trolling Speed: Speed directly affects a crankbait's action and depth.
- Faster Speeds: Generally, a faster troll will make a crankbait run slightly shallower and often give it a more aggressive, erratic action. This can be good for covering water and triggering strikes, but if you're already near the bottom, it could cause the lure to "dig in" or "plow" into structure rather than deflect.
- Slower Speeds: A slower troll usually allows the crankbait to dive deeper, as there's less water pressure pushing against its lip. However, if you go too slow, some crankbaits lose their enticing action and simply sink, making them highly susceptible to snagging, especially if you momentarily pause or lose forward momentum. Think about how a boat handles the currents on the Missouri River; speed adjustments are constantly needed!
Proactive Strategies to Prevent Snagging
Alright, let's get into the good stuff – how to proactively keep those precious crankbaits out of the snags. Prevention is always better than recovery!
Mastering Your Electronics and Mapping
In today's world, fishing without modern electronics is like driving blindfolded. For North Dakota anglers, especially on vast lakes like Lake Sakakawea or Devils Lake, understanding your sonar and mapping systems is non-negotiable for snag-free trolling.
- Sonar (2D, Down Imaging, Side Imaging): Your fish finder is your eyes underwater. Use your 2D sonar to see the depth directly beneath your boat and identify any sudden rises or drops. Down Imaging gives you a more photographic view of what's directly below, helping to distinguish between soft bottom, rock, or brush. Where Side Imaging truly shines is in showing you structure to the sides of your boat. This allows you to identify rock piles, weed lines, or submerged timber well before your crankbaits get anywhere near them. If you see a cluster of trees or a boulder field off to the port side on your Side Imaging, you know to steer clear or adjust your line length. Many excellent units are available on Amazon that offer these advanced features.
- GPS Mapping: A good GPS map with detailed contour lines is your roadmap. Before you even drop a line, study the contours. Look for consistent depth ranges where you want to target fish. Mark potential hazard areas – known rock piles, old foundations, sharp ledges. As you troll, keep your boat icon positioned exactly where you want it relative to the contour lines. If you're trying to maintain a crankbait at 15 feet, and you see the contour lines jump from 15 feet to 10 feet ahead, you know it's time to adjust. Learn more about the Best Fish Finders for North Dakota Lakes.
- Constant Vigilance: Don't just set it and forget it! Keep one eye on your sonar screen constantly. Look for changes in depth, bottom composition, and any "arcs" that indicate fish. If you see your depth suddenly shallowing, or a large piece of structure appearing, react immediately.
Selecting the Right Crankbait for the Depth
This is where many anglers go wrong. It's not about having the biggest box of crankbaits; it's about having the right crankbait for the conditions.
- Know Your Lure's Dive Curve: Every crankbait has an advertised diving depth range. However, this is an estimate and can vary based on line diameter, trolling speed, and line length. Many manufacturers provide dive curves (charts showing depth vs. line out) – use them! If you're fishing in 15 feet of water, don't throw a crankbait rated for 25 feet. Aim for a lure that runs 1-3 feet shallower than the actual bottom depth you're targeting. This gives you a safe buffer. For example, if you're fishing a 12-foot flat, a crankbait that dives to 8-10 feet with your current setup is often ideal, as it will occasionally tick the bottom without consistently digging in.
- Consider Lip Design:
- Shallow Divers: With smaller, less aggressive lips, these are perfect for targeting shallower flats, weed edges, or when fishing over submerged structure where you want to just clear the top.
- Medium Divers: Your workhorses for many North Dakota walleye scenarios, covering the 10-20 foot range. These are often the most prone to snagging if not managed well.
- Deep Divers: For getting down to those deep-water walleye on Lake Sakakawea or the Missouri River. These require careful attention to bottom contours.
- "Bottom Bouncers" as Lures: Some crankbaits are designed specifically to deflect off bottom structure. Lures like the Berkley Flicker Shad or certain Shad Rap models are often excellent choices because their lip shape and buoyancy allow them to "kick" off rocks and logs rather than burying into them. For a deeper dive into lure selection, check out our guide on Best Crankbaits for North Dakota Walleye.
Adjusting Line Length and Trolling Speed
These are your primary controls for fine-tuning crankbait depth while trolling.
- Line Length (Feet Out): This is your most powerful tool. The more line you let out, the deeper your crankbait will dive (up to its maximum depth). Conversely, reeling in line will make it run shallower.
- The "Tick-Stop-Reel" Method: A common technique is to let out line until you feel your crankbait occasionally "tick" the bottom, then reel in a foot or two until the ticking stops. This ensures your lure is running just above the desired depth. This can be highly effective in areas with consistent depths, like some sections of Jamestown Reservoir.
- Using Line Counter Reels: These are invaluable for trolling, especially when trying to replicate a successful depth. A line counter reel (many great options exist, including on Amazon) allows you to know precisely how many feet of line are out, making adjustments and repeatability much easier. When you find that sweet spot, you can replicate it on other rods or on future passes.
- Trolling Speed Adjustments:
- Speed Up to Go Shallower: If you feel your crankbait starting to dig into the bottom, a slight increase in trolling speed can sometimes make it rise a foot or two, clearing the snag.
- Slow Down to Go Deeper (Carefully): While slowing down generally makes a lure dive deeper, be cautious. Too slow, and some crankbaits lose their action and can just sink, increasing snag risk. It's a delicate balance.
- Experimentation: Different crankbaits perform optimally at different speeds. Pay attention to your rod tip action – a good, consistent wobble indicates proper lure performance. If the rod tip stops wobbling or is erratic, your speed might be off. Consider your Best Line Weight for Walleye Trolling and how it interacts with speed.
Reactive Techniques When Snags Happen (or Are Imminent)
Even with the best planning, snags happen. It’s a fact of fishing life in North Dakota. The key is how you react when you feel that tell-tale thump or suddenly heavy pull.
The Immediate Back-Off Maneuver
This is your first line of defense, and often your most successful. The moment you feel a snag, don't just pull harder.
- Shift to Neutral: Immediately take your boat out of gear. This stops forward momentum and reduces the force pulling the lure into the snag.
- Back Off Slightly: If you can, quickly shift into reverse for a few seconds. This changes the angle of pull on the crankbait, often dislodging the hooks from whatever they're caught on. Imagine pulling a thorn out of your finger – you don't pull straight out; you often back it up a bit first.
- Maintain Line Tension: While backing off, keep a steady, moderate tension on the line. Don't go slack, but don't try to rip it free either. The idea is to let the backward movement of the boat, combined with the lure's buoyancy, help it float free.
- Pump and Reel: Once you've backed off, try gently pumping the rod tip while slowly reeling. This can sometimes "walk" the crankbait off the structure.
This maneuver works surprisingly often, saving you countless lures and re-rigging time.
Using a Line Snubber or Breakaway System
For those particularly gnarly areas, or when you’re targeting aggressive fish that might not be shy about structure, some anglers use specialized gear.
- Line Snubbers: These are elastic devices that clip onto your main line, acting as a shock absorber. While primarily designed to absorb the shock of a strike, they can also provide a small amount of "give" when a crankbait hits structure, sometimes allowing it to bounce off rather than snagging hard.
- Breakaway Leaders/Systems: These are less common for crankbait trolling but can be rigged. The idea is to have a weaker line segment or a special clip that attaches your crankbait, designed to break away before your main line if it gets irrevocably snagged. This saves your main line and allows you to retrieve some of your gear, even if the crankbait is lost. This is more often seen in situations with extremely high snag potential, or when targeting very aggressive fish like Northern Pike, where losing a lure is almost guaranteed. You can find components for these on Amazon if you're keen to experiment.
The "Figure-Eight" or Circular Maneuver
If the back-off doesn't work, don't give up immediately. This technique is for those stubborn snags.
- Maintain Tension: Keep your line taut.
- Circle the Snag: Slowly maneuver your boat in a wide circle around the snagged lure. This changes the angle of pull from your rod to the crankbait in the water. As you circle, the line will sweep across different points of the structure, and sometimes, the crankbait will pop free.
- Vary Angles: Try making a figure-eight or a few circles in different directions. The goal is to pull the crankbait from as many different angles as possible.
- Listen and Feel: As you change angles, listen for any sounds of the lure scraping or popping free, and feel for any subtle changes in tension on your rod. It often comes free with a sudden "snap" as the hooks release.
This is a patient game, but it often pays off, especially with valuable, deep-diving crankbaits.
Essential Gear and Setup for Snag-Free Trolling
Having the right tools for the job can make all the difference, not just in catching fish, but in avoiding snags and minimizing losses.
Rods, Reels, and Line Choices
Your rod, reel, and line are the direct link to your lure and your first line of defense against snags.
- Rods for Trolling: Look for a medium-heavy power rod with a moderate or moderate-fast action. This combination provides enough backbone to handle large fish and absorb the shock of a strike, but the moderate action gives the rod tip enough flexibility to absorb bumps and deflections from structure. A rod that's too stiff might transmit every bump into a hard snag, while one that's too soft won't give you the leverage to pull a lure free. The Best Fishing Rods for North Dakota Anglers will often include options ideal for trolling.
- Line Counter Reels: As mentioned earlier, these are a game-changer. Being able to precisely reproduce line length is key to staying in the strike zone without constant snagging. If you know that at 80 feet back, your lure hits the bottom, you can then try 75 feet back to stay just clear.
- Line Types and Pound Test:
- Braided Line: Offers excellent sensitivity and virtually no stretch. This means you feel every tick, every weed, and every bottom contact immediately, allowing for quicker reactions. Its thinner diameter also lets crankbaits dive deeper. Many anglers use 10-20 lb test braid for walleye trolling.
- Fluorocarbon Line: Has good abrasion resistance and sinks, making it less visible underwater. Some anglers use it as a leader on braided line, or as a main line for its low visibility and abrasion qualities. Its sinking nature can also slightly increase dive depth.
- Monofilament Line: Offers good stretch, which can act as a shock absorber. However, its thicker diameter (compared to braid of the same strength) reduces diving depth, and its stretch can make it harder to feel subtle bottom contact.
- Leaders: Using a fluorocarbon leader (e.g., 10-15 lb test) attached to your braided main line is a popular choice. The fluoro offers invisibility and some abrasion resistance near the lure, while the braid gives you sensitivity and strength. Just ensure your knot is solid! For specific North Dakota scenarios, you might want to consider Best Line Weight for Walleye Trolling.
Employing Bottom Bouncers or Lead Core Lines
Sometimes, the best way to avoid snagging a crankbait is to not let the crankbait be the primary contact point with the bottom.
- Bottom Bouncers: These are weighted wires designed to "bounce" along the bottom while keeping your lure (often a spinner rig or even a shallow-diving crankbait) a set distance above it. This is incredibly effective in rocky or snaggy areas, especially on lakes like Lake Audubon or segments of the Missouri River. The bottom bouncer hits the structure first, protecting your lure. You feel the bouncer ticking the bottom, and you can adjust your retrieve or boat speed to keep it just ticking or slightly off.
- Lead Core Lines: Lead core fishing line has a lead core encased in a braided sheath. Different colors on the line indicate different lengths (e.g., 10 yards per color). This line sinks, and by letting out a certain number of colors, you can achieve a specific depth for your lure without using weights on your main line. While primarily used with spoons or spinner rigs, it can also be used effectively with crankbaits, allowing you to present them at precise depths with less risk of snagging the lure itself on the bottom. The heavier line maintains the depth, but the lure still has its action. This is often employed on bigger water like Lake Sakakawea.
Tools for Retrieval
Despite all your best efforts, you will still get snagged sometimes. Having the right tools on board can turn a lost lure into a retrieved one.
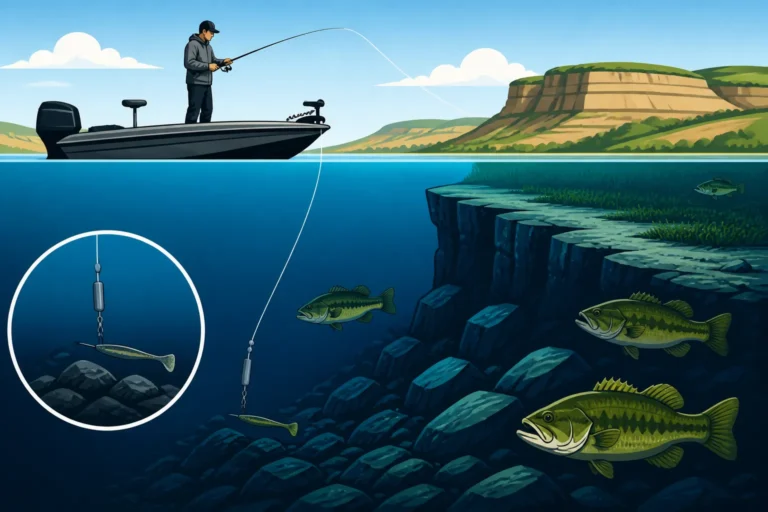
- Plug Knocker/Lure Retriever: This is a weighted device, often with a chain or wire loop, that you send down your fishing line when snagged. It slides down to your crankbait and, with some jarring and maneuvering, can often knock the lure free from the snag. These come in various weights and designs, and many anglers swear by them. Investing in a good one from Amazon can save you serious money in lost lures over time.
- Heavy Line or Rope: If a plug knocker fails, sometimes a heavy line or rope with a grappling hook (like a small anchor) can be used to drag the bottom around the snagged area. This is a last resort but can sometimes retrieve both your lure and other discarded lines.
By combining careful planning with the right gear and smart techniques, you can drastically reduce the number of crankbaits you lose to snags, allowing you to focus on the thrilling chase of North Dakota's incredible fish.
Disclaimer
This article is for general informational purposes only and does not constitute professional advice. Laws, prices and regulations vary by location and change over time. Consult a qualified professional for guidance on your specific situation.