Best Fish Finders for Boat Fishing
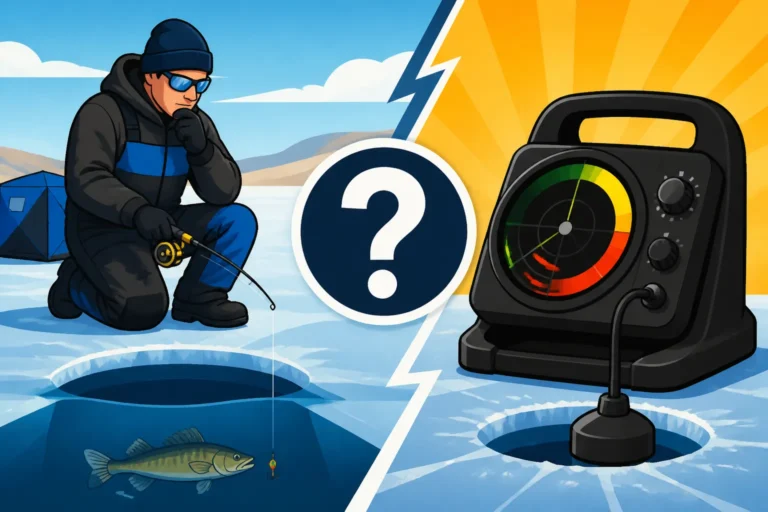
There’s nothing quite as frustrating as spending a beautiful day out on the vast waters of a North Dakota lake, only to come home empty-handed because you couldn't locate any fish. It’s a common struggle, especially when you’re staring at miles of seemingly featureless water. This guide is here to cut through that frustration, walking you through everything you need to know about choosing and effectively using the best fish finders to turn those "fishing trips" into actual "catching trips" on your boat.
Why a Fish Finder is a Game-Changer on North Dakota Waters
North Dakota's lakes and rivers, from the sprawling expanse of Lake Sakakawea to the flooded timber of Devils Lake or the currents of the Missouri River, present unique challenges. Without a clear understanding of what lies beneath the surface, you're essentially fishing blind. A quality fish finder doesn't just show you where the fish are; it paints a picture of their underwater world, revealing structure, depth changes, and even the subtle movements of baitfish. It’s the difference between guessing and truly knowing, and that knowledge empowers you to fish smarter, not just harder.
Beyond Just Seeing Fish – Mapping and Structure
Many anglers initially think of a fish finder as just a "fish detector," but modern units offer so much more. Imagine being able to see a submerged rock pile, a sharp drop-off, or a hidden weed bed that extends far from shore – these are all prime locations where fish congregate. These features, often invisible from the surface, become crystal clear with the right technology.
This ability to "see" underwater structure is critical. Walleye, for instance, love to hug contours and ambush prey from cover. Northern pike lurk in weed lines, waiting for an unsuspecting meal. Without a fish finder, you might troll right over these productive areas without ever knowing they were there. It's like having X-ray vision for the lake, and once you start understanding what structure looks like on your screen, you'll never want to fish without it.
Saving Time and Fuel on Big Lakes
North Dakota is home to some truly massive bodies of water. Lake Sakakawea, for example, is one of the largest man-made lakes in the country. Covering such immense distances just "hoping" to stumble upon fish is a surefire way to burn through gas, time, and patience. A fish finder drastically reduces this guesswork.
By identifying productive areas quickly, you can spend less time searching and more time fishing. This is especially valuable when you're targeting specific species known to hold to certain depths or structures. Instead of zig-zagging aimlessly, you can navigate directly to promising spots, anchor up, and start casting. Over the course of a fishing season, this efficiency truly adds up, making your outings more enjoyable and more successful.
Understanding Fish Finder Technology: The Basics You Need to Know
Before you dive into buying a new unit, it's really helpful to understand the core technologies at play. Modern fish finders are incredibly sophisticated, but at their heart, they're all about sending and receiving sound waves. Knowing the difference between sonar types and how they work will help you choose the right tool for your specific fishing adventures in North Dakota.
Sonar, Down Imaging, and Side Imaging Explained
At its most basic, traditional 2D sonar sends a cone-shaped sound wave directly down from your boat. When this sound wave hits something – a fish, the bottom, a submerged tree – it bounces back to the transducer, and the unit interprets it, displaying it as an "arch" for fish or a contour for structure on your screen. It's great for showing you what's directly beneath your boat and gives a good general overview of depth and density.
Down Imaging (often called DownVü or DownScan) takes this a step further. Instead of a cone, it uses a very thin, high-frequency beam that acts more like a camera, giving you photo-like images of what's directly below. You'll see individual trees, rocks, and even fish in incredible detail, making it much easier to distinguish between different types of structure and fish species. Side Imaging (or SideVü/SideScan) is perhaps the most revolutionary for covering large areas. It sends out beams to the sides of your boat, often up to hundreds of feet in each direction. This allows you to scan vast swathes of water as you move, revealing structure and fish far off to the port and starboard, without having to drive directly over them. Imagine cruising down Lake Sakakawea and seeing a brush pile 100 feet to your left that’s holding a school of walleye – that's the power of side imaging.
GPS and Chartplotting Integration
Modern fish finders are rarely just fish finders anymore; most high-quality units come integrated with GPS and chartplotting capabilities. This means your unit isn't just showing you what's under the boat, but also exactly where you are on a detailed map. This feature is absolutely essential for navigating North Dakota's larger bodies of water, especially when you're exploring new areas or dealing with ever-changing water levels.
With GPS, you can mark waypoints for productive fishing spots, dangerous submerged hazards, or even your favorite boat launch. The chartplotter then displays these waypoints on a map, allowing you to easily return to those exact locations later. Many units also come with pre-loaded high-definition mapping of popular lakes, showing depth contours, navigation aids, and points of interest. This is invaluable for finding those subtle humps or deep channels that hold fish. Being able to combine real-time sonar data with precise location tracking gives you an unparalleled understanding of the fishing environment. You might find it useful to dive deeper into Best GPS Chartplotter for Lake Sakakawea.
Transducer Types and Their Importance
The transducer is the unsung hero of your fish finder system. It’s the part that actually sends and receives those sound waves. The type of transducer you choose and how it's mounted significantly impacts the performance of your unit. Transducers come in various forms, each designed for different applications and boat types.
For most recreational boat anglers, a transom-mount transducer is the most common and easiest to install. It attaches to the back of your boat, sitting just below the waterline. However, if you have an older aluminum boat with a riveted hull, you might consider an in-hull transducer, which shoots through the hull and avoids drilling holes. For serious anglers, especially those with larger fiberglass boats, a thru-hull transducer offers the best performance by minimizing interference, though it requires drilling a hole directly through the bottom of your boat. The frequency of your transducer is also crucial. Lower frequencies (like 50 kHz) penetrate deeper water and provide better coverage, which is great for the deep channels of Lake Sakakawea. Higher frequencies (like 200 kHz or Chirp) offer much finer detail and better target separation, ideal for identifying individual fish or subtle structures in shallower water or when targeting Yellow Perch and Panfish Daily Limits Explained. Many modern transducers offer multiple frequencies or "Chirp" technology, which sweeps a range of frequencies for the best of both worlds.
Key Features to Look for in a North Dakota Boat Fish Finder
When you start browsing the options, the sheer number of features can feel overwhelming. But for fishing in North Dakota, a few key elements stand out as truly essential. Focusing on these will help you narrow down your choices and invest in a unit that will serve you well for years to come.
Screen Size and Resolution – Clarity is King
Imagine trying to read a detailed map on a tiny, blurry screen while bouncing around on choppy water. Not fun, right? This is why screen size and resolution are paramount for a fish finder, especially on North Dakota's big lakes where you're constantly scanning for subtle details. A larger screen allows you to see more information at once, whether that's a split-screen view of sonar and mapping, or just a bigger, clearer display of what's under your boat.
Resolution, measured in pixels, determines how sharp and detailed that image will be. A higher resolution means less pixelation and a clearer picture of fish arches, bait balls, and underwater structure. If you're serious about identifying individual fish or distinguishing a submerged log from a rock pile, investing in a unit with excellent resolution will pay dividends. It's often worth stretching your budget a bit for a larger, higher-resolution screen, as it directly impacts your ability to interpret what you're seeing and make informed decisions on the water. Many anglers find that a 7-inch screen is a good minimum, while 9 or 12-inch screens offer a truly immersive experience, especially when using side imaging.
Power (RMS Watts) and Frequency Options
The power of a fish finder, typically measured in RMS (Root Mean Square) wattage, dictates how effectively its sonar signal can penetrate the water and return a clear echo. Think of it like a flashlight: a more powerful flashlight can illuminate objects further away and more clearly. For deeper lakes like Sakakawea or Lake Oahe, a higher RMS wattage is definitely beneficial. It allows the unit to send a stronger signal, which can then return clearer readings from greater depths and through murkier water.
Along with power, having versatile frequency options is crucial. As mentioned before, lower frequencies are better for deep water and broad coverage, while higher frequencies provide finer detail. Many excellent units offer dual-frequency capabilities (e.g., 83/200 kHz) or employ CHIRP sonar, which continuously sweeps a range of frequencies. CHIRP technology offers superior target separation, meaning it can distinguish individual fish from a school or from structure, rather than just showing one big blob. This is a huge advantage when trying to pick out a trophy walleye lurking near the bottom. When you're considering a unit, check its power output and the range of frequencies it can operate on – these specs directly relate to how well it will perform in North Dakota's varied fishing conditions.
User Interface and Ease of Use
You could have the most technologically advanced fish finder in the world, but if it's a nightmare to operate, it's not going to do you any good out on the water. A clunky, confusing interface can be incredibly frustrating, especially when you're trying to quickly adjust settings or mark a waypoint while dealing with wind, waves, and a hot bite. This is where the user interface (UI) and overall ease of use become incredibly important.
Look for a unit with intuitive menus, easily accessible buttons (or a responsive touchscreen), and a clear, logical layout. Some brands are known for their user-friendly designs, making it easy for even beginners to quickly get comfortable with the unit's functions. Consider whether you prefer physical buttons, which can be easier to operate with wet or gloved hands, or a touchscreen, which offers smartphone-like navigation. Many anglers appreciate a system that allows for quick adjustments to sensitivity, range, or zoom without having to dive deep into sub-menus. Ultimately, the best fish finder for you is one that you can operate effectively and confidently, allowing you to focus on the fishing, not the technology. You might want to consider going to a store like Bass Pro Shops to get a hands-on feel for different units before committing.
Top Fish Finder Types for North Dakota's Diverse Fisheries
North Dakota fishing isn't a one-size-fits-all experience. From chasing walleye on massive reservoirs to targeting panfish in smaller lakes or battling catfish on the Red River, the ideal fish finder can vary. Let's break down some common scenarios and the types of units that excel in them.
For Walleye Anglers on Lake Sakakawea
If your heart beats for walleye and you spend countless hours on the immense waters of Lake Sakakawea, you need a fish finder that can handle big water and help you locate those elusive schools. For this, a unit with robust side imaging and GPS chartplotting capabilities is practically non-negotiable. Lake Sakakawea is full of vast flats, submerged humps, and long points where walleye often suspend or hug subtle contours. Side imaging allows you to scan hundreds of feet to either side of your boat, quickly revealing these structures and any fish holding on them, without having to drive directly over every single spot. This saves an incredible amount of time when trying to cover such a large body of water.
Combined with detailed mapping, a good unit will let you pinpoint those productive areas, mark them as waypoints, and return to them with precision. Look for screens 9 inches or larger for optimal viewing, and prioritize high-definition (HD) mapping if available. Units with powerful CHIRP sonar will also give you superior target separation, helping you differentiate between baitfish and larger walleye arches. Brands like Humminbird with their MEGA Side Imaging or Lowrance with their StructureScan often come highly recommended by serious walleye anglers for their clarity and range. This kind of investment directly impacts your ability to consistently find and catch walleye in one of North Dakota's premier fisheries.
For Multi-Species Anglers on Devils Lake and the Missouri River
Anglers who enjoy the diverse opportunities of Devils Lake or the flowing waters of the Missouri River need a versatile fish finder. On Devils Lake, you might be targeting walleye in flooded timber, perch over vast flats, or pike in the weeds. The Missouri River presents strong currents, deeper channels, and varying bottom compositions, ideal for walleye, catfish, and sauger. For these multi-species scenarios, a unit that excels in both 2D sonar and offers good down imaging is crucial.
Down imaging will be your best friend for picking apart submerged trees and rock piles on Devils Lake, or identifying subtle changes in the river bottom. While side imaging is still very useful, the ability to clearly see what's directly below, especially in vertical structure, can be paramount. A unit with multiple frequency options or CHIRP sonar will allow you to adapt to different depths and target species. For river fishing, good 2D sonar for tracking bottom contours and marking fish in current is very important. Strong GPS and reliable mapping are also essential for navigating unknown areas and marking your productive drifts or anchor spots. Consider a unit with a bright screen for visibility in various lighting conditions, and robust construction to handle the varied conditions you'll encounter.
Budget-Friendly Options for Getting Started
It’s easy to feel like you need to spend a fortune to get into the fish finder game, but that's simply not true! There are fantastic budget-friendly options available that offer a solid array of features to get you started and dramatically improve your success. For those who are new to boating or just want to test the waters without a huge investment, look for units that prioritize reliable 2D sonar and basic GPS capabilities. You might not get the expansive side imaging or ultra-high-definition screens of the top-tier models, but you'll still gain a massive advantage over fishing blind.
Many entry-level units from reputable brands will offer decent screen resolution (5-7 inches is common), a trustworthy 2D sonar, and the ability to mark waypoints. Some might even include basic down imaging, which is incredibly helpful for identifying structure. These units are often simpler to operate, which can be a relief for beginners. You can find excellent options on online marketplaces like Amazon or at local sporting goods stores. While they may not have all the bells and whistles, these budget-friendly fish finders are perfect for learning the ropes, understanding how sonar works, and consistently finding fish in your local North Dakota spots. Remember, any fish finder is better than no fish finder when you're trying to locate fish. If you're looking for more specific recommendations, you could check out Best Fish Finder Under $300 for North Dakota Lakes.
Installation and Setup Tips for Your Boat Fish Finder
Once you've chosen your new fish finder, the next crucial step is proper installation. A great unit poorly installed is just a fancy paperweight. Taking the time to do it right will ensure optimal performance and prevent frustrating issues down the line.
Mounting the Head Unit and Transducer
The main display unit, often called the head unit, needs to be mounted in a location that is easily visible and accessible from your primary fishing position. Consider glare from the sun and make sure it's not obstructing your view for safe navigation. A gimbal mount, which allows you to tilt and swivel the screen, is often the most versatile option. Secure it firmly to a flat surface, ensuring all wiring can be routed cleanly and protected from the elements.
The transducer is arguably the most critical component for proper function. For transom-mount transducers, which are the most common, placement is key. It needs to be mounted on the stern of your boat, in an area where it will be fully submerged and free from turbulent water, which can create air bubbles and interfere with the sonar signal. Test different positions, if possible, to find the "sweet spot" where you get a clean reading at various speeds. Ensure it's level with the bottom of the boat and not angled too high or too low. Secure it tightly, but don't overtighten, and check its position periodically, especially after hitting anything in the water. For optimal performance, many anglers consider having a professional install their transducer, particularly for more complex thru-hull or in-hull setups.
Powering Your Device and Cable Management
Your fish finder needs a clean, consistent power source to operate correctly. Most units run on a 12-volt DC system, drawing power directly from your boat's battery. It's crucial to connect your fish finder directly to a dedicated battery terminal if possible, or to a clean power bus bar, rather than tapping into existing circuits that might have voltage drops or interference from other electronics. Use appropriate gauge wiring for the length of the run and always include an inline fuse for protection, located close to the battery.
Cable management, while often overlooked, is vital. Protect all cables from chafing, sharp edges, and excessive bending. Use cable ties, conduit, or protective sleeving to keep wiring neat and tidy. Route power and transducer cables separately from other electrical lines (like trolling motor wires or VHF radio cables) as much as possible to minimize electrical interference, which can show up as unwanted noise on your screen. A neat wiring job doesn't just look better; it prevents future headaches and ensures your unit receives the clean data and power it needs for peak performance. Properly installed, your fish finder will be a reliable tool on every North Dakota outing.
Maximizing Your Fish Finder's Potential on the Water
Having a great fish finder is only half the battle; knowing how to use it effectively is where the real magic happens. Learning to interpret what your screen is showing you, and using its features to your advantage, will dramatically improve your fishing success.
Interpreting Sonar Readings and Understanding Arches
At first glance, a fish finder screen can look like a chaotic mess of lines and colors. But with a little practice, you'll start to "read" the water. Traditional 2D sonar displays fish as arches. A full, strong arch typically indicates a fish that has moved completely through the sonar cone. Smaller, broken arches or short lines often mean a fish that's on the edge of the cone or not fully passing through it. The thickness and length of the arch can give you clues about the size of the fish.
Understanding the bottom reading is also crucial. A hard, clean bottom (like rock or gravel) will usually show up as a thicker, brighter line, while a soft, muddy bottom will appear thinner and less intense. Irregularities in the bottom line indicate structure – humps, ditches, or submerged objects. With down imaging, you'll see more photo-like representations, making it easier to identify specific items like trees or tires. Side imaging takes practice to interpret, but once you get the hang of it, you'll be able to spot brush piles, ledges, and schools of fish off to the sides of your boat with amazing clarity. Remember that the color palette you choose can also impact how you interpret the images – experiment to find what works best for your eyes and conditions. You might find some excellent tips in Best Fish Finder Settings for Walleye.
Using Waypoints and Custom Mapping
One of the most powerful features of a modern fish finder with GPS is the ability to mark waypoints. When you stumble upon a productive rock pile, a school of baitfish, or even a single trophy fish arch, mark it immediately! These waypoints become your personal treasure map, guiding you back to successful spots on future trips. Don't be shy about marking everything that looks promising – you can always delete them later.
Beyond simply marking individual spots, many units allow for custom mapping or creating your own contours. As you drive your boat, the unit can record depth data and create highly detailed, personalized maps of the areas you traverse. This is invaluable on lakes like Sakakawea, where subtle bottom transitions can hold key fish. You can highlight depth ranges, create custom shading, and overlay different data points to get a truly unique view of the underwater world. These custom maps become incredibly useful for understanding How to Find Walleye Structure With a Map and developing patterns, especially when fishing for species that relate strongly to specific depths or types of structure. Regularly reviewing your saved waypoints and maps can help you identify patterns and unlock new fishing strategies.
Troubleshooting Common Fish Finder Issues
Even the best fish finders can encounter hiccups. Knowing how to troubleshoot some common issues can save you a lot of frustration on the water.
Common Fish Finder Issues & Solutions
| Issue | Possible Cause(s) | Solution(s) |
|---|---|---|
| No Bottom Reading | Loose transducer connection; Air bubbles on transducer; Damaged transducer; Incorrect frequency selected. | Check connections; Clean transducer face; Check for damage; Adjust frequency or settings. |
| Interference/Noise | Electrical interference from other electronics (trolling motor, radio); Power issues; Improper grounding. | Separate power and transducer cables; Add a ferrite bead to power line; Check battery connections. |
| No Fish Arches | Incorrect sensitivity setting; Fish not present; Transducer too shallow. | Increase sensitivity; Adjust depth range; Ensure transducer is fully submerged. |
| GPS Not Working | GPS antenna obstruction; Faulty antenna connection; Unit needs reset. | Ensure clear view of sky for antenna; Check antenna cable; Perform a soft reset. |
| Inaccurate Depth | Air bubbles on transducer (cavitation); Transducer angled incorrectly. | Re-position transducer; Clean transducer face; Ensure level mounting. |
| Unit Won't Power On | Loose power connection; Blown fuse; Dead battery. | Check all power connections; Replace inline fuse; Charge battery. |
Many issues stem from power or transducer connections. Always start by checking that all cables are securely plugged in and that your battery is fully charged. If you're getting a lot of "noise" or a choppy image, it might be electrical interference, often from a trolling motor or other electronics. Try isolating your fish finder's power source or routing cables away from other electrical lines. Sometimes, simply adjusting the sensitivity or range settings on your unit can clear up a murky screen. Don't hesitate to consult your unit's manual; they often have comprehensive troubleshooting guides. A quick fix can often get you back to finding fish in no time.
Disclaimer
This article is for general informational purposes only and does not constitute professional advice. Laws, prices and regulations vary by location and change over time. Consult a qualified professional for guidance on your specific situation.