Best Fish Finder Settings for Walleye
One of the most frustrating things about modern fishing electronics is staring at a fish finder screen that looks like a jumbled mess of colors and lines, leaving you wondering if you're looking at a school of walleye or just some underwater debris. It can feel like you need a degree in sonar technology just to get a decent read. But don't worry, friend, this guide is here to demystify those daunting fish finder settings and help you dial in your unit for maximum walleye-finding success in North Dakota's diverse waters.
Understanding Your Fish Finder's Core Settings
Before we dive into walleye-specific tricks, let's get a solid grasp on the fundamental settings that every angler needs to understand. Think of these as the building blocks for clear, actionable sonar data. Getting these right is like tuning an instrument – once it's in tune, you can really make some music.
Frequency and Cone Angle
Your fish finder works by sending sound waves into the water and listening for their echoes. The frequency refers to the pitch of those sound waves, and the cone angle describes how wide an area those waves cover as they travel down. Most modern fish finders offer multiple frequencies, typically 200 kHz (high frequency) and 50 kHz (low frequency), sometimes with a CHIRP option that sweeps through a range of frequencies for enhanced detail.
The 200 kHz (or high CHIRP) frequency uses a narrower cone angle, often around 10-20 degrees. This is fantastic for detailed readings directly under your boat, identifying structure, baitfish, and individual fish with excellent target separation in shallower water, say up to 60-80 feet. It’s perfect for picking out a walleye lurking right on a rock pile in a smaller lake or along the Missouri River channel. However, because of its narrow cone, it "sees" a smaller area, meaning fish can swim out of its view quickly. On the flip side, the 50 kHz (or low CHIRP) frequency employs a much wider cone angle, sometimes 45 degrees or more. This broad coverage is ideal for deeper water applications or when you're trying to cover a large area to locate schools of fish, such as those vast expanses of Lake Sakakawea. While it sacrifices some detail and target separation, its wide reach makes it excellent for seeing fish off to the sides and detecting thermoclines or suspended baitfish in the water column.
For walleye, a common strategy is to start with a higher frequency (200 kHz or high CHIRP) to get a clear, detailed picture of what's directly below, especially when fishing structure or shallower flats. If you're covering open water, perhaps trolling for active fish, consider switching to a lower frequency (50 kHz or low CHIRP) to scan a wider area and pinpoint those elusive schools. Many units, especially those you might find on Amazon, now feature dual-beam or CHIRP sonar, allowing you to use both high and low frequencies simultaneously or select a specific range for the best of both worlds.
Sensitivity and Gain
If frequency and cone angle are about what your fish finder sees, sensitivity (or gain) is about how well it sees it. This setting controls how much detail your unit displays by adjusting its ability to pick up echoes. Too low, and you'll miss faint echoes from fish or subtle bottom structure. Too high, and your screen will be cluttered with noise, irrelevant echoes, and confusing signals, making it impossible to distinguish between actual fish and interference.
Think of sensitivity as the volume control on a radio: too low, and you hear nothing; too high, and it's static. The goal is to set it as high as possible without introducing excessive clutter. For walleye fishing, which often involves detecting fish tight to the bottom or suspended in subtle patterns, a properly tuned sensitivity is critical. Start by increasing your sensitivity until you begin to see some noise or false echoes on the screen, then back it down just a touch until the clutter disappears. This often puts you in the sweet spot where you're picking up faint fish returns without overloading the display. Conditions like water clarity, depth, and even the type of bottom can influence the ideal sensitivity. Murky waters, common in certain parts of the Red River, might require a slightly lower setting to reduce interference, while clearer waters might allow for a higher gain.
A helpful tip is to adjust your sensitivity as you move to different depths or areas. If you move from a shallow bay to a deep channel, your optimal setting will likely change. Many anglers set their sensitivity manually, but some advanced units offer an "auto" mode. While auto mode can be a good starting point, especially for beginners, taking manual control will almost always yield better results for serious walleye anglers who want to truly "read" the water.
Chart Speed and Scroll Rate
Chart speed, also known as scroll rate, determines how quickly the sonar history scrolls across your screen. Imagine your fish finder screen as a continuous strip of paper unrolling from right to left; chart speed controls how fast that paper unrolls. This seemingly simple setting has a big impact on how you interpret the information displayed.
A faster chart speed provides a more detailed, stretched-out view of what's beneath you. This can be incredibly useful when you're actively jigging for walleye over a specific piece of structure, or when you’re watching a bait presentation directly below the transducer. You’ll be able to see more clearly how your jig is moving, how fish are reacting to it, and the subtle movements of your target. For instance, if you're jigging a spoon on Lake Ashtabula, a fast chart speed will show the distinct up-and-down motion of your lure and any fish that approach it. However, a very fast speed means less history is displayed at once, potentially making it harder to spot trends or areas you just passed over.
Conversely, a slower chart speed compresses the information, showing a longer history of the bottom and fish marks. This can be beneficial when you're trolling over large areas, allowing you to see broader patterns in bottom contours or to identify where a school of walleye might have been located over a longer distance. It's also good for stationary fishing where you're not constantly moving. For most walleye fishing scenarios, a medium to medium-fast chart speed (often about 75% of max) provides a good balance between detail and historical context. Experiment with this setting as you fish. If you're struggling to distinguish individual fish from structure, try speeding it up. If you're missing the bigger picture of a promising fishing spot, slow it down a bit.
Optimizing for Walleye Specifics
Walleye have distinct behaviors and preferred habitats, and knowing how to adjust your fish finder to locate them specifically can dramatically improve your catch rate. It's not just about seeing any fish, but seeing the right fish.
Interpreting Arches and Marks
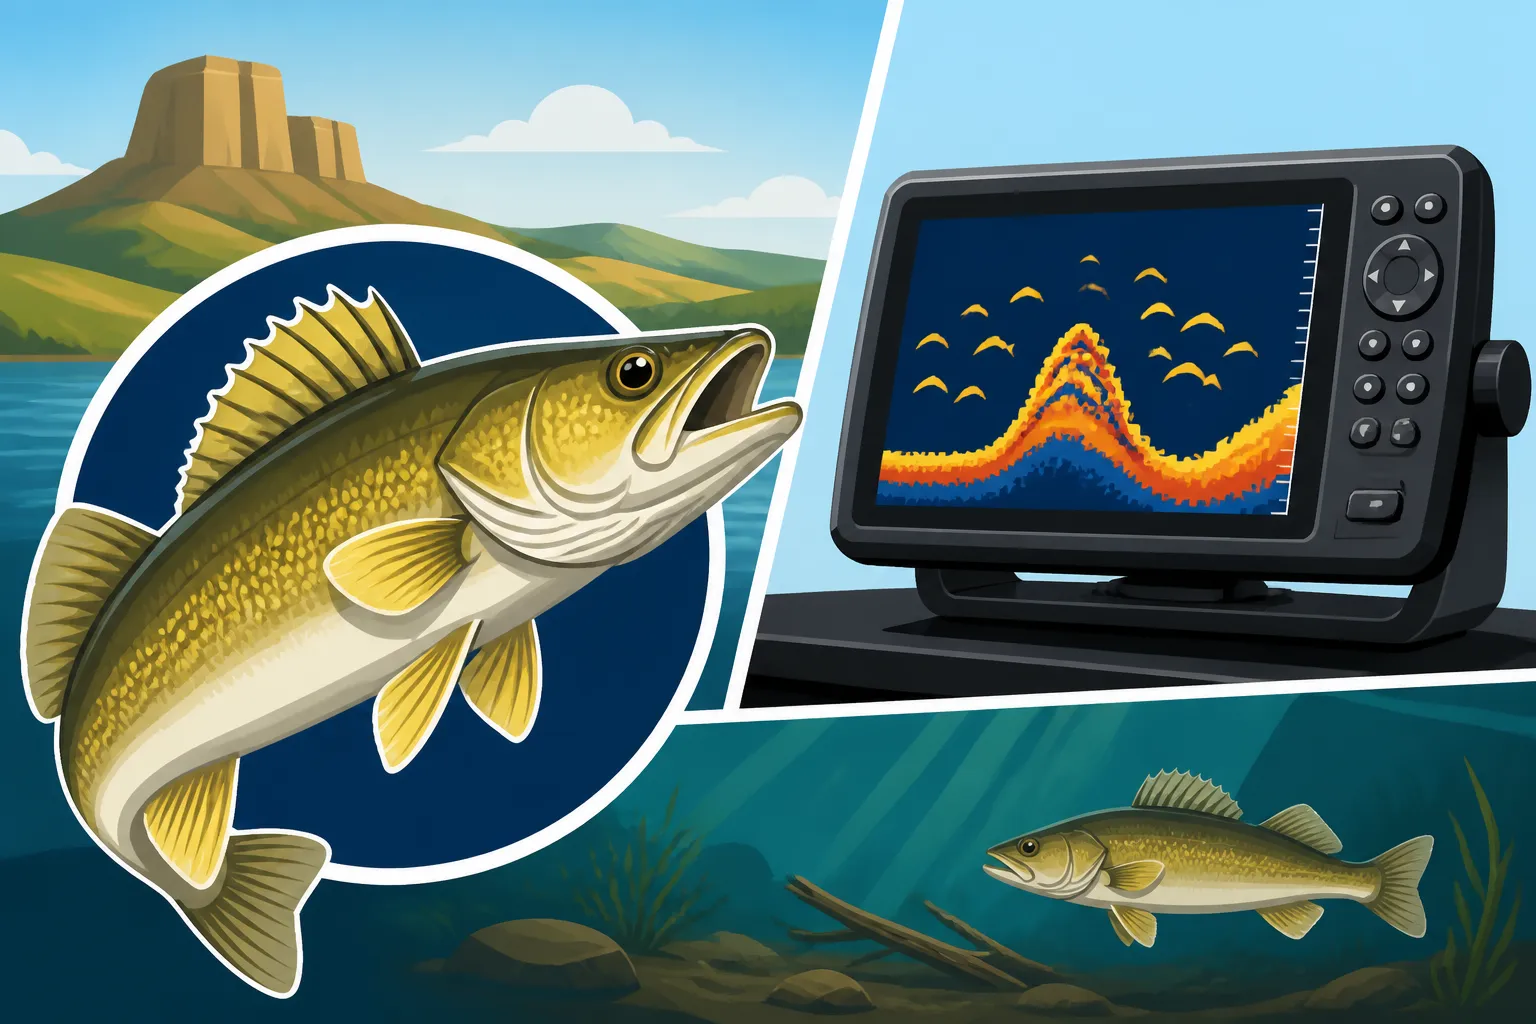
The classic "arch" on your fish finder screen is often depicted as the ideal fish symbol. While a perfect arch can indicate a fish, especially one moving through the sonar cone, walleye often don't show up as textbook arches, especially when they're tight to the bottom or holding still. Instead, you might see anything from a thick, distinct line to a faint dash, or even just a blob. The key is to look for distinct marks that stand out from the bottom or suspended baitfish.
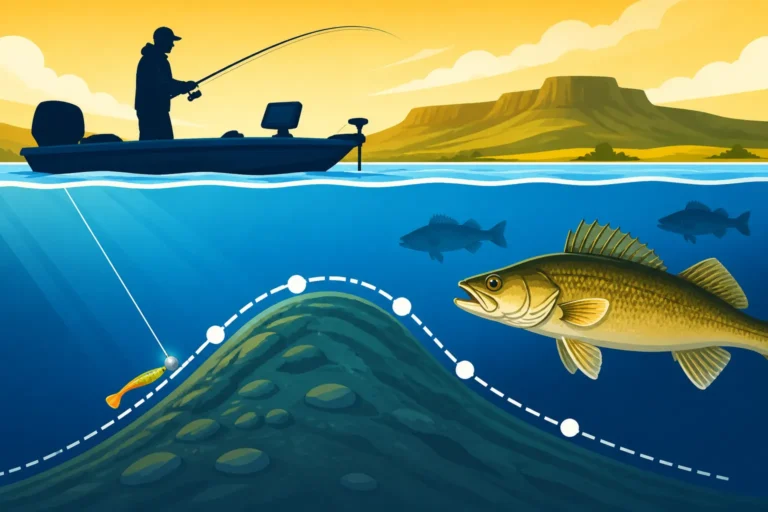
A strong, thick, often yellow or red (depending on your color palette) mark that is separated from the bottom is a very good sign, often indicating a larger fish or a school of fish. Walleye, being ambush predators, frequently hold close to structure or along depth breaks. So, pay close attention to marks that appear right on top of or just off the bottom. If you see what looks like a bump on the bottom that suddenly gets a thick, distinct line hovering just above it, that's often a walleye! These are the marks that separate them from the bottom, even if by only a foot or two. Also, consider the size and shape of the mark. Larger, more elongated marks generally indicate bigger fish. If you're seeing small, fuzzy marks, that might be baitfish, which is also valuable information because walleye are often nearby.
Learning to discern a walleye mark from a rock or a submerged tree takes practice and experience. One excellent way to train your eye is to drop a jig down to a mark you think might be a walleye. If the mark reacts, moves, or changes shape in response to your lure, you're likely on to something. Pay attention to how the mark appears before, during, and after you interact with it. The best way to learn is to simply spend time on the water, observing how different fish species appear on your specific unit.
Adjusting for Depth and Structure
Walleye are notorious for relating to specific depths and structures, whether it's the sheer drop-offs of Lake Sakakawea or the rocky reefs of Devils Lake. Your fish finder settings need to be adaptable to these changing environments.
When fishing shallower water (say, less than 20 feet), your 200 kHz frequency will typically give you the best detail. You might need to dial back your sensitivity slightly to avoid too much bottom clutter, especially if there's vegetation or rocky rubble. Pay close attention to subtle changes in the bottom contour – a small rise, a transition from soft mud to hard gravel, or the edge of a weed line can all hold walleye. Use your zoom feature (which we'll discuss more later) to magnify the bottom 5-10 feet, allowing you to really pick apart individual fish marks from the structure. For instance, if you're targeting early season walleye in shallow bays, a clear, zoomed-in view of the bottom will show you exactly where those fish are staging. You might even find some valuable insights in a guide like "Early Spring Walleye Techniques in North Dakota".
In deeper water, such as a major river channel or the depths of Lake Oahe, the 50 kHz or low CHIRP frequency becomes more important for broader coverage, helping you identify schools of fish or vast expanses of structure. However, in these deep scenarios, you'll likely need to increase your sensitivity to ensure you're picking up faint echoes from the bottom and suspended fish. When dealing with deep structure, like submerged humps or old riverbeds, switch to a split-screen view if your unit offers it, showing both wide and narrow cone angles. This allows you to scan a wide area while still getting a detailed look at specific targets. For example, if you're exploring deep humps, the wide cone might show a cluster of fish, and the narrow cone can then confirm they are indeed tight to the top of the hump.
Dealing with Weeds and Clutter
North Dakota lakes, especially in late spring and summer, can develop significant weed growth. While weeds provide excellent cover for walleye and baitfish, they can turn your fish finder screen into an impenetrable green or yellow blob, making it impossible to distinguish fish.
The first step in dealing with heavy weeds is often to reduce your sensitivity. Weeds are essentially thousands of small targets, and too much sensitivity will cause your unit to "see" every single stalk, creating a solid mass on your screen. By lowering the sensitivity, you're telling the unit to ignore the weaker echoes from the individual weed stalks and focus on stronger echoes, like those from fish. Another trick is to adjust your frequency. Sometimes, a higher frequency (200 kHz) can penetrate dense weeds slightly better or provide a clearer definition of the top of the weed line, where walleye often suspend.
Look for pockets, edges, and lanes within the weed beds. Walleye rarely sit in the densest part of a weed mass; they prefer the open areas adjacent to them, where they can ambush prey. Your fish finder should be set to clearly define the edge of the weeds. If you're seeing a solid block, reduce sensitivity until you can discern the distinct upper and outer edges. Some advanced units have "Clutter Rejection" or "Noise Rejection" filters that can help, but manual adjustments to sensitivity and frequency are usually the most effective tools. You'll find that fishing these weed lines can be incredibly productive, especially if you're using techniques discussed in a guide like "North Dakota Walleye Fishing Techniques".
Advanced Settings and Troubleshooting
Once you've mastered the basics, there are some more advanced features that can truly elevate your walleye fishing game. These settings can provide different perspectives and help you fine-tune your approach.
Color Palettes and Display Modes
Most modern fish finders offer a variety of color palettes, and while it might seem like a cosmetic choice, the right palette can make a huge difference in how you interpret what's on your screen. Different colors represent different signal strengths, with warmer colors (red, yellow) typically indicating stronger echoes and cooler colors (blue, green) indicating weaker echoes.
For walleye fishing, many anglers prefer palettes that offer strong contrast, making it easier to distinguish fish marks from the bottom or from baitfish. A common preference is a palette that uses strong yellows and reds for fish targets against a darker blue or black background. This high contrast helps the walleye marks "pop" on the screen. Experiment with a few different palettes. What looks good to one angler might be confusing to another, and screen visibility can also depend on ambient light conditions. On a bright, sunny day, a darker background might be easier to see, while a lighter background might work better in low light. Some units even offer a specific "fishing mode" or "walleye mode" that automatically adjusts the palette and other settings to highlight typical walleye targets.
Beyond color, explore different display modes. Many units allow for split-screen views. For instance, a common setup is to have traditional 2D sonar on one side and a map or a different frequency on the other. Down Imaging or Side Imaging (sometimes called DownScan or SideScan by different brands) are also incredibly useful for walleye. Down Imaging provides a photographic-like view directly below the boat, excellent for distinguishing fish from specific pieces of structure like a sunken tree or a rock pile. Side Imaging scans out to the sides of your boat, allowing you to cover a vast amount of water and locate structure or schools of walleye far from your current position, which is invaluable on big waters like Lake Sakakawea.
Bottom Lock and Zoom Features
These two features are immensely powerful for walleye anglers, especially when dealing with fish that are hugging the bottom or when you need to scrutinize specific depth ranges.
Bottom Lock (or Bottom Tracking) is a display mode that "locks" the bottom of the screen to the actual bottom contour, regardless of depth changes. This means that the bottom line appears flat, and any fish marks directly above it are displayed in a magnified, clearer view. This is incredibly useful when you're targeting walleye that are tightly glued to the bottom, which they often are, especially in cold water or during periods of inactivity. If you're seeing a faint mark that you suspect is a walleye just off the bottom, engaging bottom lock can magnify that signal, making it easier to confirm and target. It removes the up-and-down motion of the boat's roll or waves, giving you a steady view of the fish-to-bottom relationship.
The Zoom feature is equally critical. Instead of seeing the entire water column from the surface to the bottom, zoom allows you to select a specific depth range to magnify. For walleye, this typically means zooming in on the bottom 5-15 feet of the water column. When you zoom in, the pixels in that selected depth range are spread out across the entire screen, giving you much finer detail and better target separation. This is indispensable when you're trying to distinguish between a small rock and a walleye resting next to it. If you're marking fish in 25 feet of water, zooming in on the 20-30 foot range will make those fish marks much larger and clearer, often revealing details you missed in the full-screen view. Many anglers use a fixed zoom, say the bottom 10 feet, while others prefer auto-zoom features that dynamically adjust to keep the bottom visible. It's a game-changer for jigging over structure or watching how fish react to your presentation.
Common Challenges and Quick Fixes
Even with the perfect settings, fish finders can sometimes act up. Knowing some common troubleshooting steps can save a lot of frustration on the water.
One of the most frequent issues is a cluttered screen, often appearing as excessive noise or random dots. This usually points to your sensitivity being too high for the current conditions. Dial it back gradually until the screen clears up. Another common problem is a weak or intermittent signal, which can be caused by several factors. First, check your transducer. Is it clean? Is it properly submerged and angled correctly? Air bubbles, marine growth, or even being slightly out of the water can severely impact its performance. Also, check your power connection; a loose connection can lead to signal drops. Electrical interference from other electronics on your boat (like a trolling motor, especially older brushed models) can also cause horizontal lines or static. If you suspect electrical interference, try turning off other electronics one by one to isolate the culprit. For portable units, ensure your battery is fully charged. Finding a reliable power station, often available on Amazon, can keep your unit running strong.
Sometimes, your fish finder might stop reading depth accurately. This could be a transducer issue, but also check for large amounts of debris in the water (like heavy weed mats or large schools of baitfish) that can confuse the sonar. If your unit has a "Noise Filter" or "Surface Clutter" setting, increasing these can sometimes help reduce false echoes from surface turbulence or prop wash. Finally, if all else fails, a simple reboot of your fish finder can often resolve minor software glitches, much like restarting your computer. If you frequently encounter issues on the Red River, for instance, where current and turbidity can be factors, practicing these quick fixes will become second nature.
Putting It All Together: On-the-Water Scenarios
Theory is great, but how do these settings actually apply when you're out there chasing North Dakota walleye? Let's look at a few common scenarios.
Open Water Trolling for Walleye
When you're covering vast expanses of water, perhaps trolling crankbaits on the main basin of Lake Sakakawea, your goal is to locate active walleye or schools of baitfish that walleye are feeding on.
For this scenario, you'll want a balance of wide coverage and sufficient detail. Start with your 200 kHz (or high CHIRP) frequency for good detail, but also consider a split-screen with 50 kHz (or low CHIRP) if your unit allows, to gain a wider perspective. Keep your sensitivity relatively high to pick up suspended baitfish and active walleye that might be cruising. Your chart speed should be medium to medium-fast; you want to see a good history of what you've passed over to identify patterns, but also enough detail to react when you see a fish. Use your GPS mapping on a separate screen or as an overlay to mark waypoints when you get a bite or see a good concentration of fish. Identifying these "hot spots" is key for repeatable success. Don't forget to track your trolling speed and direction relative to the wind; sometimes, a slight change can make all the difference. This aligns perfectly with techniques discussed in "Summer Walleye Trolling Techniques".
Jigging Over Structure
Imagine you're targeting walleye on a rocky reef in Devils Lake, actively jigging a spoon or a soft plastic. Here, precision and real-time feedback are paramount.
Your primary frequency should almost always be 200 kHz (or high CHIRP) for maximum detail and target separation directly under your boat. Your sensitivity should be dialed in to show your jig clearly and any fish that approach it. Increase it until you see your jig's full movement, then back it off just a hair if there's too much clutter. A fast chart speed is crucial here; you want to see the real-time interaction between your lure and the fish. This will let you discern if a walleye is just looking at your lure, following it, or about to strike. Engage your zoom feature, focusing on the bottom 5-10 feet, to magnify the fish marks and structure. If your unit has a A-Scope or Real-Time Sonar (RTS) window, use it! This vertical flasher-like display provides instant feedback on what's happening directly under your transducer. Watching a walleye mark rise to meet your jig in the A-Scope can be incredibly exciting and informative. You'll find great tips for this specific technique in "Jigging for Walleye on Lake Sakakawea".
Ice Fishing for Walleye Considerations
Ice fishing presents its own unique set of challenges and opportunities for fish finder settings, especially on frozen North Dakota lakes. Portability and real-time accuracy are key.
For ice fishing, many anglers opt for a flasher-style fish finder, which provides an instantaneous, circular display of what's beneath the ice. However, many traditional graph units also have excellent "flasher" modes or highly effective 2D sonar for ice fishing. For walleye through the ice, a 200 kHz (or high CHIRP) frequency is almost always preferred for its narrow cone, giving you precise detail down your hole. Your sensitivity needs to be set to clearly show your presentation (jig, minnow, etc.) and any fish approaching it. A fast chart speed is vital for real-time feedback, showing you precisely how fish react to your movements. The zoom feature, focused on the bottom 5-10 feet, is a non-negotiable for separating walleye from the bottom.
In very cold conditions, ensure your transducer is making good contact with the water in the hole and isn't iced over. Keep your battery charged, as cold can reduce battery life; a dedicated ice fishing battery or a portable power station (often available on Amazon) is a smart investment. If you're using a graph unit, consider a specific ice fishing transducer for better performance. Many of these settings and techniques are covered in more detail in our "How to Ice Fish in North Dakota" guide.
Remember, every fish finder unit is a little different, and every body of water and fishing situation is unique. The best settings for walleye fishing are often found through experimentation and spending time learning how your specific unit interprets the underwater world. Don't be afraid to tweak, adjust, and try new things. The more you use your fish finder, the better you'll become at "reading" the screen and turning those ambiguous marks into successful walleye hook-ups.
Walleye Fish Finder Settings Quick Reference
Here's a quick summary of general starting points for your fish finder settings when chasing walleye in North Dakota. Remember, these are just starting points; always adjust based on conditions and what you're seeing on your screen.
| Setting | Trolling (Open Water) | Jigging (Structure/Bottom) | Ice Fishing (Specific Hole) | Notes |
|---|---|---|---|---|
| Frequency | 200 kHz (or High CHIRP); 50 kHz for wider search | 200 kHz (or High CHIRP) | 200 kHz (or High CHIRP) | Higher frequency = more detail, narrower cone; lower = wider cone. |
| Sensitivity/Gain | As high as possible without clutter | High enough to see jig/lure | High enough to see jig/lure | Too low = miss fish; too high = clutter/noise. |
| Chart Speed | Medium to Medium-Fast | Fast | Fast | Faster for real-time reactions; slower for history/trends. |
| Zoom/Bottom Lock | Use as needed for specific targets | Always use bottom 5-15ft zoom | Always use bottom 5-10ft zoom | Magnifies bottom targets for better separation and detail. |
| Color Palette | High contrast, dark background | High contrast, dark background | High contrast | Experiment to find what works best for your eyes and unit. |
| Display Mode | 2D Sonar; Split-screen with map/SideScan | 2D Sonar; A-Scope/RTS; Down Imaging | 2D Sonar; Flasher Mode (if available) | SideScan for searching, Down Imaging for identifying structure. |
| Noise Filter | Low to Medium | Low | Low | Reduce surface clutter and electrical interference. |
Disclaimer
This article is for general informational purposes only and does not constitute professional advice. Laws, prices and regulations vary by location and change over time. Consult a qualified professional for guidance on your specific situation.