How to Rig a Slip Bobber for Walleye
There’s nothing quite like the subtle tug of a walleye on your line, especially when you’re out on the water, soaking in the peace and quiet of a North Dakota morning or evening. But let's be real, sometimes those walleye can be incredibly finicky. They might be suspended just off the bottom, or hiding in a weed line, making traditional jigging or bottom-bouncing a real challenge. You're trying to present your bait perfectly, but the depth is constantly changing, or the fish are just shy. This guide is all about mastering the slip bobber rig, a technique that allows you to present your bait at a precise depth, adjust quickly, and often entice those elusive walleye when other methods fail.
Why a Slip Bobber is Your Walleye Secret Weapon
Many anglers new to walleye fishing, or even some seasoned folks, tend to stick with tried-and-true methods like trolling crankbaits or bouncing jigs directly on the bottom. And don't get me wrong, those techniques absolutely catch fish in North Dakota! But walleye aren't always glued to the lakebed. Sometimes they suspend in the water column, perhaps chasing schools of baitfish, or maybe they're just being lazy and don't want to exert themselves to hit something moving fast along the bottom. This is where the slip bobber truly shines.
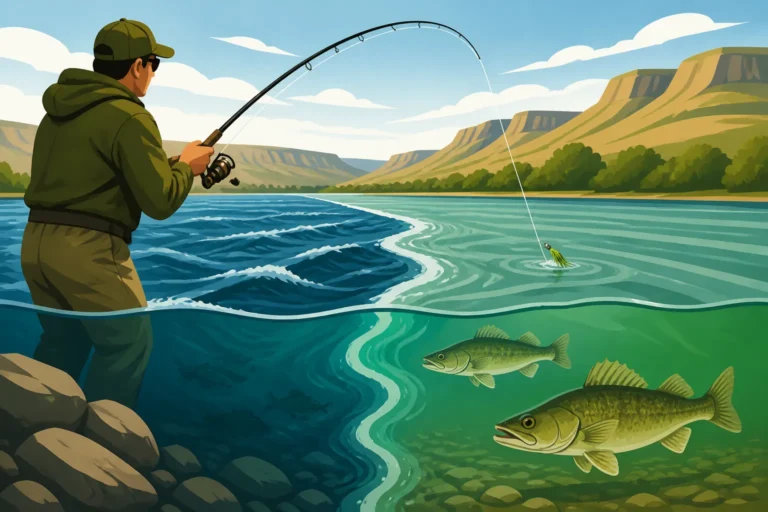
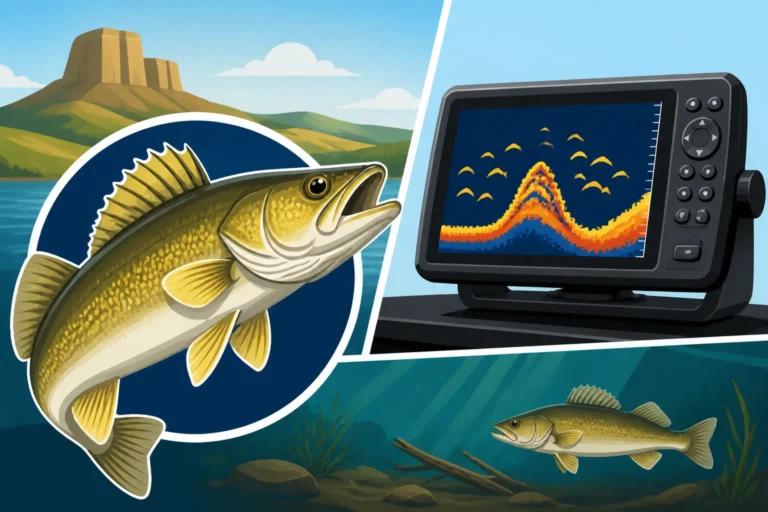
Imagine you're fishing a breakline on Lake Sakakawea, and your fish finder shows walleye congregating at 15 feet over a 30-foot bottom. With a fixed bobber, you’d be limited to a shallow presentation, or if you were bottom bouncing, you might spook the fish as your weight scrapes the bottom. A slip bobber allows your bait to descend freely to that exact 15-foot mark, suspending it right in the walleye's strike zone, naturally and subtly. It’s a versatile tool that helps you adapt to different depths, tackle varying conditions, and present live bait in the most appealing way possible, often leading to more consistent bites when the bite gets tough. For a broader understanding of how walleye behave throughout the year, be sure to check out our North Dakota Walleye Fishing Guide.
The Advantage of Precision Depth Control
The beauty of the slip bobber system is its unparalleled ability to control your bait's depth. Unlike a fixed bobber, where your bait can only go as deep as the distance from the bobber to the hook, a slip bobber allows your line to "slip" through the bobber. This means your bait can descend to virtually any depth you set, regardless of how much line you have out. The only limitation is the length of your rod, which determines how much line you can reel in before the bobber stop hits the rod tip.
This precision is critical because walleye are often depth-sensitive. Even a difference of a foot or two can be the difference between a fantastic day and coming home skunked. On a calm evening on Devils Lake, when walleye are actively feeding on yellow perch just off a rock pile, knowing you can consistently place your minnow or leeches at their eye level can make all the difference. You can quickly adjust your depth by sliding the bobber stop, which is much faster and less cumbersome than retying a fixed bobber rig or constantly letting out more line with a bottom bouncer. This adaptability is what sets the slip bobber apart for targeting those suspended fish or subtle presentations.
Presenting Live Bait Naturally
Walleye are opportunistic predators, but they can also be cautious, especially in clear water or during high-pressure fishing periods. A slip bobber allows your live bait – whether it's a lively shiner, a juicy nightcrawler, or a wriggling leech – to behave as naturally as possible. The weight of the sinker pulls the bait down to your desired depth, but once there, the slip bobber suspends it, allowing it to swim and twitch freely without the heavy drag of a jig or a bottom bouncer.
This natural presentation is a huge advantage. A struggling minnow suspended just above a weed bed looks like an easy meal. A leech slowly drifting by a submerged timber pile can be irresistible. The subtle movement of the bait under a slip bobber often triggers strikes from walleye that might ignore a more aggressively presented lure. It's particularly effective when walleye are sluggish or when you're fishing in areas with dense cover, like the flooded timber on Devils Lake, where a snag-free, vertical presentation is key. For more on what these fish like to snack on, delve into our guide on the Best Bait for North Dakota Fishing.
Essential Components for a Slip Bobber Rig
Before you even think about tying your first knot, let's gather all the bits and pieces you'll need for a successful slip bobber setup. You don't need a tackle box overflowing with specialty items, but having the right foundational gear makes all the difference. It's about ensuring every component works together seamlessly to give you that precise, natural presentation.
The Bobber Stop
This tiny but mighty component is arguably the most crucial part of your slip bobber rig. It’s what prevents your bobber from sliding all the way down to your hook. Bobber stops typically come in two main forms: string (or thread) stops and rubber stops.
- String Bobber Stops: These are often my personal preference, especially when using lighter lines. They're usually tied onto your main line using a small plastic tube, which you then remove, leaving a small knot. The beauty of string stops is that they cinch down tightly on your line, preventing slippage, but are small enough to reel right onto your spinning reel spool and pass through your rod guides without much fuss. This means you can effectively fish depths greater than your rod length. They come in various colors, but the color doesn't really matter as it's above the water line. You can often find pre-tied string stops, sometimes with a small bead included, which is handy.
- Rubber Bobber Stops: These are small, tapered rubber pieces that slide onto your line. They are often quicker to deploy, but can sometimes slip more easily on thinner lines or if they get wet. They’re also a bit bulkier than string stops, so they don’t always pass through rod guides as smoothly if you're trying to reel in a significant amount of line. Both types are readily available at any tackle shop or online, including on Amazon.
Make sure your bobber stop is securely tightened but not cinched so hard it damages your line. It needs to hold firm when the bobber pulls against it, yet still be adjustable.
The Bead
Right below your bobber stop, you absolutely need a small plastic or glass bead. This bead serves a vital purpose: it prevents the bobber stop from sliding through the top hole of your slip bobber. Without it, your bobber stop would just disappear into the bobber, rendering it useless. The bead acts as a buffer, ensuring the bobber stop has something solid to rest against.
Choose a bead that's small enough to slide freely on your line but large enough that it cannot pass through the opening of your slip bobber. Most fishing beads are designed with this in mind, and you can pick up a pack for very little cost. Some string bobber stops even come pre-packaged with a bead, simplifying the setup process.
The Slip Bobber
Now for the star of the show! A slip bobber is designed with a hole running through its center, allowing your main line to pass through freely. They come in various shapes, sizes, and materials, each suited for different conditions and bait sizes.
- Balsa or Foam Bobbers: These are lightweight and very sensitive, perfect for detecting subtle bites from finicky walleye. They float high, making them easy to see. Brands like Thill make excellent balsa slip bobbers that are highly popular among walleye anglers.
- Plastic Bobbers: Often more durable and affordable, these are a great all-around choice. They might be slightly less sensitive than balsa but are robust enough for everyday fishing.
- Lighted Bobbers: For those dusk-to-dawn or night fishing adventures, particularly useful when chasing channel catfish on the Red River or walleye after dark, lighted slip bobbers are indispensable. They have a small battery and an LED light that makes them glow, so you can easily see them in low light.
When choosing a slip bobber, consider the size of your bait and the weight of your sinker. You want a bobber buoyant enough to float your bait and sinker, but not so large that it offers too much resistance when a walleye tries to pull it under. A good rule of thumb is to use the smallest bobber that will effectively float your rig.
Split Shot or Sinker
To get your bait down to the desired depth and keep your slip bobber upright, you'll need some weight. Most anglers opt for a small split shot or a bullet/egg sinker.
- Split Shot: These small, lead (or lead-free) weights simply pinch onto your line. They come in various sizes, from tiny micro-shots to larger sizes. I usually use one or two split shots, placed just a few inches above my swivel or directly above the hook if not using a swivel. This keeps the bait in the strike zone and helps the bobber stand up properly, indicating subtle bites.
- Bullet/Egg Sinkers: If you're fishing in windy conditions or with larger baits, a small bullet or egg sinker can be more effective. These weights slide freely on your line above a swivel. The key is to select enough weight to balance your bobber so it sits upright, but not so much that it pulls the bobber completely under. Again, finding the right balance is crucial for sensitivity. You can find a wide assortment of sinkers on Amazon or at any local bait shop.
Swivel
A small barrel swivel is a great addition to your slip bobber rig, especially if you're using live bait that tends to spin (like minnows on a retrieve). It helps prevent line twist, which can weaken your line and lead to tangles. Place the swivel between your main line (with the bobber stop, bead, and bobber) and your leader (with the hook). This also makes it easy to quickly change out your leader length or hook size without re-rigging your entire setup.
Hook
The choice of hook depends entirely on your bait and the target species. For walleye, a sharp, strong hook is essential.
- J-Hooks (Aberdeen or Kahle): These are classic choices for live bait. Aberdeen hooks are thin-wired, making them less likely to snag in cover, but can straighten out on larger fish. Kahle hooks have a wider gap, which is great for hooking the corner of a walleye's mouth. Sizes typically range from #6 to #2 for minnows and leeches, and #1 or 1/0 for larger nightcrawlers.
- Treble Hooks: Some anglers prefer small treble hooks for large minnows or for fishing cut bait, as they offer more hooking points. However, they can be harder to remove from a fish and cause more damage.
- Circle Hooks: If you’re practicing catch and release, small circle hooks are an excellent choice. They are designed to hook fish in the corner of the mouth, minimizing deep hooking and making release easier.
Always ensure your hook is sharp! A dull hook means missed bites, and nobody wants that. For a perfect presentation with a jig and minnow combo, you might want to explore How to Rig a Jig and Minnow Combo for those times when you opt for a more active approach.
Step-by-Step Guide to Rigging a Slip Bobber for Walleye
Now that you have all your components ready, let’s get down to the nitty-gritty of putting it all together. This is a straightforward process, but getting each step right ensures your rig performs perfectly, leading to more strikes and fewer frustrations on the water.
Step 1: Threading the Bobber Stop
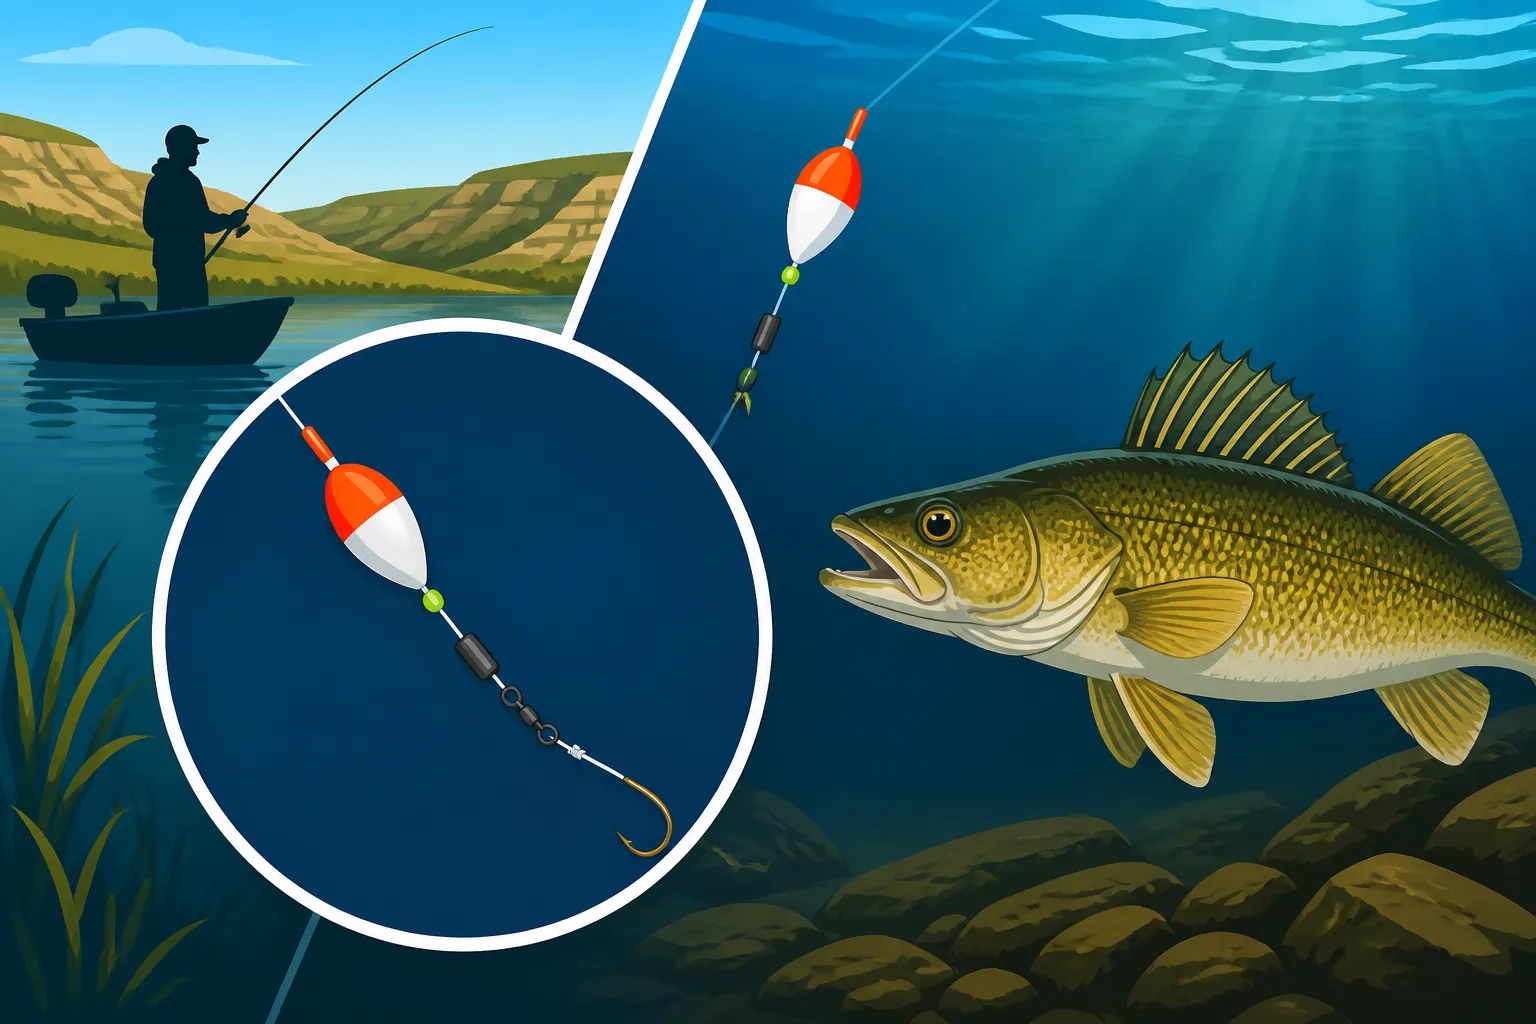
This is where it all begins. Take your main fishing line – usually 6-10 lb monofilament or fluorocarbon, or even lighter braided line for increased sensitivity (though braid can slip more with rubber stops) – and begin by threading on your bobber stop. If you're using a string bobber stop that comes on a plastic tube, pass your main line through the tube. Then, slide the string knot off the tube and onto your main line, pulling the tag ends gently to snug it down. Don’t overtighten it just yet; you'll want some room to slide it for initial depth adjustments.
If you're using a rubber bobber stop, you'll typically thread your line through a small wire loop that comes with the stop. Slide the rubber piece onto your line from the loop. Again, don't cinch it down completely. The key here is to make sure it's on your line and can slide, but will hold its position once tightened. Remember, this little guy is setting your depth, so it needs to be reliable. For recommendations on the best lines for your North Dakota fishing adventures, take a look at our guide on the Best Fishing Line for North Dakota Lakes.
Step 2: Adding the Bead and Slip Bobber
Immediately after the bobber stop, slide on your protective bead. This bead is essential because it stops the bobber stop from getting pulled into the bobber's center hole. Without it, your carefully set depth would be lost the moment a fish tugs or you reel in. Choose a bead that's small enough to slide freely but large enough not to pass through the bobber's eyelet.
Once the bead is on, thread your main line through the center hole of your slip bobber. The line should pass freely through the bobber without any resistance. Ensure the bobber is oriented correctly so it floats upright when in the water. Most slip bobbers are designed to be quite intuitive in this regard.
Step 3: Attaching the Weight and Swivel
Next up, you'll want to add your weight. I usually recommend starting with a small split shot or two. Pinch them onto your line about 6 to 12 inches above where you plan to tie your hook. The goal here is just enough weight to get your bait down and keep your bobber upright. You might need to experiment with different sizes or quantities of split shot once you’re on the water to find the perfect balance.
After adding your weight, tie on a small barrel swivel. This is a crucial connection point that helps reduce line twist and allows for easy leader changes. Use a strong knot like a Palomar knot or an improved clinch knot to secure the swivel to your main line. Make sure it's snug and tight. The swivel also helps prevent your slip bobber from sliding down to your hook, acting as a secondary stop.
Step 4: Tying on the Leader and Hook
From the other end of your swivel, you'll attach your leader. Your leader can be made of monofilament or fluorocarbon, usually slightly lighter than your main line. The length of your leader will vary, but typically anywhere from 12 inches to 3 feet works well for walleye. A longer leader can allow your bait to swim more naturally, but a shorter one might offer better control in windy conditions. Tie your chosen hook to the end of the leader using another reliable fishing knot.
When selecting your hook, consider the size of your bait. For example, if you're using medium shiners, a #4 or #2 Aberdeen hook might be perfect. If you’re targeting bigger walleye with larger bait, you might go up to a 1/0 or even 2/0. Remember, a sharp hook is a must, so check it regularly! For some insights into what makes a good walleye rod, don't forget to read our article on Best Fishing Rods for North Dakota Anglers.
Step 5: Setting the Depth
This is the final and perhaps most important adjustment. To set your depth, simply slide the bobber stop up or down your main line. If you want your bait shallower, slide the stop closer to your hook. If you want it deeper, slide it further away.
How do you know what depth to set it at? Your fish finder is your best friend here. Look for baitfish schools, submerged structure, or actual fish marks, and then set your bobber stop so your bait will be just above or directly in the zone where you see activity. For example, if fish are suspended at 10 feet, set your bobber stop 10 feet from your hook. A general rule of thumb when targeting walleye is often to fish your bait a foot or two above the structure or the fish you're seeing on sonar. If you're new to using your electronics to scout out prime locations, our guide on How to Find Walleye Structure With a Map can give you a leg up.
Once you’ve set your depth, give the bobber stop a gentle tug to ensure it’s securely in place. Then, bait your hook, cast it out, and watch that bobber! When a walleye takes the bait, the bobber will usually dip or lay flat, signalling it’s time to set the hook. This method allows you to explore varying depths in a given area with relative ease, making it highly adaptable for unpredictable walleye behavior.
Tips for Maximizing Your Slip Bobber Success
Just like any fishing technique, rigging a slip bobber is only part of the battle. The true artistry comes in knowing how to use it effectively, understanding the nuances, and adapting to the conditions on the water. Here are some pro tips to help you put more walleye in the boat using your new favorite rig.
Choosing the Right Conditions and Locations
Slip bobbers aren't always the best tool for every situation, but they excel in specific scenarios. They are fantastic for:
- Fishing over submerged structure: Think rock piles, humps, weed beds, or flooded timber on lakes like Lake Audubon or Jamestown Reservoir. A slip bobber allows you to suspend your bait just above the snags, drastically reducing hang-ups while presenting your offering right where the fish are hiding.
- Targeting suspended walleye: When walleye are holding off the bottom, chasing baitfish in open water, a slip bobber is ideal. Your fish finder will show you their depth, and you can precisely place your bait there. This often happens during late morning or midday in deeper lakes.
- Shallow water weed lines: Early spring walleye often relate to emerging weed growth. A slip bobber lets you drift a minnow or leech right along the edge of the weeds without constantly snagging. Check out our Early Spring Walleye Techniques in North Dakota for more on this time of year.
- Fishing breaklines: Walleye love transition zones. Drifting a slip bobber rig along a sharp drop-off can be incredibly effective, allowing your bait to follow the contour at a consistent depth above the bottom.
- Calm or light wind days: While you can use a slip bobber in wind, excessive wind makes bobber watching difficult and causes unnatural bait movement. Calm conditions are generally preferred.
Knowing when to deploy this rig is just as important as knowing how to rig it. When conditions are tough, perhaps during a Fishing During a Cold Front in North Dakota, a subtle, natural presentation with a slip bobber can be the difference-maker.
Bait Presentation and Action
The beauty of the slip bobber is its ability to create a natural presentation, but you can still influence that presentation.
- Live Bait is King: While you can certainly use artificials under a slip bobber (like a small jig with a soft plastic), live bait is usually preferred for walleye. A lively minnow (shiner, fathead, rainbow chub), a juicy nightcrawler, or a wriggling leech are all top contenders. Hook your minnow lightly through the lips or just behind the dorsal fin to keep it active. Thread a nightcrawler onto the hook, leaving a good portion dangling. For leeches, hook them through the sucker.
- Subtle Movement: Let the natural movement of your live bait do most of the work. On calm days, the bait itself provides enough action. In light chop, the bobber will gently jiggle your bait, adding more enticement.
- Periodic Jiggles: Don't be afraid to give your rod tip a gentle twitch every minute or so. This causes your bobber to dip slightly, making your bait "jump" or twitch, which can often trigger a strike from a hesitant walleye.
- Drifting vs. Anchoring: Both can be effective. When drifting, cover more water and let the wind or current move your rig naturally. When anchored over a specific piece of structure, you can precisely target a spot. For those calm evenings, check out our insights on the Best Time of Day to Catch Walleye.
Watching Your Bobber and Setting the Hook
This is where your patience and keen observation skills come into play. A walleye bite on a slip bobber can range from a violent yank to the most subtle dip.
- The Classic "Gone Under": The bobber simply disappears under the surface. This is the most obvious sign and usually means a walleye has committed fully.
- The Sideways Slide: Sometimes, a walleye will grab the bait and swim horizontally, causing the bobber to move across the surface or slowly slide sideways. Don't mistake this for wind or current; if it's moving against the elements, it's usually a fish.
- The "Dip and Hold": The bobber dips slightly, perhaps a few inches, and then holds that position or slowly sinks. This can be a very cautious walleye mouthing the bait.
- The "Pop-Up": In rare cases, especially with larger fish, the bobber might actually pop up or lie flat on the surface if the fish picks up the bait and swims towards you, creating slack.
Regardless of the action, once you see a definitive sign of a bite, wait a moment to let the fish fully take the bait. With live bait, a 3-5 second count is often sufficient. Then, reel down any slack, and set the hook with a firm, sweeping motion of your rod. Don't set too hard if you're using light line, but make sure it's enough to drive the hook home. Remember to always know your North Dakota Walleye Size Limit Rules before you decide to keep your catch.
Table of Common Walleye Slip Bobber Rigs and Their Best Uses
| Rig Component Combination | Best Use Cases | Advantages | Considerations |
|---|---|---|---|
| Light String Stop, Small Bead, Balsa Bobber, Single Split Shot, Aberdeen Hook, Minnow/Leech | Calm water, finicky bites, clear water, shallow to medium depths (5-20 ft) | Maximum sensitivity, natural bait presentation, reels easily through guides | Less effective in wind, lighter bait only |
| Rubber Stop, Larger Bead, Plastic Bobber, Multiple Split Shots, Kahle Hook, Nightcrawler | Moderate chop, general purpose, medium depths (10-30 ft), slightly larger bait | Good durability, easy depth adjustment, versatile | Reduced sensitivity compared to balsa, can slip on thin line |
| Lighted String Stop, Glow Bead, Lighted Bobber, Bullet Sinker, Circle Hook, Cut Bait/Large Minnow | Night fishing, low light, deeper water (15-40 ft), bigger baits | Visible in the dark, prevents line twist (bullet sinker) | Requires batteries, heavier setup, potentially less sensitive |
| Heavy String Stop, Large Bead, Weighted Bobber, Jig Head (instead of hook/sinker), Plastic Grub | Windy conditions, aggressive fish, fishing vertically in current, searching for active fish | Added stability in wind, presents artificial lures, faster fall rate | Less natural presentation for live bait, heavier overall rig |
This table should give you a good idea of how to adapt your slip bobber rig to various situations you might encounter while walleye fishing across North Dakota's diverse waters.
Final Thoughts on Your Slip Bobber Journey
Mastering the slip bobber rig for walleye is a game-changer for many anglers, especially when those North Dakota walleye are playing hard to get. It’s a technique that demands a bit of patience and attention to detail, from the precise rigging of your bobber stop and bead to the subtle art of watching that bobber for the slightest hint of a strike. But once you get the hang of it, the rewards are often well worth the effort.
Remember, fishing is all about adapting. There will be days when the walleye are crushing crankbaits on a fast troll, and other days when they want nothing but a perfectly suspended minnow under a slip bobber. Having this versatile rig in your arsenal means you’re prepared for a wider range of conditions and fish moods, increasing your chances of a successful outing. So, tie one on, cast it out, and enjoy the anticipation as you wait for that bobber to dance. You'll be amazed at how many walleye you can entice with this simple, yet highly effective, setup.
Disclaimer
Fishing regulations, license requirements, and safety guidelines can change. Always consult the latest North Dakota Game and Fish Department regulations before heading out on the water. This guide is for informational purposes only and does not constitute legal advice.