Early Ice Fishing Safety Tips
The first whispers of winter on North Dakota's lakes bring a unique thrill to anglers – the promise of early ice fishing. However, this initial layer of ice, while exciting, is notoriously unpredictable and can pose significant dangers. This guide is dedicated to equipping you with the vital knowledge and practices needed to stay safe when venturing onto the nascent ice, ensuring your early season adventures are memorable for the right reasons.
Understanding Early Ice Conditions in North Dakota
The allure of fresh ice, often before the crowds descend, is powerful. But this "first ice" phase is also when the most accidents can occur. It's crucial to approach these conditions with a healthy dose of caution and respect, understanding that what looks safe on the surface might be a trap beneath.
The Deceptive Nature of First Ice
Early ice is a tricky beast, plain and simple. It forms gradually, often freezing in patches, especially on larger bodies of water like Lake Sakakawea or Devils Lake. You might find several inches of solid, clear ice in one spot, only to take a few steps and encounter dangerously thin or slushy areas. This inconsistency is its most deceptive quality. Imagine walking onto a seemingly solid floor, only to find a hidden trap door just a few feet away – that's early ice in a nutshell. Areas near shorelines often freeze first and appear sturdy, lulling anglers into a false sense of security before they venture further out to more dangerous, recently frozen sections. Don't be fooled by the edges; the middle is often a different story entirely.
Different factors contribute to this variability. Snowfall, even a light dusting, can insulate the ice, slowing down its thickening process, or even worse, creating a layer of slush between existing ice and newly forming ice. This slush can freeze into what's known as "snow ice," which is significantly weaker than clear, black ice. Areas with current, like river channels or inflows/outflows of smaller lakes and reservoirs, will always have thinner ice, regardless of how cold it's been. North Dakota's ever-changing weather patterns, with significant temperature swings, can further complicate things, causing ice to thaw and refreeze, weakening its overall integrity.
Factors Influencing Ice Formation and Stability
Several environmental factors conspire to make early ice unpredictable. Understanding these elements is key to making informed safety decisions before you even step foot on the ice.
- Air Temperature and Duration: While cold air is essential, sustained freezing temperatures over several days and nights are what truly build strong, stable ice. A few cold days followed by a warm spell can quickly weaken or honey-comb the ice structure, making it incredibly fragile. We're talking consistent overnight lows well below freezing, not just daytime highs hovering around the freezing mark.
- Water Depth and Body Size: Shallow, smaller lakes and ponds typically freeze faster and more uniformly than deep, vast bodies of water. The sheer volume and thermal mass of larger lakes like Lake Sakakawea or Lake Oahe mean they take much longer to cool down and form thick ice. This is why you might find safe ice on a small prairie pothole near Bismarck, but Lake Sakakawea is still wide open water in parts. Smaller, shallower areas cool quicker and offer a more consistent initial freeze.
- Wind and Snow Cover: Wind can keep open water agitated, preventing freezing or eroding newly formed ice. Conversely, heavy snow acts as an insulator, slowing ice growth significantly once it's on the surface. That pristine blanket of white might look inviting, but it could be hiding very thin, weak ice underneath. Snow also adds weight, potentially causing slush layers that refreeze into weaker, opaque ice.
- Underlying Currents and Springs: Any movement of water beneath the ice is a major red flag. This includes river currents, inflows from culverts, natural springs, or even strong wind-driven currents on larger lakes. These warmer water flows constantly eat away at the ice from below, creating dangerously thin spots that are impossible to see from above. Always be extremely wary around inlets, outlets, bridges, and known spring areas. If you're wondering How Long Does Devils Lake Take to Freeze?, understand that factors like wind and depth play a huge role, especially in its more open sections.
Essential Ice Thickness Guidelines for Safe Travel
When it comes to ice fishing, there's no such thing as "good enough" when it comes to ice thickness. Knowing the minimum recommended depths for various activities is paramount, but remembering these are just guidelines is even more important. Always err on the side of caution.
Recommended Minimum Ice Thicknesses
The North Dakota Game and Fish Department, like most ice safety organizations, provides clear recommendations for ice thickness based on the load it needs to support. These are not absolute guarantees but rather general benchmarks for safe travel under ideal conditions.
- 4 inches of new, clear ice: This is the absolute minimum for safe foot travel by a single angler. Even then, you should still proceed with extreme caution and constantly check ahead.
- 5-7 inches of clear, new ice: Generally considered safe for small groups of anglers walking in single file, spaced well apart.
- 8-12 inches of clear, new ice: This depth is usually sufficient for snowmobiles and ATVs. However, it's crucial to remember that these vehicles carry momentum and can stress ice differently than foot traffic. Always operate them at reduced speeds on ice.
- 12-15 inches of clear, new ice: At this thickness, light vehicles like small cars or utility trucks might be supported, but it’s still risky, especially on early ice. Never drive a vehicle onto ice alone or if you're unsure of the conditions.
- 15+ inches of clear, new ice: Larger vehicles, like full-size pickup trucks, require this much ice or more. This kind of thickness is rarely seen during "early ice" conditions and usually comes later in the season.
It's vital to remember that these figures refer to clear, hard, black ice. White or "snow ice" is only about half as strong as clear ice, meaning you need double the thickness for the same safety margin. Slushy ice is practically worthless for support. If the ice is cloudy, slushy, or has a honeycomb appearance, assume it's unstable, regardless of the measurement. For a more detailed look, check out our guide on How Thick Ice Needs to Be for Ice Fishing.
Here's a quick reference table for ice thickness guidelines:
| Activity | Minimum Clear Ice Thickness | Additional Considerations |
|---|---|---|
| Foot Travel | 4 inches | Single angler, proceed with extreme caution. Always check ahead. |
| Small Group | 5-7 inches | Multiple anglers, spaced out. |
| Snowmobile/ATV | 8-12 inches | Travel slowly, avoid congregating. Double-check for cracks and pressure ridges. |
| Small Car/Truck | 12-15 inches | Very risky on early ice. Never alone. Windows down, doors unlocked, seatbelt off. |
| Medium Truck | 15+ inches | Rarely seen on early ice. Requires sustained deep freeze. Follow all vehicle safety protocols. |
The Importance of Continuous Ice Monitoring
Simply checking the ice at the access point isn't enough. Ice conditions can change dramatically across a lake, even within a few yards. This is especially true for North Dakota's diverse waterways, from the sprawling main lake bodies of Sakakawea to the smaller, more current-prone sections of the Missouri River.
As you venture out, you must be your own chief safety officer. Carry a spud bar (a heavy chisel-like tool) and use it to tap the ice every few steps. Listen to the sound and feel the resistance. A solid thunk usually indicates strong ice, while a hollow crack or easy penetration means you're on thin ice. When you drill your first hole with an auger, measure the ice thickness. Then, as you move, continue to drill test holes or use your spud bar to monitor changes. A common mistake is to drill a hole near the shore, find 8 inches, and assume the entire lake is safe. This couldn't be further from the truth.
Always remember the old adage: "No ice is 100% safe." Factors like cracks, pressure ridges, and submerged objects can all weaken ice. Regularly looking around for visible signs of distress, such as new cracks forming or water seeping up through holes, is also part of continuous monitoring. If you notice any of these signs, it's time to re-evaluate your position and potentially head back to shore. For more insights on how to safely check conditions, refer to our detailed article on How to Check Ice Thickness Safely.
Gear and Preparedness for Early Ice Expeditions
The right gear isn't just about catching fish; it's about getting home safely, especially during the volatile early ice period. Being prepared means having the tools for prevention and self-rescue readily at hand.
Non-Negotiable Safety Gear
When the ice is still establishing itself, your personal safety equipment list needs to be robust. These items aren't optional; they're lifelines.
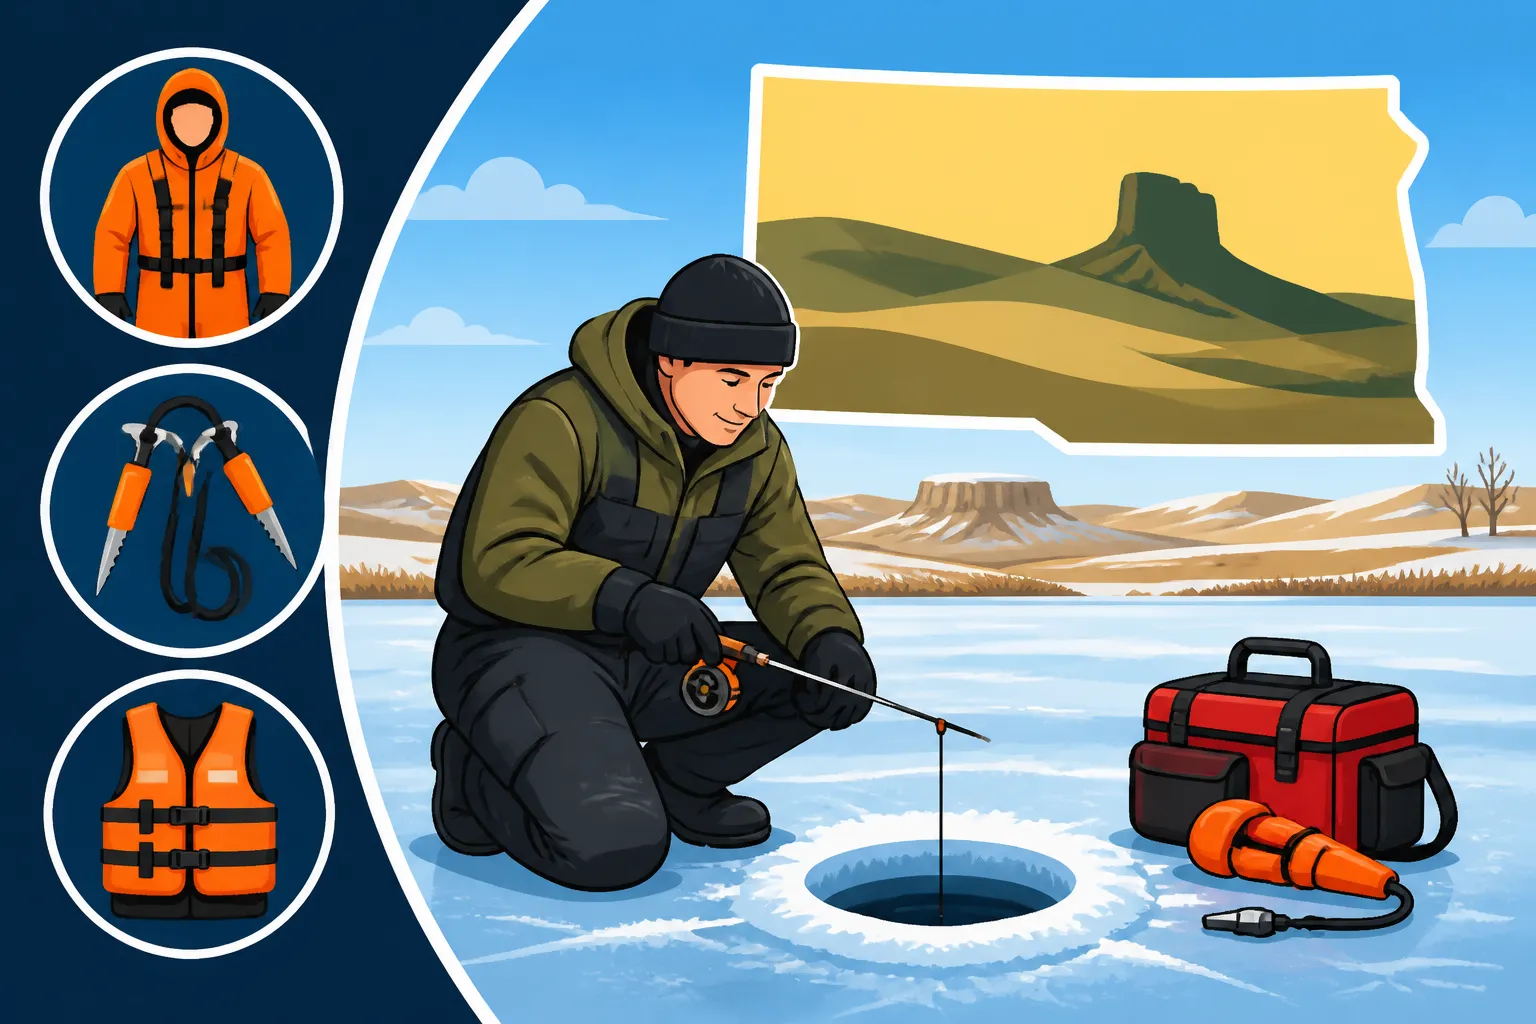
- Ice Picks: These small, pointed tools are arguably the most crucial piece of early ice safety gear. They are designed to give you purchase on slippery ice, allowing you to pull yourself out of the water if you fall through. You should wear them around your neck, ideally with a lanyard that clips to your jacket, so they're instantly accessible. Many affordable and effective models are available online, including a wide selection on Amazon. Keep them sharp and practice grabbing them quickly. For more details on why these are so important, read our post on Should You Carry Ice Picks While Ice Fishing?.
- Throw Rope: A bright, buoyant rope (at least 50 feet long) stored in a throw bag is essential for rescuing others without putting yourself at risk. It should be easily accessible in your sled or worn on your person. Familiarize yourself with how to quickly deploy it.
- Personal Flotation Device (PFD) or Flotation Suit: Even experienced anglers can misjudge ice. Wearing a PFD (life vest) over or under your winter clothing, or better yet, an ice fishing suit with built-in flotation, drastically increases your survival chances if you go through the ice. The cold water shock alone can incapacitate you, making it hard to swim or even stay afloat. Brands like Frabill or Clam offer excellent ice fishing suits with inherent buoyancy that also provide insulation. These are a worthy investment and can also be found on platforms like Amazon.
- Spud Bar: This heavy metal chisel with a T-handle is your best friend on early ice. It's used to test ice thickness ahead of you. A good spud bar will penetrate weak ice with one or two strikes but bounce off solid ice. It's much safer than blindly walking onto unknown ice. Get into the habit of spudding every few steps, especially when moving into new areas.
- Dry Bag with Spare Clothes: Even if you manage to pull yourself out, hypothermia sets in rapidly in North Dakota's frigid temperatures. Having a completely dry set of base layers, socks, and a hat stored in a waterproof dry bag can be a literal lifesaver. This bag should be easily accessible and carried with you, perhaps in your ice fishing sled.
Communication and Emergency Preparedness
Beyond your immediate personal gear, having a solid plan for communication and knowing what to do in a broader emergency situation is critical.
- Charged Cell Phone: Always carry a fully charged cell phone in a waterproof, insulated case or bag. Cold temperatures drain batteries quickly, and if it gets wet, it's useless. Consider a portable power bank (also readily available on Amazon) to keep your phone topped up. In an emergency, it's your direct line to help.
- Whistle: A simple, loud whistle can attract attention far more effectively than your voice, especially in windy conditions or if you're experiencing cold shock. Clip it to your jacket or PFD.
- First Aid Kit: A basic first aid kit with essentials for cuts, scrapes, minor sprains, and hypothermia care (like chemical hand warmers) should always be part of your gear.
- The Buddy System: Never go on early ice alone. Having at least one trusted fishing partner significantly increases safety. They can assist you if you fall through or call for help. Agree on a plan beforehand: what to do if someone goes through, who calls for help, etc.
- Leave a Trip Plan: Inform someone reliable (a family member, friend, or even a local bait shop) of your exact fishing location, who you're with, your expected return time, and what to do if you don't check in. This simple step can drastically reduce response times in an emergency.
- Headlamp or Flashlight: Even if you plan to be off the ice before dark, things can go wrong. A reliable light source is essential for navigating back to shore, especially if you get disoriented or delayed.
Traveling on Early Ice: Best Practices and Warnings
Once you've geared up and understood the basics, how you actually move across the ice is the next critical component of safety. It's not just about what you have, but how you use common sense and caution with every step.
Foot Travel and Spacing
Walking on early ice requires a mindful approach. It's not a race; it's a calculated journey.
- Walk, Don't Run: Every step you take creates stress on the ice. Running or jumping can create concussive force, potentially cracking already weak ice. A slow, shuffling gait is best, distributing your weight more evenly.
- Maintain Distance: If you're with a group, spread out. Don't walk in a tight cluster. This prevents too much weight from being concentrated in one area and allows others to react if someone goes through. A good rule of thumb is to stay far enough apart that if one person falls in, the others aren't immediately affected and can assist from a stable position.
- Avoid Known Hazards: Stay clear of obvious dangers like open water, areas around aeration systems, current-prone spots (like where rivers enter or exit lakes), and anything that looks like a pressure ridge. Pressure ridges are areas where ice sheets push against each other, creating buckles and cracks that can be highly unstable. They might look like a frozen wave or a jagged line across the ice. Ice around docks, piers, and pilings can also be weaker due to heat absorption or movement.
- Visually Inspect the Ice: Get into the habit of constantly looking down. Clear, hard ice is generally safest. Cloudy, milky, or bubbly ice often indicates weaker snow ice or ice with air pockets. Dark spots could mean thin ice or even open water if the surface hasn't refrozen.
Vehicle Safety on Early Ice
While the allure of driving right to your spot is strong, vehicle travel on early ice in North Dakota is inherently more dangerous and often not recommended. If you choose to do so, extreme precautions are non-negotiable.
- Never Be the First Vehicle: Let someone else test the ice first. Observe if others are driving on the lake and how they are doing it. Better yet, stick to foot, ATV, or snowmobile travel during the early season. For insights into when it might be safer to drive, consider checking our guide on Is It Safe to Drive a Truck on North Dakota Ice?.
- Windows Down, Doors Unlocked, Seatbelt Off: This is standard operating procedure. If the worst happens, you need to be able to exit the vehicle immediately without fumbling with locks or restraints.
- Slow and Steady Wins the Race: Drive at a crawl (5-10 mph). High speeds create damaging pressure waves under the ice. Avoid sudden stops, starts, or turns.
- Maintain Distance: Vehicles should maintain significantly greater distances from each other than foot traffic, at least 50-100 yards, to prevent overloading a single section of ice.
- Avoid Grouping: Never park vehicles in a cluster. Spread them out to distribute weight. If possible, park on thicker ice closer to shore and walk the rest of the way.
- Know Your Vehicle's Weight: Don't just consider the truck; factor in all your gear, passengers, and any trailers. Overloading even seemingly safe ice can lead to disaster.
Understanding Current and Springs
On many of North Dakota's vast waters, especially those connected to the Missouri River system or those with significant inlets/outlets, currents and springs are invisible dangers that thin ice from below.
- The Threat of Currents: Rivers, streams, and even large culverts feeding into lakes create currents that prevent ice from forming consistently or erode it rapidly. The Missouri River below Garrison Dam, for example, often has dangerously thin or open water areas even when surrounding lakes are frozen solid. Always be extra cautious around these zones. The moving water can create a "bridge" of thin ice that looks safe but offers no support.
- Hidden Springs: Many lakes have natural underwater springs that release warmer water. These spots can create localized areas of dangerously thin ice, even in otherwise stable sections of the lake. These are almost impossible to detect from the surface, which is why constant spudding and avoiding unknown areas are so important. If you see an area of slush or water seeping up from the ice in an otherwise solid-looking spot, it could indicate a spring below.
What to Do in an Emergency
Even with the best preparation, accidents can happen. Knowing how to react in an emergency, both for yourself and for others, can be the difference between a scary story and a tragic one.
Self-Rescue Techniques
If you find yourself in the terrifying situation of falling through the ice, staying calm and knowing what to do immediately are your best defenses.
- Don't Panic: The initial cold shock is intense and can make you gasp for air. Fight the urge to panic. Take a few deep breaths to regain control.
- Turn Towards Your Entry Point: The ice you just came from was strong enough to hold you moments before, so it's generally the strongest immediate area.
- Use Your Ice Picks: These are your best friends in this situation. Drive them into the solid ice ahead of you. If you don't have picks, use your forearms and elbows to gain purchase.
- Kick Your Legs Vigorously: This helps propel your body horizontally in the water, bringing your torso up onto the ice. You want to get as much of your body onto the surface as possible, reducing the resistance of the water.
- Worm or Roll Away: Once you've gotten onto the ice, don't stand up. The surrounding ice is still likely thin. Instead, roll or crawl like a seal, distributing your weight widely, until you reach truly solid, thicker ice. Only then should you slowly and carefully get to your feet.
- Head for Shore Immediately: Once you are safely out, get to shore or a heated shelter as quickly as possible. Strip off wet clothing (if you can get into a warm place) and put on dry clothes. Get warm drinks and food into you. Seek medical attention if you feel disoriented, severely cold, or develop shivering that won't stop. Our guide on What to Do If You Fall Through the Ice offers more detailed step-by-step instructions.
Assisting Others Safely
Seeing someone fall through the ice is terrifying, but rushing in without a plan can lead to multiple victims. Remember the acronym REACH, THROW, GO, ROW:
- R – Reach: If the victim is close to shore and you can safely reach them with a long pole, branch, or even your arm while lying flat on solid ice, do so. Do not stand up or put yourself in danger.
- T – Throw: This is the most common and safest method. Grab your throw rope, a long extension cord, or anything that floats and can be thrown to the victim. Lie flat on the ice to distribute your weight, then throw the rope past them and instruct them to grab it. Pull them slowly and steadily to safety. You can find essential throw ropes and other rescue gear on Amazon.
- G – Go (with caution): Only go onto the ice to retrieve someone if you have proper training, safety equipment (like a flotation device or a rescue board), and additional help on solid ground. If you must go, crawl flat on your stomach, pushing a ladder, long board, or even an ice fishing sled ahead of you to distribute your weight.
- R – Row: If a boat is available and you can safely get it into the water, it's often the safest way to approach a victim, as it provides both flotation and a platform for rescue.
After the victim is out, immediately begin treatment for hypothermia, which includes getting them into dry clothes, providing warm drinks, and seeking immediate medical help.
Local Considerations and Regulations
Fishing in North Dakota comes with its own set of challenges and specific rules. Being aware of these local nuances will make your early ice adventures both safer and more enjoyable.
North Dakota's Unique Challenges
The "Peace Garden State" lives up to its cold reputation, offering some incredible ice fishing, but also some significant hazards, especially during early ice.
- Extreme Temperature Swings: North Dakota is known for its dramatic weather changes. A week of bitter cold can be followed by a warm front, rapidly deteriorating ice conditions. Always check the forecast leading up to and during your trip.
- Vast and Varied Water Bodies: From the colossal Lake Sakakawea, with its river-like currents and deep sections, to the vast, shallow, and often wind-swept Devils Lake, and countless smaller prairie lakes, ice conditions will vary wildly. Ice that's safe on a small, sheltered pond might be dangerously thin on a large, exposed reservoir. Don't assume conditions are uniform across different bodies of water. For example, understanding How Cold It Gets Ice Fishing in North Dakota can prepare you for the sudden drops that impact ice stability.
- Snowfall Effects: North Dakota often gets early-season snow. As mentioned earlier, snow insulates the ice, slowing its growth, and can create slush layers that weaken the ice considerably when they refreeze. Always be extra cautious on snow-covered ice.
- North Dakota Game and Fish Advisories: The North Dakota Game and Fish Department is an invaluable resource. Before heading out, always check their website or social media for the latest ice reports, warnings, and localized conditions. They often post specific advisories for popular lakes, which can be a lifesaver. You can find specific rules and regulations in our comprehensive North Dakota Ice Fishing Rules guide.
Respecting Private Property and Access Points
Much of North Dakota's land surrounding lakes and rivers is privately owned. Responsible angling includes respecting these boundaries.
- Know Your Access: Stick to designated public access points, boat ramps, or areas where you have explicit permission from landowners. Driving onto private property without permission is trespassing and can lead to fines or confrontation.
- Parking Etiquette: Park vehicles in designated areas or well off the roadway, ensuring you don't block access for others or impede traffic.
- Leave No Trace: Pack out everything you pack in. This includes bait containers, fishing line, food wrappers, and anything else you bring onto the ice. Littering spoils the experience for everyone and can lead to access restrictions.
- Check Regulations: Always be aware of the specific regulations for the water body you're fishing, including limits, special zones, and any specific gear restrictions. For information on what you need before you even cast a line, check out our guide on North Dakota Ice Fishing License Requirements. Many great options for Best Portable Ice Shelter for Windy Conditions or Best Cold Weather Gear for Ice Fishing can be found online and will help you stay comfortable while adhering to local rules.
Disclaimer
This guide provides general safety information and recommendations for early ice fishing in North Dakota. Ice conditions are highly variable and can change rapidly. Always exercise extreme caution, use your judgment, and prioritize safety above all else. Neither the author nor the publisher assumes any liability for accidents or injuries that may occur. When in doubt, stay off the ice.