Best Sonar Settings for Finding Baitfish
There’s nothing quite as frustrating as being out on the vast waters of North Dakota, knowing that elusive walleye or northern pike is lurking somewhere, but your sonar screen just looks… empty. Or worse, a jumbled mess of green and yellow that tells you absolutely nothing useful. A big part of solving that puzzle, and putting more fish in the boat, comes down to finding the forage – the baitfish schools that attract those bigger predators. This guide is all about demystifying your sonar, helping you dial in those settings specifically to pinpoint those crucial baitfish concentrations.
Why Baitfish Matter and Why They're Hard to Find
When you're chasing game fish across North Dakota's expansive waters, from the massive stretches of Lake Sakakawea to the unique structure of Devils Lake, it can feel like a game of hide-and-seek. You know the fish are out there, but pinpointing their exact location is the real challenge. What many anglers often overlook, or struggle to interpret, is the direct relationship between game fish and their food source: baitfish.
The Critical Link: Baitfish and Game Fish
Think of it this way: game fish, whether it's a hungry walleye, an aggressive northern pike, or even a schooling perch, are constantly looking for their next meal. They aren't just swimming around aimlessly; they are actively seeking out concentrations of baitfish. Where the bait is, the predators will follow. It's a fundamental principle of fishing that often gets ignored when we're obsessing over jig colors or trolling speeds. If you can locate dense schools of minnows, smelt, or other forage, you've essentially found the buffet line, and the bigger fish are almost certainly nearby, waiting for their turn to feed.
The frustration I hear from fellow anglers all the time is seeing a barren screen, or just a few scattered dots, when they know there are fish in the area. It feels like your expensive electronics are letting you down. But often, it's not the sonar unit itself, but how it's set up. The default settings on many fish finders are designed for general use, not for the specific task of separating tiny baitfish from the water column or bottom structure. Learning to fine-tune these settings is like giving yourself a superpower, allowing you to see the vibrant ecosystem beneath your boat, not just the occasional trophy target. Understanding Seasonal Fish Movement Patterns in North Dakota Lakes is also vital, as baitfish will move with the seasons, and your sonar needs to be ready to find them wherever they roam.
Common Challenges in Locating Baitfish Schools
Finding baitfish isn't always as simple as turning on your sonar. These small fish are masters of evasion, and several factors can make them incredibly elusive. Water depth plays a huge role; a tiny school of minnows looks vastly different in 5 feet of water compared to 50 feet. Water clarity also impacts how well sonar signals penetrate and return, with murky waters making it harder to get a clear image. Furthermore, baitfish are constantly on the move, responding to changes in light, temperature, and predatory pressure. They might be hugging the bottom one minute, suspended in the middle of the water column the next, or even tucked tight against a thermocline.
Thermal stratification, or thermoclines, can present a particular challenge. This is where layers of water with different temperatures form, creating a boundary that can either hold baitfish or obscure them from your sonar. Your default sonar settings might struggle to penetrate or accurately depict these layers, making it seem like there's nothing there even if dense schools are just above or below the thermal break. The movement of your boat, interference from other electronics, or even air bubbles in the water can also contribute to a cluttered, unreadable screen, making those delicate baitfish signals disappear. It's truly a dance between technology and nature, and a skilled angler learns to lead.
Understanding Your Sonar: Key Settings to Tweak
Your fish finder is a powerful tool, but like any complex piece of equipment, it performs best when you understand its controls. When it comes to finding baitfish, there are several key settings that, once mastered, will revolutionize what you see on your screen. These aren't just random buttons; they directly control how your sonar "sees" the underwater world.
Frequency: Matching Your Environment
One of the most crucial settings on your sonar is its operating frequency. Most modern units offer multiple frequencies, often 200 kHz (kilohertz) and 83 kHz, with advanced CHIRP models sweeping a range of frequencies for even better detail.
- High Frequencies (e.g., 200 kHz, or higher CHIRP ranges): These frequencies provide excellent detail and target separation, making it easier to distinguish individual baitfish within a tight school or to pick out a small bait ball close to the bottom. They work best in shallower water, typically up to 100 feet or so, as their signal doesn't penetrate as deeply. For instance, if you're working the shallower bays of Lake Ashtabula looking for perch and their forage, 200 kHz would be your go-to.
- Low Frequencies (e.g., 83 kHz, or lower CHIRP ranges): These signals penetrate deeper water more effectively, but they sacrifice some detail. While you might not see individual baitfish as clearly, a low frequency is excellent for getting a broader view of the water column in deeper areas, like the main basin of Lake Sakakawea, and for locating large, dispersed schools that might be missed by a narrower high-frequency cone. They're also less prone to interference.
The key is to select the frequency that best suits the depth you're fishing and the level of detail you need. Many units allow you to run two frequencies simultaneously in a split-screen view, which can be incredibly useful for getting both a broad overview and a detailed look.
Sensitivity/Gain: The Art of Seeing More
This is arguably the most critical setting for finding baitfish. Sensitivity (often called "Gain" on some units) controls how much of the sonar's returning echo it will display.
- Too Low: If your sensitivity is too low, your sonar will filter out weak returns, including those from small baitfish or sparsely packed schools. Your screen might look clean, but you're missing a lot of what's actually under your boat.
- Too High: Crank the sensitivity too high, and your screen will become a cluttered mess of noise, surface clutter, and phantom readings. It's like trying to listen to a whisper in a crowded stadium – too much background noise drowns out the important sounds.
The art is finding the "sweet spot." A good starting point is often to increase your sensitivity until you start to see a bit of clutter or interference, then dial it back just slightly. You want to see the faint, wispy returns of baitfish without the screen becoming unreadable. When targeting specific species, like walleye, adjusting this setting is also crucial, and you can learn more about general adjustments in Best Fish Finder Settings for Walleye. Remember, this setting isn't "set it and forget it." It needs constant adjustment based on depth, water clarity, and even boat speed. You'll find yourself tweaking it throughout the day as conditions change.
Range/Zoom: Focusing Your View
The depth range setting determines how much of the water column your sonar is displaying. If you're fishing in 30 feet of water but your range is set to 100 feet, all the relevant information will be compressed into the top third of your screen, making it hard to discern small targets.
- Auto Range: Most units default to "Auto Range," which can be convenient but isn't always optimal for finding baitfish. The unit might choose a range that's too broad.
- Manual Range: When specifically looking for baitfish, it's often better to manually set your depth range. If you know baitfish are likely to be in the top 20 feet, set your range to 0-30 feet. This stretches out the relevant portion of the water column across the entire screen, making baitfish schools appear larger and easier to identify.
Zoom is another powerful tool. Many units offer a "bottom lock" or "zoom" feature that lets you magnify a specific portion of the water column. If you see a faint baitfish signal near the bottom in 40 feet of water, zooming in on the 30-50 foot range will expand that area, allowing you to see the school's density and structure more clearly. Some high-end units allow for "split zoom," showing a full-screen view alongside a magnified section. This is fantastic for seeing the big picture while simultaneously studying the details of a baitfish school.
Scroll Speed: Painting the Picture Accurately
The scroll speed (or chart speed) dictates how quickly the sonar history scrolls across your screen. This setting is crucial for accurately representing baitfish schools and their movements.
- Too Slow: If your scroll speed is too slow relative to your boat speed, baitfish schools will appear compressed, elongated, and distorted. You might miss the true size and shape of a school.
- Too Fast: Conversely, a scroll speed that's too fast can make schools appear too short or jumpy, and you might not get a clear enough "picture" to interpret them effectively.
A good rule of thumb is to match your scroll speed to your boat speed. When trolling slowly, a slower scroll speed might be appropriate. When moving faster, increase the scroll speed to prevent the image from becoming too stretched. Many anglers find that a medium-to-fast scroll speed works well for actively searching for baitfish, as it provides a more realistic representation of what's beneath the boat as you move. A fast scroll speed allows you to see changes quickly, which is critical when trying to stay on top of moving baitfish schools.
Noise Rejection & Surface Clarity: Cleaning Up the Screen
These settings are designed to clean up your sonar screen by filtering out unwanted interference.
- Noise Rejection (or Interference Rejection): This setting helps eliminate electrical interference from your boat's engine, trolling motor, or other electronics. Interference often appears as random lines or dots across the screen that don't make sense. By increasing noise rejection, your sonar can better distinguish actual targets from electrical "noise," making baitfish schools stand out more clearly.
- Surface Clarity (or Surface Clutter Rejection): This addresses the "clutter" that often appears at the very top of your screen, caused by air bubbles, turbulence, and debris near the water's surface. While some surface clutter is normal, excessive amounts can obscure baitfish that are feeding or hiding just below the surface. Adjusting this setting can clear up the top few feet of the water column, giving you a cleaner view of shallow-sitting bait.
It's important to use these settings judiciously. Too much noise or surface rejection can sometimes filter out actual fish signals, especially small or weak ones. Start with these settings on a low or medium level and increase them only if you're experiencing significant clutter that's obscuring actual targets. The goal is a clear screen, not a blank one!
Practical Application: Dialing in for Baitfish
Understanding what each sonar setting does is one thing; putting it into practice on the water is another entirely. Finding baitfish isn't about setting it once and forgetting it; it's an ongoing process of adjustment and interpretation.
Starting Point and Live Adjustment
When you first head out on the water, don't just rely on your factory default settings. They are a good general starting point, but they rarely optimize for baitfish detection.
- Start with Auto: Begin by putting your sonar on auto-depth and auto-sensitivity. This gives you a baseline view of the water column.
- Adjust Frequency: Select a frequency appropriate for your depth. If you're in less than 50 feet, start with a higher frequency (200 kHz or high CHIRP). If you're on the deeper main lake of Lake Sakakawea, consider using 83 kHz or a lower CHIRP band, or even split-screen both.
- Manual Sensitivity: Turn off auto-sensitivity. Begin to slowly increase the gain/sensitivity until you start to see a "speckling" or noise appearing on the screen. This indicates you're picking up almost everything. Now, dial it back just enough so that the screen is clean, but you can still discern faint returns. This is your sweet spot for revealing baitfish. You'll likely need to adjust this as you change depths or water clarity.
- Set Manual Range: Disable auto-depth. Manually set your depth range slightly beyond the deepest water you expect to see baitfish or the bottom. This maximizes the screen real estate for the most critical information.
- Adjust Scroll Speed: Match your scroll speed to your boat speed. If trolling slowly, a medium speed works. If cruising, a faster speed is needed to prevent stretching.
- Fine-tune Noise/Surface: If you're still seeing excessive clutter near the surface or random lines, gradually increase your noise rejection and surface clarity settings. Be cautious not to overdo it.
This process is dynamic. As you move into different depths, encounter different water clarity, or change your boat speed, you'll need to make subtle adjustments. Think of it as tuning a radio – you're always trying to find the clearest signal.
Interpreting Baitfish Returns
Once you've dialed in your settings, the next step is learning to interpret what those signals mean. Baitfish schools rarely look like perfect arches, which are more indicative of larger, individual fish.
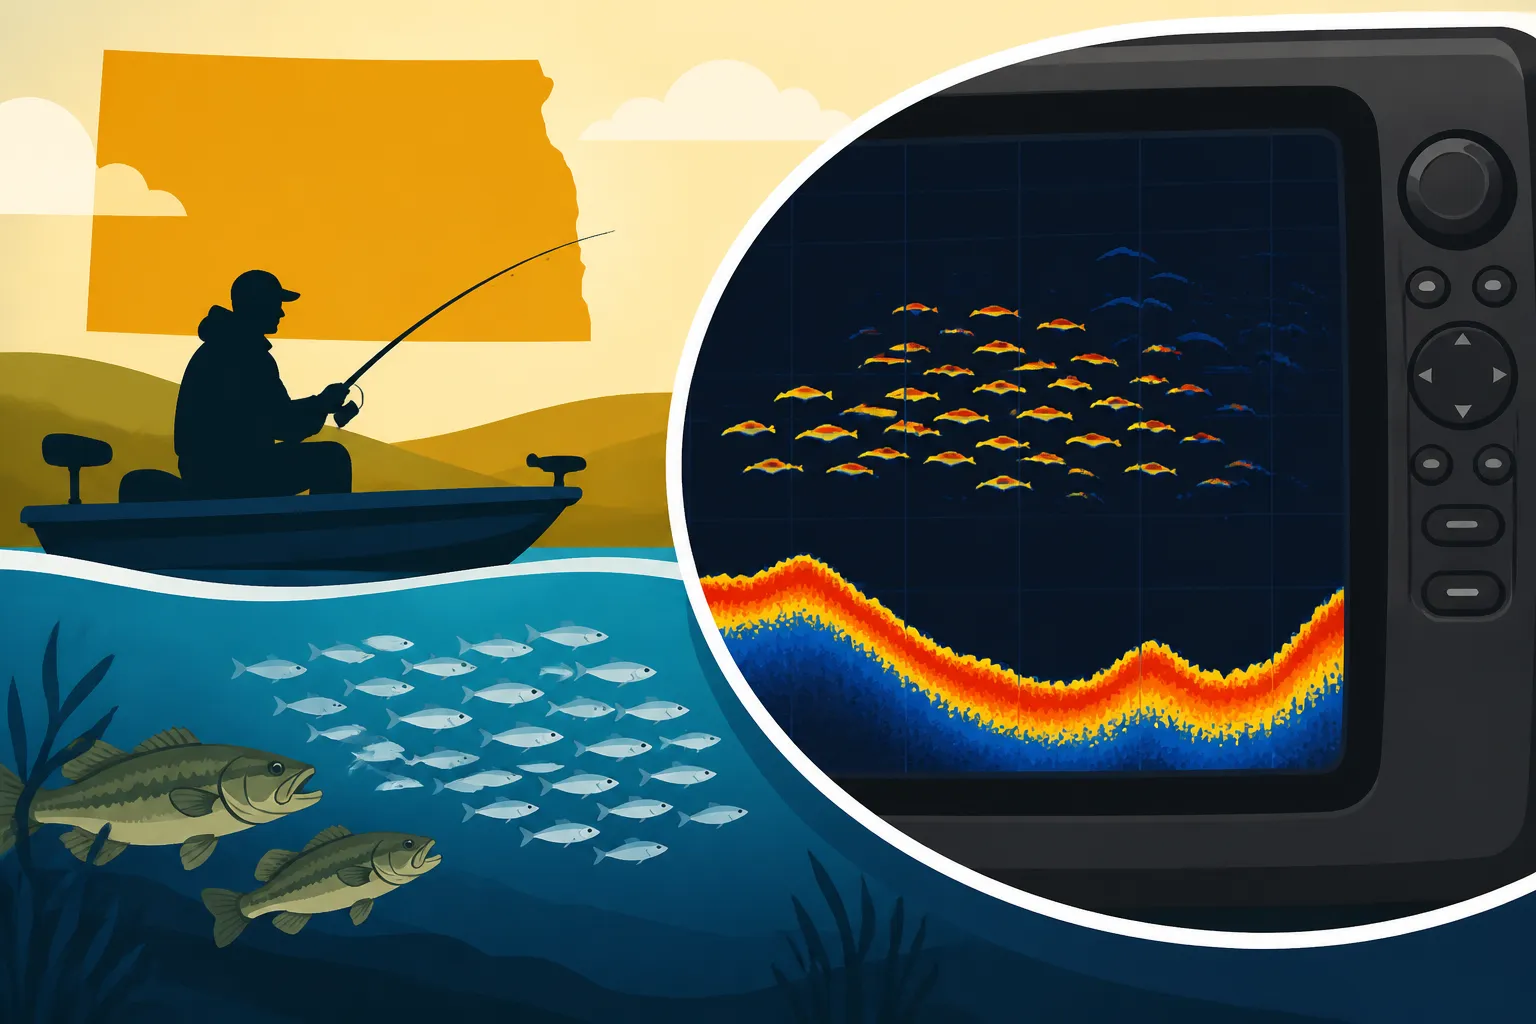
- Small, Dispersed Baitfish: These might appear as faint, scattered dots or very small, wispy clouds on your screen. They often look like "snow" or "confetti" in the water column.
- Dense Baitfish Schools: These are the game-changers. They'll show up as larger, more defined blobs, clouds, or even solid masses of color. The density and color intensity will depend on the frequency, sensitivity, and the tightness of the school. On higher frequencies, you might even resolve individual fish within the mass as tiny dots.
- Distinguishing from Weeds/Debris: Baitfish schools typically move. If a "blob" stays perfectly still regardless of your boat movement, it's probably structure like weeds, a rock pile, or a submerged tree. Baitfish will often show a slight movement or change in shape as you pass over them. Also, baitfish are typically suspended or near structure, not part of it. Knowing How to Read a Fish Finder for Ice Fishing also helps in different contexts, as similar principles of interpreting returns apply, even if the method of fishing changes.
- Thermoclines: A strong thermocline will often appear as a distinct, usually flatter, horizontal line across your screen. Baitfish might congregate just above or below this line.
When you see a large, dense cloud of baitfish, especially if it's accompanied by larger, distinct arches or marks around its edges or within it, you've hit the jackpot. Mark that spot with a waypoint immediately!
Considering Water Conditions and Time of Day
The environment plays a huge role in baitfish behavior and, consequently, how your sonar needs to be set up.
- Water Temperature: Baitfish, like all fish, are cold-blooded and sensitive to temperature changes. They will seek out comfortable temperatures. Finding these temperature breaks (thermoclines) with your sonar and adjusting your range/zoom to focus on them can reveal hidden baitfish.
- Water Clarity: In clear water, baitfish might be more spread out or hold deeper to avoid predators, and your sonar will generally have an easier time with signal penetration. In murky or stained water, they might congregate more tightly, and you might need to increase sensitivity to pick up weaker signals.
- Light Levels (Time of Day): Baitfish often move shallower at dawn and dusk to feed, and deeper during bright midday sun or at night to escape predators. Adjusting your depth range to scan these shallower or deeper zones according to the time of day can be very effective. For example, during low light, you might focus on the top 10-20 feet, while in the afternoon, you might be scanning 30-50 feet. Do Walleye Bite Better at Night? also implies baitfish movement in darker conditions.
The best approach is to adapt. Be prepared to constantly tweak your settings, observe what's happening on your screen, and correlate that with your understanding of fish behavior in North Dakota's diverse fishing environments. Sometimes, an adjustment as simple as bumping the sensitivity up two clicks can turn a blank screen into a bustling underwater world.
Advanced Tips for Next-Level Baitfish Detection
Once you've mastered the basic sonar settings, there are even more ways to leverage technology to gain an edge in finding those elusive baitfish schools. Modern fish finders offer features that provide unparalleled views of the underwater world, allowing you to not just see what's directly below, but what's off to the sides and with incredible detail.
Side Imaging and Down Imaging for Baitfish
Traditional 2D sonar (the cone-shaped view) is excellent for what's directly beneath your boat, but it has limitations in covering a wider area quickly. This is where advanced imaging technologies really shine:
- Down Imaging (or DownScan, ClearVü): This technology provides a picture-like view directly below your boat, often at much higher frequencies than traditional 2D sonar. For baitfish, Down Imaging can offer incredibly detailed, almost photographic, representations of schools. You'll see the individual fish within a tight school much more clearly, and it makes distinguishing baitfish from submerged timber or dense weeds far easier. It's fantastic for confirming what your 2D sonar might be hinting at, providing a "truth" image. Companies often found on Amazon offer a wide range of units with this capability.
- Side Imaging (or SideScan, SideVü): This is a game-changer for covering vast areas. Side Imaging sends out high-frequency beams to the sides of your boat, scanning wide swaths of water. Instead of just seeing directly beneath you, you can see hundreds of feet to either side. For finding baitfish, this means you can quickly locate large schools that might be off to the port or starboard, without having to drive directly over them. Imagine cruising along a long point on Lake Oahe and seeing a massive bait ball 100 feet to your left – you can then adjust your course to intercept it, rather than blindly driving around. Side Imaging is also excellent for finding baitfish relating to structures like submerged roadbeds, humps, or drop-offs that your 2D cone might miss.
Using both 2D sonar and one or both of these imaging technologies in a split-screen display gives you the ultimate advantage. The 2D sonar provides the raw data and depth, Down Imaging gives photographic detail, and Side Imaging offers wide-area coverage.
Using Waypoints and GPS Integration
Finding a baitfish school is one thing; remembering exactly where it was is another. This is why GPS integration and effective use of waypoints are so crucial.
- Marking Hotspots: Whenever you encounter a significant baitfish school, especially one with bigger fish marks nearby, immediately hit that waypoint button on your GPS-enabled fish finder. Don't wait! Conditions change, and fish move, but that area likely holds forage for a reason (e.g., proximity to structure, a current seam, an ideal temperature zone).
- Pattern Recognition: Over time, by marking baitfish locations, you'll start to see patterns. Do baitfish consistently congregate on certain types of bottom structure? Are they found at specific depths during certain times of day? Are they in specific bays or points of Lake Sakakawea Walleye Fishing Spots? Your saved waypoints become a valuable database of historical information that helps you predict where baitfish (and therefore game fish) might be in the future.
- Revisiting Productive Areas: With waypoints saved, you can easily navigate back to these productive baitfish zones, whether it's later in the day, the next week, or even next season. This saves you valuable time searching and puts you directly on the fish. Many modern fish finders allow you to store hundreds or even thousands of waypoints, so don't be shy about marking everything that looks promising.
Understanding Different Baitfish Signatures
While a blob of color often signifies baitfish, different species of baitfish can sometimes present slightly different signatures on your sonar, especially with high-resolution units. This isn't an exact science, but with practice, you might start to discern subtle differences.
- Dense, Tight Schools (e.g., smelt, shiners): These often appear as very solid, almost impenetrable masses of color, especially when they're actively schooling defensively. They might be tear-drop shaped or long and narrow if they're moving quickly.
- Looser, More Dispersed Schools (e.g., larger minnows, young perch): These might show up as more "cloudy" or "wispy" returns, with individual specks visible within the cloud, indicating they're not packed as tightly.
- Larger Forage Fish (e.g., adult ciscoes, goldeye): While still forage, these larger individuals might show up as more distinct, albeit small, arches or marks within a larger school, or as more robust signals when solitary. Learning about Goldeye Fishing in North Dakota might help in identifying these larger baitfish.
Developing this level of interpretation takes time on the water, observing your sonar, and then catching fish (or bait) to confirm what you're seeing. The more you use your sonar with optimized settings, the better you'll become at recognizing the subtle nuances of baitfish activity.
Recommended Sonar Settings for Baitfish Detection
Here's a quick reference table to help you get started with optimizing your sonar settings for finding baitfish in various North Dakota fishing scenarios. Remember, these are starting points – always adjust based on your specific conditions!
| Scenario | Frequency (Hz) | Sensitivity/Gain | Range/Zoom | Scroll Speed | Notes |
|---|---|---|---|---|---|
| Shallow Water (0-20 ft) | High (200 kHz or higher CHIRP) | High (adjust down from max) | Manual (0-30 ft, use zoom) | Medium to Fast | Emphasize detail, see individual baitfish or small schools. Good for shorelines & weed edges. |
| Moderate Depth (20-60 ft) | Split (200/83 kHz or Mid/High CHIRP) | Medium to High | Manual (focus on relevant zone) | Medium | Balance detail with depth penetration. Look for baitfish suspended or near structure. |
| Deep Water (60+ ft) | Low (83 kHz or Low CHIRP) | Medium to High | Manual (0-100 ft or more) | Medium to Slow | Prioritize depth penetration and broader coverage. You're looking for larger schools or deep-holding bait. |
| Dense Baitfish Schools | High (for definition), Low (for overall size) | High (to resolve individuals) | Auto or Manual (narrow for detail) | Medium to Fast | Don't be afraid to try high sensitivity briefly to see internal structure of the school. |
| Sparse Baitfish / "Snow" | High (to pick up faint returns) | Max (until clutter, then back off) | Manual (narrow) | Medium | Focus on removing clutter to reveal faint, scattered signals. |
| Trolling (Slow) | Optimal for depth | Optimal for depth | Optimal for depth | Medium | Slower scroll speed for clearer, less distorted images of schools. |
| Cruising (Fast) | Optimal for depth | Optimal for depth | Optimal for depth | Fast | Faster scroll speed to prevent image compression and keep up with quick changes. |
Disclaimer
This article is for general informational purposes only and does not constitute professional advice. Laws, prices and regulations vary by location and change over time. Consult a qualified professional for guidance on your specific situation.