How to Read a Fish Finder for Ice Fishing
Stepping onto a North Dakota lake in the dead of winter, peering into a tiny hole, it can feel like you're fishing blind. The chilling reality is that without some help, you are. Trying to find fish beneath several feet of ice is one of the biggest challenges ice anglers face, leading to hours of sitting over barren water. This guide is here to unravel the mysteries of your fish finder, transforming that confusing screen into a reliable map of the underwater world and dramatically improving your chances of success.
The Essential Role of a Fish Finder for Ice Anglers
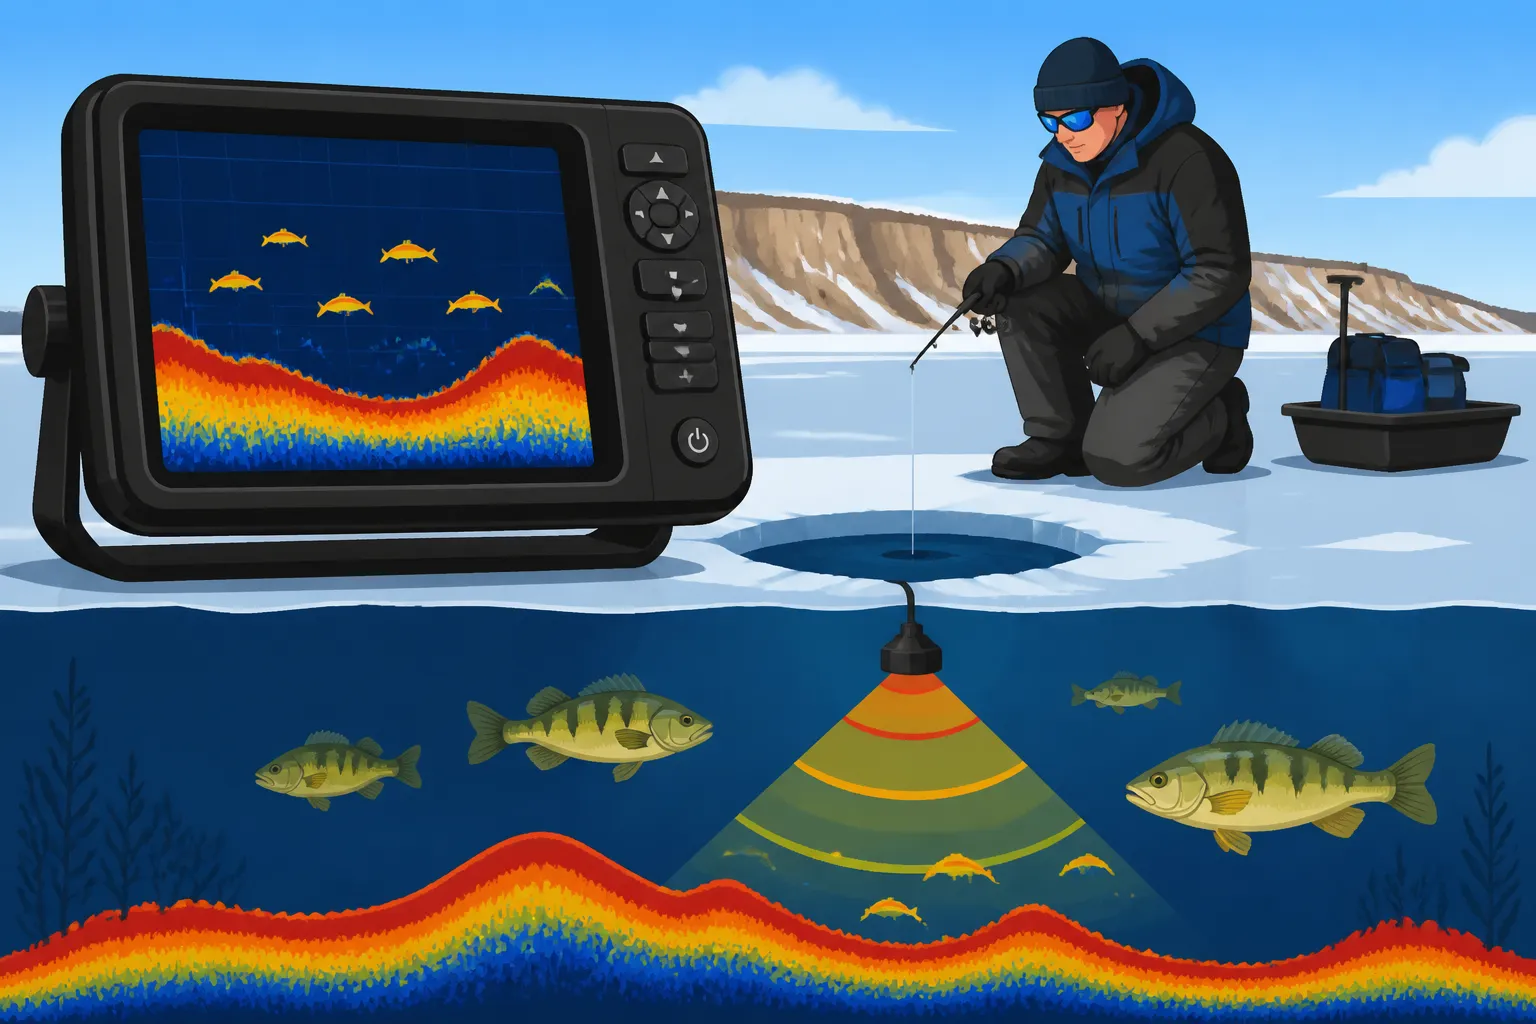
For many ice anglers, especially those just getting started or transitioning from open water, a fish finder can seem like an intimidating piece of technology. You bought it, set it up, but when you look at that screen, it’s a jumble of lines, colors, and numbers. The truth is, understanding your fish finder isn't just about spotting a fish; it's about interpreting a dynamic snapshot of the entire water column beneath your hole. It's your eyes under the ice, revealing everything from bottom composition to baitfish schools and, of course, those elusive game fish.
Beyond Just Seeing Fish: Understanding the Full Picture
A common misconception is that a fish finder only shows you fish. While that's certainly a primary function, a truly savvy angler uses their device for so much more. Think about it: when you drop your transducer into a fresh hole, the first thing you notice is the bottom. Is it soft and muddy? Hard and rocky? Does it have structure like a subtle hump or a sharp break? This information alone can be invaluable, especially when targeting species like walleye or perch that relate closely to specific types of bottom.
Furthermore, your fish finder will show you your bait or lure. This is a game-changer for ice fishing, as it allows you to see how fish are reacting to your presentation in real-time. Are they coming up to investigate? Are they shying away? Is your bait too high or too low? This instant feedback loop empowers you to adjust your technique, often making the difference between an empty bucket and a successful day. It's not just about fish; it's about the entire ecosystem happening under your feet. This is especially true when you're trying to figure out how to catch perch through the ice in North Dakota, as perch often school tight to the bottom or slightly above.
Choosing the Right Tool: Flasher vs. Graph Displays
When it comes to ice fishing specific fish finders, you'll primarily encounter two types of displays: the traditional flasher and the more modern graph (also known as a sonar unit with a scrolling display). Each has its unique strengths and weaknesses, and understanding them is crucial for reading them effectively.
Flashers, like those from Vexilar or Marcum, offer a real-time, circular display that shows immediate sonar returns. They're known for their instantaneous feedback, ruggedness, and battery efficiency. Many seasoned ice anglers swear by flashers for their raw, unfiltered data and quick response time. They excel at showing subtle movements of your jig and how fish are approaching it right now. For many, a flasher is the quintessential tool for how to ice fish in North Dakota.
Graph units, often from brands like Humminbird or Garmin, look more like the sonar displays you'd find on open-water boats, featuring a scrolling screen that shows a historical view of the water column. These units provide more detailed information, can record sonar logs, and often include GPS mapping capabilities, which can be invaluable when trying to pinpoint specific best ice fishing lakes in North Dakota. While the scrolling data isn't quite as "instant" as a flasher's radial display, modern graphs have become incredibly fast, offering detailed target separation and customizable views.
Many anglers even run both, using a flasher for quick, real-time jigging feedback and a graph for broader situational awareness or mapping. Understanding the nuances of each type is the first step toward truly mastering your ice fishing electronics.
Deciphering the Flasher Display: Real-Time Insights
Flashers are a classic for a reason. Their immediate, no-nonsense display gives you an unparalleled connection to what's happening beneath your hole. But for the uninitiated, it can look like a disco party of swirling lights. Let's break down what those colors and lines are really trying to tell you.
The Color Code: What Each Hue Tells You
The magic of a flasher lies in its color-coded rings. Typically, flashers use a three-color system – green, yellow (or orange), and red – to represent the strength of the sonar return. The outer edge of the display is the surface, and as you move inward, the rings represent increasing depth until you hit the bottom.
- Green: This usually signifies the weakest signal. You'll often see your small jig appear green, or perhaps a distant fish or a small school of baitfish. Think of it as a soft whisper from the depths. If you're dropping a tiny tungsten jig for perch, it might appear as a faint green line or segment.
- Yellow/Orange: A medium-strength signal. This could be a larger lure, a bigger fish, or a fish that's closer to the transducer or directly in the center of the cone angle. It's a stronger signal, indicating a more substantial object or a more direct return. When a decent walleye begins to approach your bait, its return might shift from green to yellow.
- Red: This is the strongest signal. A solid red band indicates a very hard return, typically the bottom of the lake, or a very large fish directly under your transducer. If you see a thick red line, you're looking at the lakebed. If a big northern pike swims directly into your cone, its return will likely be a bright, strong red.
Understanding this hierarchy of colors is fundamental. It's not just about what's there, but how "strong" its presence is. A small fish might appear green, but if it suddenly turns yellow or red, it's either moved closer to the center of your sonar cone or it's a much larger fish than you initially thought. This instant change is what makes flashers so exciting and effective for quick decision-making.
Reading the Returns: Fish, Bait, and Bottom Structure
Once you grasp the color code, you can start interpreting the various "marks" on your flasher. It's like learning a new language, but one that speaks of underwater opportunities.
- Your Lure/Bait: This is often the easiest to spot. When you drop your line, you'll see a distinct color band appear that moves up and down as you jig. This is crucial. If you can't see your bait, adjust your gain or sensitivity. Seeing your bait allows you to gauge how fish are reacting. Are they rising to meet it? Following it down? This is where the real-time feedback shines. You can literally watch a fish approach your bait, see if it turns away, and then adjust your jigging cadence or depth.
- Fish Returns: Fish will appear as colored bands or lines that move independently of your lure. A fish rising towards your bait will show a line moving inward (towards shallower water), while one diving will move outward. Pay attention to the thickness and color. A thin green line might be a small perch, while a thicker, brighter yellow or red band could indicate a larger walleye or pike. Sometimes, you'll see multiple lines stacked on top of each other, indicating a school of fish. On Devils Lake, for example, finding those stacked yellow perch returns can lead to fast action.
- Bottom Structure: The bottom will always be the thickest, most vibrant red band on your flasher. But don't just look at its presence; look at its character. A consistent, smooth red line indicates a flat, hard bottom. A jagged or broken red line suggests rocks, logs, or other uneven structure. If you see a flickering green or yellow above the red bottom, that could be soft mud or weeds that the sonar is weakly penetrating. The depth of the bottom is indicated by where this red band appears on the circular display. For example, if the red band starts at the "20-foot" mark, you know you're in 20 feet of water. Understanding how to fish deep water humps for walleye becomes much easier when you can accurately read the contours of the lakebed on your flasher.
Learning to differentiate between these returns takes practice, but with each trip to the ice, your eye will become more trained. Pay attention to what's happening when you get a bite versus when you don't. That experience is invaluable.
Mastering the Graph Display: Historical and Detailed Views
While flashers offer that instant, raw feedback, graph displays provide a more detailed, historical view of the water column, along with advanced features that can give you a significant edge. If you're used to open-water fishing, this display will feel more familiar, but ice fishing presents unique challenges that require specific interpretation.
Interpreting Sonar Scrolling: From Marks to Arches
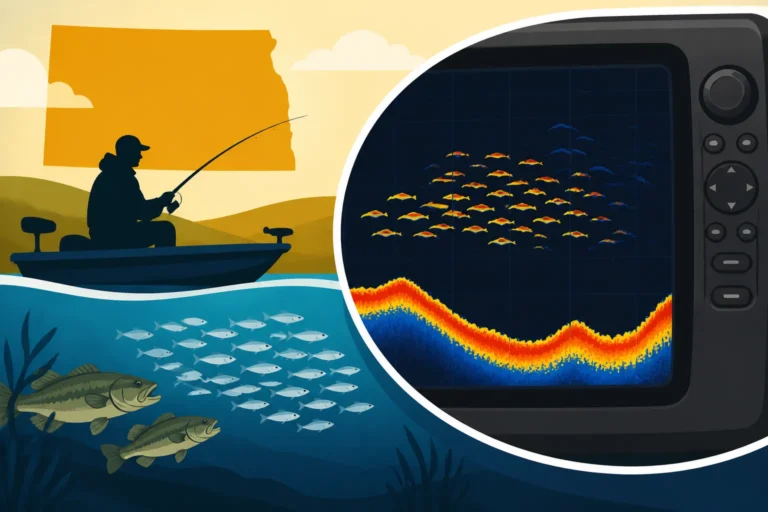
Graph displays, whether on a dedicated ice unit or a portable version of your open-water fish finder, show a scrolling history of sonar returns from right to left. The far-right edge is real-time, and as time passes, the data scrolls to the left. This historical view can be incredibly helpful for identifying trends, such as fish cruising through your area repeatedly.
- Your Lure: Similar to a flasher, your lure will appear as a distinct line that moves up and down as you jig. You want this line to be sharp and clear. If it's fuzzy, adjust your gain. Seeing your lure is paramount, allowing you to position it effectively.
- Fish Marks: On a graph, fish can appear as horizontal lines, blobs, or sometimes even classic "arches."
- Lines/Blobs: Often, especially if a fish is stationary or moving slowly, it will appear as a horizontal line or an irregular blob. The thickness and color of this mark indicate the size of the fish and the strength of the return, similar to a flasher. A strong, thick yellow or red blob means a big fish.
- Arches: The coveted "arch" occurs when a fish swims through the full cone angle of your transducer. As it enters the cone, the sonar detects it, then as it moves directly underneath, the signal is strongest (creating the top of the arch), and finally, as it leaves the cone, the signal weakens, completing the arch. Clear, distinct arches usually signify game fish. For faster-moving fish, the arch might be stretched due to the scrolling display.
- Bottom Contour and Hardness: The bottom on a graph will be a solid, often colored, band at the bottom of the screen. Just like with flashers, a thinner, harder line suggests a rockier bottom, while a thicker, softer-edged line indicates mud or soft sediment. Pay attention to changes in depth shown by the bottom contour. A rising or falling bottom indicates a hump or a drop-off, both prime locations for fish. Using the built-in GPS on many modern graphs, you can often save waypoints on these structural changes.
Many anglers find it beneficial to switch between standard sonar and flasher modes if their graph offers it, getting the best of both worlds. For instance, a Garmin Striker Vivid 4cv portable kit offers both traditional sonar and clear, crisp traditional flasher mode options, giving you versatility right out of the box. You might even find some great deals on these units on Amazon.
Zoom, Gain, and Sensitivity: Fine-Tuning Your View
Simply turning on your fish finder and dropping the transducer isn't enough. To truly "read" it, you need to understand and adjust its settings. These are your tools for clarifying the picture and highlighting what matters.
- Gain/Sensitivity: This is perhaps the most critical setting. It controls how much power the sonar unit transmits and how sensitive it is to incoming echoes.
- Too Low: You won't see your bait, and smaller fish might not even register. Your screen will be mostly blank.
- Too High: Your screen will be cluttered with noise, making it hard to distinguish actual fish from interference. You might see "ghost" returns.
- The Sweet Spot: The goal is to set the gain just high enough so you can clearly see your bait, and ideally, the subtle movements of nearby fish, without excessive clutter. A good starting point is to turn your gain up until you see some clutter, then back it off slightly until the screen clears up but your bait is still visible. For many fish finders, particularly during early ice fishing safety tips periods when fish are often shallow, you might need less gain than in deep water.
- Zoom: Many fish finders allow you to zoom in on a specific part of the water column, often the bottom 5-10 feet. This is incredibly useful for fine-tuning your presentation when fish are holding tight to the bottom. Instead of seeing the entire 30 feet of water, you might zoom in on just the 25-30 foot range, giving you a much larger, more detailed view of what's happening near the bottom. This increased detail can help you identify subtle bites or determine if a fish is just nosing your bait.
- Target Separation: Some higher-end units boast impressive target separation, meaning they can distinguish between two objects that are very close together, like a fish right next to the bottom or a small baitfish swimming past your jig. While you don't usually "adjust" this, it's a specification to consider when buying a unit, as it directly impacts how much detail you can interpret.
- Noise Rejection/Interference Rejection: In crowded ice fishing situations, multiple fish finders can interfere with each other, creating jumbled screens. Most units have a noise or interference rejection setting. Cycle through these settings to find one that cleans up your screen without losing legitimate returns. This is particularly useful on popular lakes like Devils Lake when multiple anglers are fishing close together.
A good practice is to experiment with these settings whenever you're on the ice. Conditions change, and what works in 10 feet of water might not work in 40 feet. The more you tweak and observe, the better you'll become at interpreting the nuanced messages your fish finder sends.
Practical Application and Common Pitfalls
Now that we've covered the fundamentals of reading both flasher and graph displays, let's talk about putting it into practice and avoiding some common mistakes that can lead to frustration.
Putting It All Together on the Ice: Live Scenarios
The real learning happens on the ice, seeing these principles in action. Here are a few common scenarios and how your fish finder helps you react:
- Scenario 1: The Approaching Mark: You're jigging a spoon, and suddenly, a green line appears on your flasher, moving inward towards your yellow lure mark. This tells you a fish is rising.
- Reaction: Keep jigging steadily. If the fish continues to rise and the mark turns yellow or red, it's getting closer and more interested. You might try a subtle lift or a pause to entice a strike. If it stops rising, try lifting your lure slightly to see if it follows. This vertical game is key when targeting walleye, especially when trying to pinpoint the best time of day to catch walleye.
- Scenario 2: Fish Hugging the Bottom: Your graph shows a solid red bottom, and a faint yellow line appears just above it, consistently staying within a foot of the lakebed.
- Reaction: Your bait might be too high. Drop your lure down so it's directly in the fish's strike zone, perhaps even lightly tapping the bottom to stir up sediment. Sometimes, a fish that's reluctant to rise will hit a bait right on their level. This is often the case with perch and crappie in North Dakota.
- Scenario 3: No Marks for a While: You've been fishing a hole for 15-20 minutes, actively jigging, but your fish finder remains stubbornly blank.
- Reaction: It's time to move! Your fish finder isn't lying; if there are no marks, there are no fish. Don't waste precious time over barren water. Use your ice fishing auger techniques to drill a new hole 20-30 feet away and check again. This is why a good portable ice shelter, like those from Clam or Eskimo, allows for quick moves to find active fish.
- Scenario 4: Schools of Baitfish: Your screen (especially a graph) shows scattered, smaller marks, perhaps green or faint yellow, swirling in the middle of the water column.
- Reaction: While these aren't game fish, they are important. Game fish like walleye and pike are often predators following bait. Try fishing directly above or below these baitfish schools. Change your lure to mimic the size and color of the baitfish you're seeing. This might mean switching to a smaller jig or a different color.
By constantly observing your screen and correlating it with what happens on your line (bites, bumps, follows), you'll quickly build an intuitive understanding of your fish finder's language.
Troubleshooting and Maximizing Your Device's Potential
Even with a good understanding, sometimes things go wrong. Here's how to troubleshoot common issues and squeeze every ounce of potential out of your device:
- No Readout or Inaccurate Depth:
- Check the Transducer: Is it fully submerged? Is it level? Is there ice or slush clinging to the face? Sometimes a simple adjustment or clearing the transducer is all it takes.
- Air Bubbles: If you've just drilled the hole, air bubbles from the auger can cling to the transducer, distorting the signal. Swish it around a bit to clear them.
- Battery Power: A low battery can lead to weak signals or inconsistent readings. Always start with a fully charged battery. Many anglers carry a spare, especially during extended ice fishing trips.
- Interference (Clutter on Screen):
- Adjust Interference Rejection: Most units have multiple IR settings. Cycle through them to find the cleanest signal.
- Move Your Transducer: Sometimes, just moving your transducer a few inches away from another angler's can resolve the issue.
- Power Source: Ensure your battery connections are clean and tight.
- Maximizing Visibility:
- Keep the Screen Clean: A smudged screen is hard to read. Carry a microfiber cloth to wipe it down.
- Use a Sun Shade: On bright, sunny days, a sun shade can make a huge difference in screen visibility, especially on graph units.
- Understand Cone Angle: Your transducer emits a cone-shaped sonar beam. A wider cone covers more area but loses detail in deeper water. A narrower cone is better for deep water detail. Most ice transducers are around 20 degrees. Knowing this helps you understand where on the bottom your fish finder is "seeing."
- Firmware Updates: Many modern graph units have software (firmware) updates available online. Check the manufacturer's website periodically. These updates can improve performance, add new features, or fix bugs. It's like getting a free upgrade for your fish finder!
By proactively addressing these issues and consistently fine-tuning your settings, your fish finder will become an indispensable tool, helping you locate the best North Dakota walleye fishing techniques and ultimately, more fish, whether you're chasing the big ones on Lake Sakakawea or finding panfish on a smaller body of water.
| Flasher vs. Graph Display Comparison | Flasher | Graph (Sonar Unit) |
|---|---|---|
| Display Type | Circular LED/LCD | Scrolling LCD/LED |
| Real-time Feedback | Very high (instant) | High (near instant, but scrolling) |
| Historical Data View | Limited | Extensive |
| Fish Appearance | Colored bands/lines | Arches, lines, blobs |
| Bottom Interpretation | Thick colored band | Solid bottom line/contour |
| Jigging Visualization | Excellent | Excellent |
| Mapping/GPS Integration | Rare | Common |
| Battery Life | Generally longer | Can be shorter, depending on screen size/features |
| Common Use Case | Vertical jigging, quick fish detection | Structure analysis, broader water column view, mapping |
Disclaimer
The information provided in this guide is for general informational purposes only and is intended to help anglers understand how to use fish finders for ice fishing in North Dakota. Fishing regulations, ice conditions, and fish behavior can change rapidly. Always consult the latest North Dakota Game and Fish Department regulations before fishing, prioritize safety on the ice by checking ice thickness, and use good judgment. Neither the author nor the publisher assumes any liability for actions taken based on the information contained herein.