Best Way to Winterize a Boat Motor
When the golden leaves start to fall and that crisp North Dakota air hints at the deep chill to come, many of us anglers feel a familiar dread: it's time to put the boat away. Forgetting or improperly winterizing your boat motor can lead to some truly heartbreaking and expensive damage when spring finally rolls around. This guide is here to walk you through the essential steps to ensure your boat's engine weathers the harsh winter, protecting your investment and getting you back on the water seamlessly come spring.
Why Winterizing Your Boat Motor is Non-Negotiable in North Dakota
Let's face it, North Dakota winters are no joke. We're talking sustained sub-zero temperatures, freezing and thawing cycles that stress materials, and conditions that can turn a perfectly good engine into a very expensive paperweight if left unprotected. It’s more than just an annual chore; it's vital maintenance that saves you a world of trouble and expense down the line. Ignoring winterization is like leaving your fishing shack door wide open during a blizzard – you know it won't end well.
Preventing Freezing Damage
The most immediate and catastrophic threat to your boat motor in our climate is freezing water. Any residual water left in the engine block, cooling passages, or exhaust system will expand as it freezes, and that expansion is incredibly powerful. It can crack engine blocks, damage cylinder heads, rupture hoses, and destroy pumps. Imagine your favorite coffee mug shattering because you left it full of water in the freezer overnight – now imagine that on a much larger, more intricate, and significantly more costly scale. Even a small amount of water in the wrong place can cause irreparable harm, and in North Dakota, you can bet that water will eventually freeze solid. This isn't a problem to be taken lightly; it's a direct threat to your motor's survival through winter.
Combating Corrosion and Fuel Degradation
Beyond freezing, there's the silent killer: corrosion. Moisture, especially salty or brackish water if you've been on certain unique waterways or even just atmospheric humidity, can wreak havoc on internal engine components. As your engine sits idle for months, condensation can form inside, leading to rust on cylinder walls, bearings, and other critical metal parts. This can cause pitting, seizing, and reduced performance when you finally try to crank it over in the spring.
Then there's the fuel system. Modern gasoline, especially blends containing ethanol, can degrade over time. It can separate, forming gummy deposits that clog fuel lines, carburetors, and injectors. Ethanol also attracts and absorbs water, which can lead to further corrosion in the fuel tank and lines. Without proper stabilization, that fuel can turn into varnish, making your engine a non-starter and requiring extensive (and costly) cleaning or replacement of fuel system components. This isn't just about an inconvenience; it's about maintaining the engine's long-term health and efficiency. You don't want to spend precious spring fishing days troubleshooting fuel issues when you could be out targeting walleye or pike. You also want to check out North Dakota Open Water Fishing Season to plan your first trip back on the water.
Essential Supplies for a Successful Motor Winterization
Before you even think about turning a wrench or pouring a fluid, you need to gather all your materials. There's nothing more frustrating than being halfway through a job only to realize you're missing a crucial item. Think of it like packing for a fishing trip to Devils Lake – you wouldn't forget your tackle box, right? Same principle applies here. Being prepared means the job gets done right and efficiently.
Here’s a breakdown of what you'll typically need, though specifics can vary slightly depending on your engine type (outboard, inboard/outboard, or inboard):
- Fuel Stabilizer: This is non-negotiable, especially with ethanol fuels. Brands like Sta-Bil are popular and readily available at most marine or automotive stores, including a big box like Bass Pro Shops.
- Engine Oil and Filter (for 4-stroke outboards and inboards): Check your owner's manual for the correct weight and type. Don't skimp on quality here.
- Gear Lube and Pump (for outboards and stern drives): Again, consult your manual for the right type. Make sure you have a pump that fits the lower unit's fill hole.
- Fogging Oil: This protects internal engine components from rust. It comes in an aerosol can and is specifically designed for this purpose.
- Marine Antifreeze (Propylene Glycol based): For inboard engines, this is critical. Ensure it's non-toxic and rated for marine use. For outboards, you might use it for flushing but not typically for filling the block.
- Grease Gun and Marine Grease: For lubricating various fittings and pivot points.
- Spark Plug Wrench and New Spark Plugs (optional, but recommended): A good time to replace them.
- Clean Rags: Always handy for spills and cleaning.
- Drain Pans/Buckets: To catch old oil, gear lube, and coolant.
- Flush Kit/Earmuffs (for outboards and stern drives): To connect a garden hose to your engine's cooling system for flushing.
- Battery Terminal Cleaner and Protector: To clean and protect battery posts.
- Shop Vacuum/Wet-Dry Vac: Helpful for sucking antifreeze through the system if needed, especially for inboards.
- Safety Glasses and Gloves: Always protect your eyes and hands.
- Owner's Manual: Your ultimate guide for specific torque settings, fluid capacities, and step-by-step instructions unique to your engine model.
You can often find all these supplies at your local marine dealer, or larger retailers like Bass Pro Shops or online marketplaces like Amazon, which offer a wide range of marine maintenance products. Sometimes, these stores even have comprehensive winterization kits designed for different engine types, which can simplify your shopping list significantly. Don't forget that if you also need to store your boat, you might need to consult a guide on Where to Store a Boat for the Winter.
| Item | Purpose | Engine Type Application |
|---|---|---|
| Fuel Stabilizer | Prevents fuel degradation, clogs, and water issues | All Gasoline Engines |
| Engine Oil & Filter | Removes contaminants, prevents corrosion | 4-Stroke Outboards, Inboards |
| Gear Lube & Pump | Protects gears, checks for water intrusion | Outboards, Sterndrives |
| Fogging Oil | Coats internal engine parts, prevents rust | All Engines (intake/spark plug) |
| Marine Antifreeze | Prevents freezing in cooling systems | Inboards, some Sterndrives |
| Grease Gun & Grease | Lubricates moving parts, prevents seizing | All Engines (steering, pivots) |
| Flush Kit/Earmuffs | Connects water for flushing cooling system | Outboards, Sterndrives |
| Battery Charger/Tender | Maintains battery health over winter | All (battery removed) |
| Drain Pans/Buckets | Collects old fluids | All |
| Owner's Manual | Specific instructions for your motor | Absolutely Essential for All |
Step-by-Step Guide to Winterizing Your Boat Motor
Now for the nitty-gritty. This is where you roll up your sleeves and get to work. While the general principles apply to most motors, always, always refer to your specific engine's owner's manual for exact procedures and specifications. They know your engine best!
Stabilize the Fuel System
This is often the very first step, and it's absolutely crucial. You need to get the fuel stabilizer thoroughly mixed with the gasoline throughout the entire fuel system, not just in the tank.
- Add Stabilizer: Pour the correct amount of fuel stabilizer (check the product's directions for ratios) into your boat's fuel tank. If you have a portable fuel tank, do it there.
- Run the Engine: Start your engine and let it run for about 10-15 minutes, either in the water or with a flush kit attached to a garden hose (if it's an outboard or stern drive). This circulates the stabilized fuel through the fuel lines, fuel pump, carburetor, or injectors, ensuring everything is protected. You want that treated fuel to reach every part of the system that will sit idle.
- Shut Off Engine: Once the stabilizer has had a good chance to circulate, turn off the engine.
If you skip this step, you risk having stale fuel turn to varnish, which can clog injectors or carburetors, leading to costly repairs and a frustrating start to your next fishing season.
Change the Engine Oil and Filter (4-Stroke Outboards and Inboards)
Old engine oil contains corrosive acids and contaminants from combustion, and leaving it in your engine all winter is a recipe for internal corrosion. Changing it now means your engine is bathed in fresh, clean oil during its long nap.
- Warm the Engine: Run the engine for a few minutes (after you've stabilized the fuel) to warm up the oil. Warm oil drains more completely.
- Drain Old Oil: For inboards, use a pump to extract the oil through the dipstick tube or drain it from the oil pan plug. For some 4-stroke outboards, you'll drain it from a plug. Catch all the old oil in a suitable container for recycling.
- Replace Filter: Remove the old oil filter and replace it with a new one. Apply a thin coat of fresh oil to the rubber gasket of the new filter before screwing it on hand-tight.
- Add New Oil: Refill the engine with the manufacturer-recommended type and amount of fresh engine oil. Use your dipstick to ensure the level is correct.
This fresh oil creates a protective coating on internal components, preventing rust and corrosion during months of inactivity.
Change the Gear Lube (Outboards and Sterndrives)
Your lower unit (outboard) or stern drive (inboard/outboard) houses gears and bearings that are constantly working hard. The gear lube protects them, but it can also become contaminated with water, especially if a seal is leaking.
- Position Engine: For outboards, trim the engine to the vertical position.
- Drain Lube: Place a drain pan under the lower unit. Remove the bottom drain screw first, then the top vent screw. This allows the old gear lube to drain completely.
- Inspect Old Lube: Crucially, inspect the old gear lube. If it looks milky or frothy, that's a sign of water intrusion, indicating a potential seal leak that needs attention before next season.
- Pump in New Lube: Using your gear lube pump, pump new gear lube into the bottom drain hole until it starts to come out of the top vent hole.
- Replace Screws: Replace the top vent screw first, then quickly remove the pump and replace the bottom drain screw. Don't overtighten.
Fresh gear lube ensures those crucial components are protected, and checking for water helps catch problems early.
Fogging the Engine
This step is designed to protect the internal combustion chambers and cylinder walls from rust and corrosion during storage.
- For 2-Stroke Outboards: While the engine is still running (either with a flush kit or in the water), spray fogging oil directly into the carburetor(s) or air intake until the engine starts to smoke heavily and eventually stalls.
- For 4-Stroke Outboards and Inboards: Remove the spark plugs. Spray a generous amount of fogging oil into each spark plug hole. You might then briefly rotate the engine by hand (or with the starter, without the spark plugs installed and kill switch engaged) to distribute the oil, but check your manual.
- Replace Spark Plugs: If you're replacing spark plugs, now is the time to install the new ones. If not, reinstall the old ones.
This oil coating prevents moisture from causing rust inside the engine, which could lead to sticky piston rings or other issues. You don't want to spend your spring trying to troubleshoot issues when you could be fishing for North Dakota Walleye Fishing Techniques.
Cooling System Protection (Inboards and Sterndrives)
This is the freezing damage prevention step. For outboards, simply ensure all water has drained. For inboards, it's more involved.
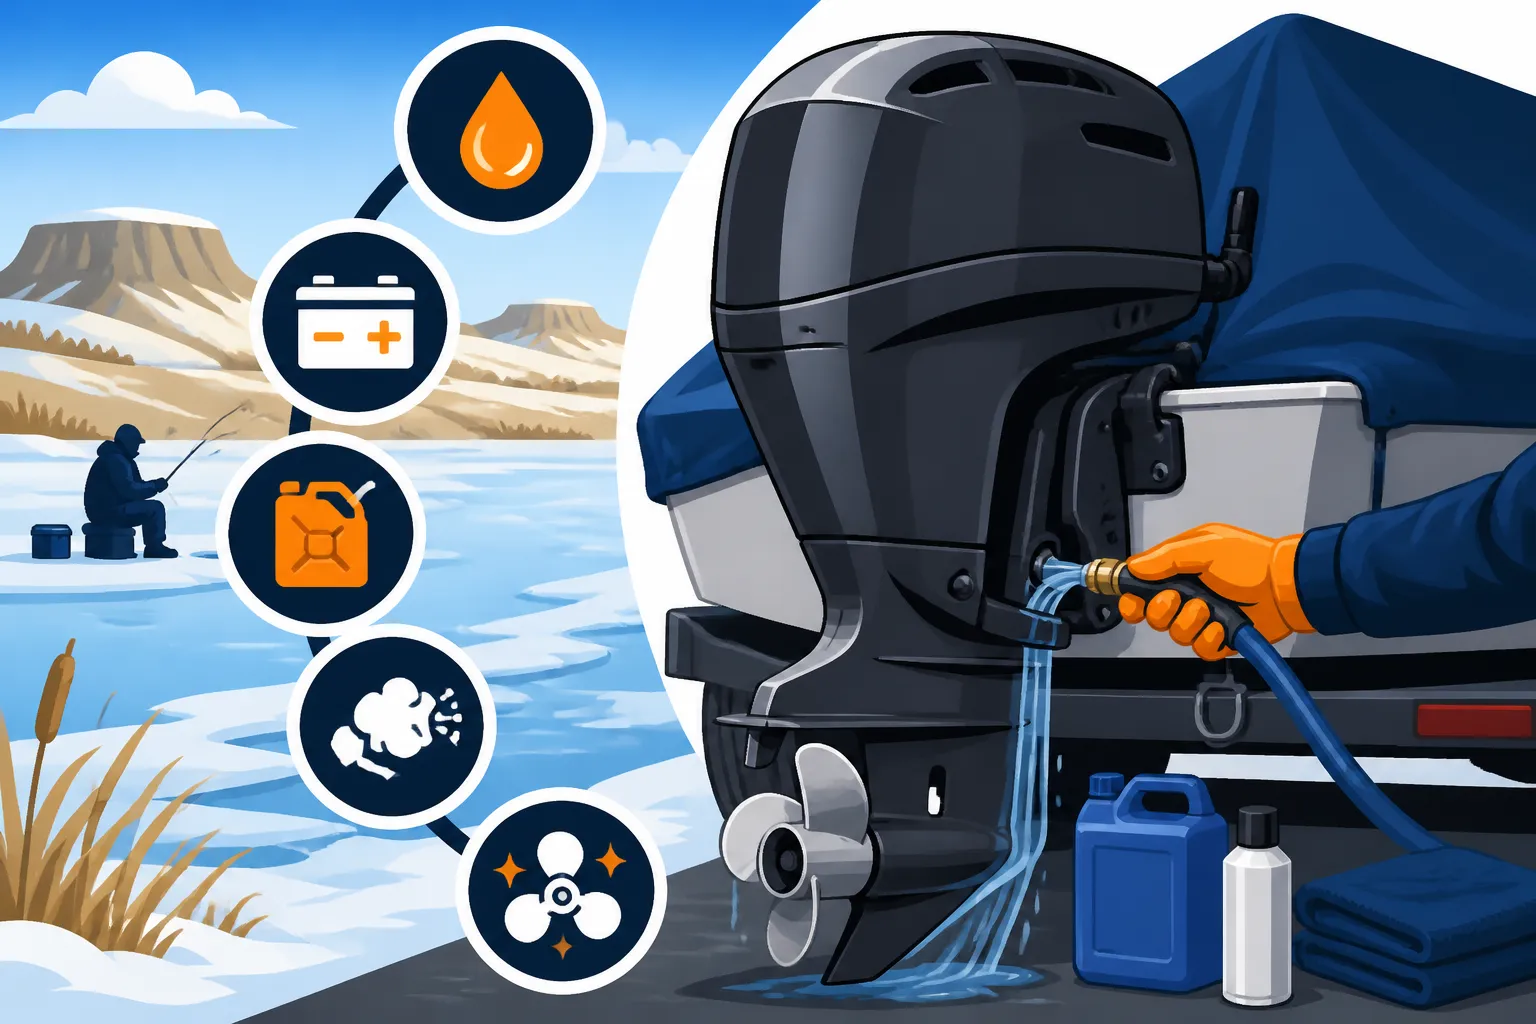
- Outboards: Tilt the engine down completely to ensure all water drains from the cooling passages. Then raise it to its normal stored position. Some people will still run antifreeze through the system with earmuffs for extra peace of mind, but if it's drained completely, it's generally safe.
- Inboards/Sterndrives: This requires marine antifreeze.
- Drain Raw Water System: Locate and open all raw water drain plugs (often on the engine block, exhaust manifolds, and water pump) to drain as much raw water as possible. Close them once drained.
- Circulate Antifreeze: Using a winterization kit or a large funnel and a wet-dry vac, run marine antifreeze (propylene glycol based, non-toxic) through the raw water intake (often via a seacock or a flush kit connection) until it flows out of the exhaust. This displaces any remaining water and fills the system with freeze protection. You'll need several gallons, depending on your engine size.
This ensures that no water is left in the cooling system to freeze and damage your engine components. It’s absolutely critical for inboards.
Lubricate Moving Parts
While the engine is protected internally, don't forget the external moving parts that are exposed to the elements.
- Grease Points: Locate all grease fittings (zerk fittings) on your engine, steering system, tilt/trim mechanism, and propeller shaft. Use a grease gun to pump marine-grade grease into each fitting until you see old grease come out.
- Throttle and Shift Cables: Lubricate the pivot points on your throttle and shift linkages with a light marine-grade grease or spray lubricant.
This prevents seizing, rust, and ensures smooth operation next season.
Remove and Store Battery
Batteries can freeze and crack if left in the boat, especially if they are discharged.
- Disconnect: Disconnect the battery cables, negative first, then positive.
- Clean Terminals: Clean the battery terminals and cable ends with a wire brush and a battery terminal cleaner.
- Store: Remove the battery from the boat and store it in a cool, dry place where it won't freeze.
- Maintain Charge: Connect it to a trickle charger or battery maintainer to keep it topped off throughout the winter. A fully charged battery is less likely to freeze.
Proper battery storage prolongs its life and ensures it's ready to go when spring arrives.
Post-Winterization Checks and Storage
You've done the hard work, but the job isn't quite done. A few final steps ensure everything is buttoned up correctly for the long winter ahead. Think of it as putting the final touches on a delicious fish fry – presentation matters!
Final Visual Inspection
Once you've completed all the winterization steps, take a moment for a thorough visual inspection of your entire motor. It's like a final once-over on your Essential Gear Checklist for North Dakota Fishing before heading out.
- Check for Leaks: Look under the engine and around drain plugs for any signs of leaks. Sometimes, a gasket or plug might not have sealed correctly. Catching this now can prevent a mess later.
- Hoses and Clamps: Inspect all hoses for cracks, bulges, or signs of wear. Make sure all hose clamps are secure.
- Wiring: Check exposed wiring for any frayed insulation or corrosion. This is a great time to address minor issues before they become major problems.
- Propeller: Remove the propeller (if you haven't already for gear lube change) and inspect it for any damage. Check the propeller shaft for fishing line that might have wrapped around it and damaged seals. Grease the prop shaft before reinstalling the propeller or storing it separately.
- Anodes: Take a look at your sacrificial anodes (zincs). If they're heavily corroded, make a note to replace them in the spring. These are critical for preventing galvanic corrosion on your engine.
This last inspection serves as a final safety net, ensuring you haven't missed anything crucial and allowing you to identify any maintenance items that might need attention before you launch next spring. This proactive approach saves time and money, and lets you focus on enjoying your time on the water, not on unexpected repairs.
Covering and Securing Your Motor
Protecting your motor from the elements during storage is just as important as the internal winterization. Even if your boat is stored indoors, a good cover can keep dust and pests out.
- Engine Cover: If you have an outboard, a well-fitting canvas or heavy-duty vinyl engine cover is a great investment. It protects the cowl from UV damage, dust, and accidental bumps.
- Full Boat Cover: For comprehensive protection, a full boat cover that extends over the motor is ideal. This prevents snow, ice, rain, and debris from accumulating on or around your engine. Ensure the cover is properly vented to prevent moisture buildup, which can lead to mold and mildew. Use support poles or frames to prevent water or snow from pooling, which can stretch and damage the cover.
- Security: While not directly related to winterization, ensure your boat and motor are secure. If stored outside, consider locks for the trailer and outboard motor to deter theft. North Dakota Boat Registration Requirements and proper identification on your boat can also help in case of theft.
Proper covering not only protects against environmental damage but also keeps your engine looking good and ready for action. It's the final layer of defense against the harsh realities of a North Dakota winter. When spring eventually rolls around and you're ready to get back out for some North Dakota Ice Out Fishing Guide, you'll be glad you took the time to do it right.
Disclaimer
This article is for general informational purposes only and does not constitute professional advice. Laws, prices and regulations vary by location and change over time. Consult a qualified professional for guidance on your specific situation.