How to Anchor an Ice Shelter in Wind
There's nothing quite like spending a day (or even a few) out on a frozen North Dakota lake, chasing walleye or perch, but anyone who's been out there knows that the weather can turn on a dime. One minute it's calm, the next you're battling fierce prairie winds that threaten to turn your cozy ice shelter into a kite. Losing your shelter to a gust isn't just an inconvenience; it can be dangerous and certainly puts an end to your fishing trip. This guide will walk you through everything you need to know about effectively anchoring your ice shelter, ensuring it stays put no matter what North Dakota's winter throws at you.
Understanding North Dakota's Windy Winter Conditions
North Dakota winters are legendary for their cold, but often, it's the wind that truly makes or breaks an ice fishing trip. These vast, open landscapes offer little resistance, allowing winds to build incredible speed and power, turning a pleasant day into a struggle against the elements.
The Unrelenting Force of Prairie Winds
If you've spent any time on the ice across our state, from Devils Lake to Lake Sakakawea, you've experienced it firsthand. The wind doesn't just bite; it pushes. What might feel like a stiff breeze in town can transform into a relentless gale out on the expansive, flat surface of a frozen lake. These winds can hit suddenly, often without much warning, or they can be a constant, grinding force all day long. Gusts can easily reach 30 to 40 miles per hour, sometimes even higher, and that's more than enough to lift an unsecured portable ice shelter right off the ice, sending it tumbling across the frozen expanse. Imagine trying to chase your expensive shelter across miles of ice in whiteout conditions – it’s a nightmare scenario no angler wants to face.
Why a Secure Shelter is Paramount for Safety and Comfort
Beyond the risk of losing your investment, a properly anchored ice shelter is absolutely critical for your safety and comfort. In freezing temperatures, having your shelter ripped away exposes you to the brutal cold and wind, risking hypothermia. Even if your shelter stays put but isn't anchored well, constant flapping and swaying can be incredibly distracting and uncomfortable, making it hard to concentrate on fishing or even enjoy a hot cup of coffee. Think about it: you've bundled up, drilled your holes, set up your gear, and all you want is to focus on the fish biting below. If you're constantly worrying about your shelter, your whole experience is ruined. A secure shelter acts as your mobile base camp, providing crucial protection from the elements, allowing you to focus on the fun part: catching fish. It’s an investment in both your gear and your well-being.
Choosing the Right Anchoring Gear for Your Ice Shelter
When it comes to keeping your ice house grounded, not all anchors are created equal, and having the right tools makes all the difference. You don't want to be caught out on the ice with flimsy gear when a squall rolls in.
Screw-In Ice Anchors: Your Primary Defense
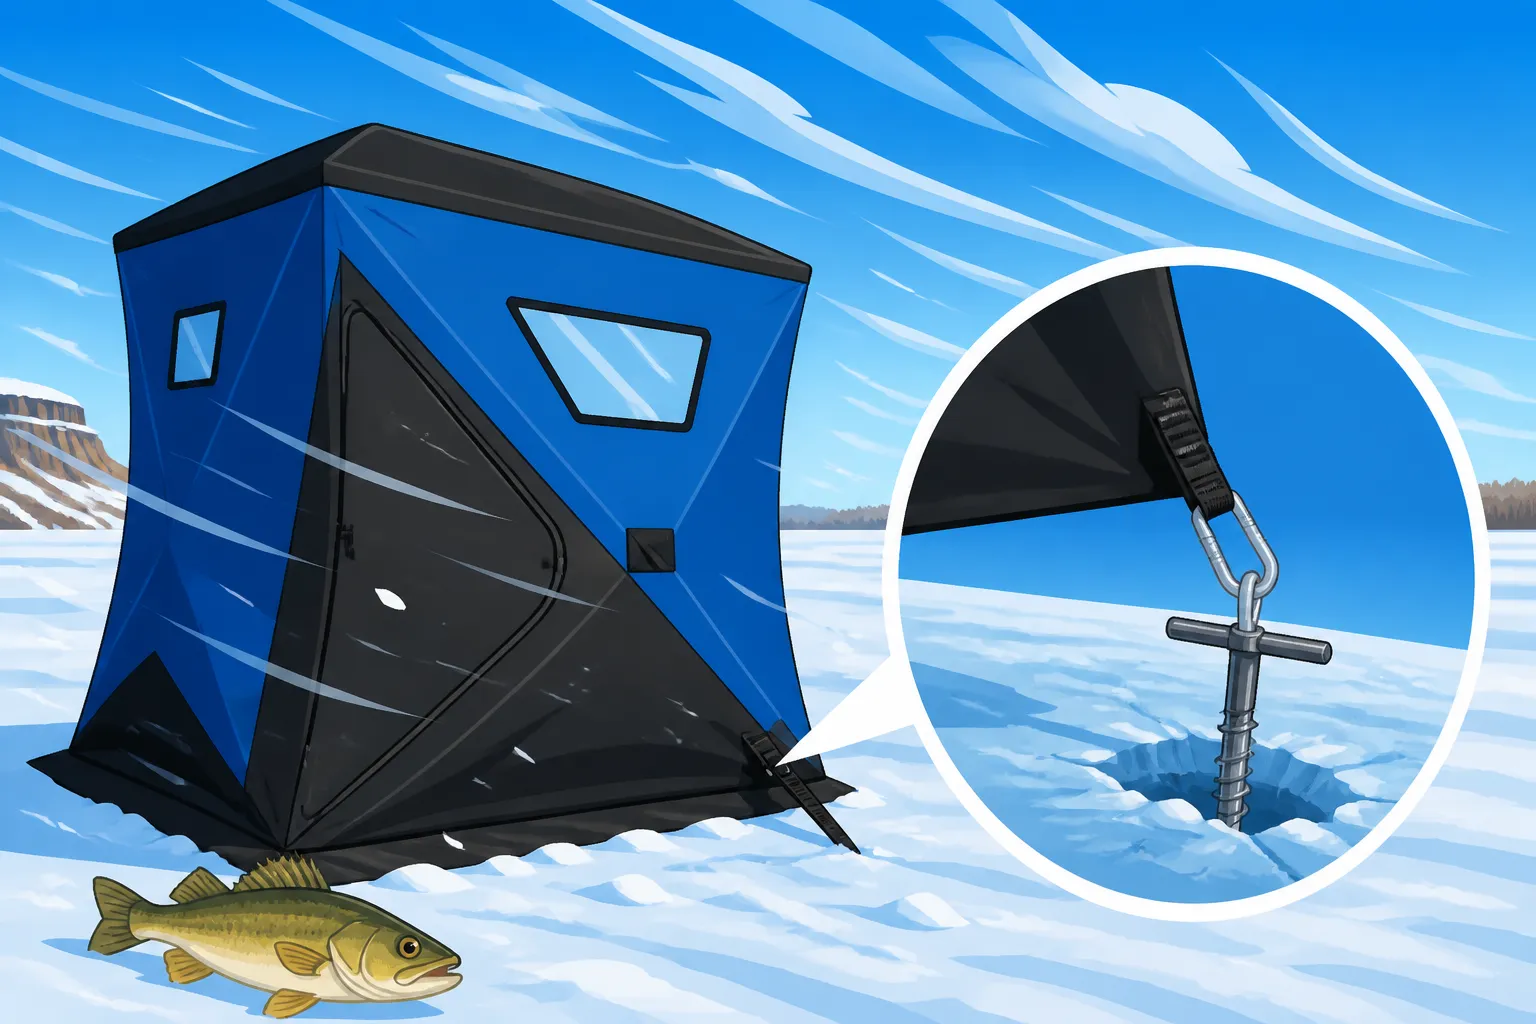
The most common and effective type of anchor for portable ice shelters are screw-in ice anchors. These are essentially large, heavy-duty screws designed to bite deeply into the ice. They come in various lengths, typically ranging from 6 to 12 inches, with wider threads that provide a strong grip. Longer anchors generally offer more holding power, especially in softer or questionable ice conditions, or when facing really intense winds. Many portable shelters, especially popular brands, will come with a basic set of anchors, but it's often wise to invest in additional, higher-quality ones. You might find excellent options at outdoor retailers like Bass Pro Shops or even through online marketplaces like Amazon, looking for brands known for durability and ease of use. Having at least four anchors, one for each corner of your shelter, is the bare minimum, but carrying six to eight provides extra security for those truly blustery days.
Specialized Tools for Effortless Installation
Trying to screw an ice anchor into hard, thick North Dakota ice by hand can be a real workout, especially if you're battling freezing temperatures and numb fingers. This is where specialized tools become your best friend.
- Anchor Installation Tools/Drivers: Many ice anchor sets include a small handle or a "T-handle" tool that slides through the top loop of the anchor, giving you leverage to twist it into the ice. While these work, they can be slow and tiring.
- Cordless Drill Adapters: The game-changer for ice anchor installation is a cordless drill adapter. This simple attachment fits into the chuck of your heavy-duty cordless drill, allowing you to power-drive your anchors into the ice in a matter of seconds. It's quick, easy, and saves your energy for fighting fish, not anchors. Just make sure your drill has enough torque and a fully charged, cold-weather-rated battery, as cold can significantly impact battery performance. You'll want a drill strong enough to handle a thick ice sheet; for more on augers, check out Best Ice Auger Brands for North Dakota.
- Chisel or Spud Bar: While not directly for screw-in anchors, a chisel or spud bar can be invaluable. It can be used to chip away at particularly hard spots on the ice surface to get an anchor started, or to clear a path if you need to reposition.
| Gear Item | Description | Why You Need It |
|---|---|---|
| Screw-in Ice Anchors | Large, threaded screws designed to grip ice (6-12 inches) | The primary method for securing your shelter. Essential for stability. |
| Cordless Drill | High-torque, cold-weather-rated drill (18V+ recommended) | Powers anchors into hard ice quickly, saving effort. |
| Drill Anchor Adapter | Attachment for your drill to spin screw-in anchors | Transforms manual labor into effortless power-driving. |
| Extra Anchor Ropes/Straps | Durable ropes or straps to attach anchors to shelter's D-rings | Ensures a strong connection between anchor and shelter. Good to have spares. |
| Ice Chisel/Spud Bar | Heavy metal bar with a sharpened end | Useful for breaking through initial crusts or freeing stuck anchors. |
| Pliers/Wrench | For tightening or loosening stubborn anchors or connections | Handy for minor adjustments or if an anchor gets slightly frozen in place. |
Supplemental Gear for Extreme Conditions
Sometimes, even with robust screw-in anchors, Mother Nature can throw a curveball. Having supplemental gear can provide peace of mind and extra holding power.
- Anchor Straps or Ropes: While most shelters come with straps, having extra, heavy-duty anchor straps or ropes can be a lifesaver if one frays or breaks. Look for durable, weather-resistant materials that won't freeze easily. Some anglers even prefer to replace the stock straps with stronger ratchet straps for maximum tension.
- Deadman Anchors: For truly extreme wind, or if you find yourself on softer ice where screw-in anchors might not hold as well, a "deadman anchor" can be a fantastic backup. This involves burying something solid (like a spare piece of lumber, a filled sandbag, or even a large rock) a short distance from your shelter and running a rope from it to your shelter. The weight of the ice above the buried object provides incredible holding power.
- Ice Stakes/Rebar: In very specific situations, such as early ice conditions or slushy ice where screw-in anchors struggle, heavy-duty ice stakes (like those used for tents, but much larger and stronger) or even pieces of rebar can be driven into the ice and tied off. Always exercise caution, as these aren't as secure as screw-in anchors and depend heavily on ice density.
Step-by-Step Guide to Securely Anchoring Your Ice Shelter
Proper technique is just as important as having the right gear. A rushed or poorly executed anchoring job can be just as ineffective as having no anchors at all. Let’s get that shelter locked down!
Strategic Placement and Initial Setup
Before you even think about drilling holes for fishing, take a moment to consider where you're setting up your shelter. This initial step can drastically reduce the stress on your anchors.
- Assess Wind Direction: Pay attention to the prevailing wind direction. If possible, set your shelter up so the narrower side or the lowest profile part of the shelter faces directly into the wind. This minimizes the surface area exposed to the wind's force, essentially making your shelter more aerodynamic. It's like turning a boat into the waves instead of letting them hit broadside.
- Look for Natural Windbreaks: Are there any snowdrifts, large pressure ridges, or even a line of trees on shore (if you're close enough) that could offer a bit of shelter? Utilizing a natural windbreak, even a small one, can significantly reduce the wind load on your shelter. A modest snowdrift might not seem like much, but it can deflect a surprising amount of wind.
- Clear the Area: Make sure the immediate area where your shelter will sit is clear of any significant chunks of ice, slush, or deep snow that could prevent your shelter from sitting flat or compromise an anchor's grip. A level, clean surface is ideal.
- Unfold and Extend: Once you've chosen your spot, unfold your portable shelter completely. Make sure all hubs are popped out and the fabric is taut. A loose or sagging shelter will flap and strain more in the wind, increasing the chance of tears and anchor stress. For more tips on setting up, check out Setting Up an Ice Fishing Shelter.
The Proper Technique for Installing Ice Anchors
This is where your screw-in anchors and drill adapter really shine. Doing this correctly will give you peace of mind.
- Start with the Corners: Begin by placing an anchor at each of the four main corners of your shelter. Ideally, place them at a slight outward angle (about 45 degrees) from the shelter's base, rather than straight down. This angle creates better resistance against uplift and horizontal pull, acting more like a tent stake.
- Drill Them In: Attach your drill adapter to your cordless drill and then insert it into the top loop of your ice anchor. Press down firmly and steadily as you engage the drill to screw the anchor into the ice. You want it to go in deep and straight. Keep drilling until the eyelet of the anchor is flush with or slightly above the ice, leaving enough room to easily attach your rope or strap. Avoid overtightening, as this can strip the ice threads.
- Attach Straps Securely: Once the anchor is in place, attach one end of your anchor strap or rope to the anchor's eyelet. Then, loop the other end through the D-ring or attachment point on your shelter's corner. Some shelters have quick-release clips, others require tying a secure knot. Make sure the connection is snug but not overly tight just yet.
- Add More Anchors if Needed: For larger shelters, particularly flip-over styles that have larger side profiles, or if the wind is really howling, you'll want to add extra anchors along the sides. Many shelters have additional D-rings along the side skirts specifically for this purpose. Again, aim for a slight outward angle for maximum holding power. An average day might just require the four corners, but high winds often call for 6 to 8 anchors.
Tightening and Double-Checking Your Setup
Once all your anchors are in, it’s time to tension everything and make sure there are no weak links.
- Even Tension is Key: Start at one corner and pull the strap taut, then move to the opposite corner and do the same. Work your way around the shelter, tightening each anchor point little by little. You want even tension across all points. This distributes the wind load evenly and prevents one area from bearing all the stress. The goal is to make the shelter fabric drum-tight, eliminating any flapping. A flapping shelter will eventually wear out its fabric, stress its frame, and potentially work its anchors loose.
- Check for Slack: Give each strap a good tug. Is there any slack? If so, tighten it further. The shelter should feel rock-solid and resistant to movement.
- Re-check Periodically: Even a perfectly anchored shelter can shift over time, especially if the ice is softening, if you're in a heated shelter causing localized melting, or if the wind picks up or changes direction dramatically. It's a good practice to periodically step outside and check your anchors, especially after a significant wind gust or if you notice your shelter swaying more than usual. This quick check can prevent a major problem.
- Don't Forget the Skirt: Many portable shelters have an extended fabric skirt around the base. In light wind, this might just sit on the ice, but in strong winds, you can pile snow or slush on top of it to help seal out drafts and provide a little extra weight to the base, further securing the shelter. Just be mindful not to freeze the skirt to the ice if you plan to move the shelter often.
Advanced Strategies and Troubleshooting Common Anchoring Challenges
Even with the best gear and technique, ice fishing in North Dakota means you'll eventually face conditions that test your setup. Knowing a few advanced tricks and how to troubleshoot can save your day.
Leveraging Natural and Artificial Windbreaks
Sometimes, you can't pick and choose your spot perfectly, but you can still make smart decisions to minimize wind impact.
- Man-Made Snowdrifts: If you're on a wide-open expanse and there are no natural windbreaks, you can create your own. Using a shovel, pile up a substantial snowdrift on the windward side of your shelter. Even a knee-high snow wall can significantly disrupt the wind flow over and around your house, reducing the direct force on the fabric. This is especially effective for hub-style shelters.
- Shelter-to-Shelter Protection: If you're fishing with a group, coordinate your setup. Positioning multiple shelters close together, with the lead shelter facing the wind, can create a buffer for the ones behind it. Just ensure there's enough space to safely move between them and avoid tangling lines or getting too close to other angler's space. Remember, ice fishing safety is paramount, so always be aware of your surroundings, especially if driving vehicles on the ice. Is It Safe to Drive a Truck on North Dakota Ice? has more on that.
- Vehicle Placement: If you drove your vehicle onto the ice, parking it strategically on the windward side of your shelter, a reasonable distance away, can act as a substantial windbreak. Just make sure you're following all North Dakota Ice Fishing Rules regarding vehicle access and placement, and be absolutely certain of ice thickness before driving on.
Avoiding Common Mistakes and Failures
Even seasoned anglers can make mistakes. Being aware of these common pitfalls can prevent a bad situation.
- Not Enough Anchors: The most frequent mistake is simply not using enough anchors. Four anchors might be fine for a calm day, but when the wind really picks up, you need more points of contact with the ice. Always err on the side of caution.
- Shallow Anchoring: If anchors aren't screwed in deep enough, they'll pull out of the ice under pressure. Ensure the entire threaded portion is submerged for maximum grip.
- Loose Straps: Any slack in the anchor straps allows the shelter to flap and shift, which works the anchors loose and puts undue stress on the fabric and frame. Keep those straps drum-tight.
- Ignoring Changing Conditions: The wind direction can shift, and ice conditions can change throughout the day. What was a secure setup at 8 AM might be compromised by 2 PM. Regular checks are vital.
- Using Improper Equipment: Trying to use regular tent stakes or flimsy cords will lead to failure. Invest in purpose-built ice anchors and strong, weather-resistant straps from reputable brands like those found on Amazon. Trying to get by with makeshift solutions just isn't worth the risk.
- Over-reliance on Melting: While a heated shelter can cause anchors to melt in a bit, providing a slightly better seal, don't rely on this to secure your shelter. It's a secondary effect, not a primary anchoring strategy.
- Forgetting to Clear Snow Around Anchors: Snow can insulate the ice around your anchors, potentially causing them to melt out more quickly if your shelter is heated, or make them harder to see if you need to quickly detach. Keep the area around your anchors relatively clear.
Emergency Measures and Shelter Maintenance
Sometimes, despite your best efforts, things go wrong. Being prepared for a sudden emergency can mitigate damage and keep you safe.
- Emergency Anchor Kit: Keep a small, dedicated emergency kit in your sled with extra anchors, a robust pair of pliers (for removing stuck anchors), and some extra heavy-duty rope. If an anchor fails or a strap breaks, you can quickly make a repair.
- Quick Release Readiness: Know how to quickly detach your shelter from its anchors. In an absolute worst-case scenario where the shelter is about to rip apart, or you need to make a rapid exit, you need to be able to get out fast. This is where D-rings and sturdy, easily-undone knots (or quick-release clips) come in handy.
- Post-Season Maintenance: After the ice fishing season, inspect all your anchors and straps for wear and tear. Clean off any rust or grime from the anchors, and store straps dry to prevent mildew and degradation. Replace any damaged components before next season. This ensures your gear is ready when you are. Remember to winterize all your gear, not just your shelter. You can learn more about caring for your equipment in How to Winterize Fishing Gear After the Season.
By taking these steps, you'll not only keep your ice shelter securely grounded against North Dakota's infamous winds but also enhance your overall ice fishing experience, making it safer, more comfortable, and much more enjoyable. Now go catch some fish!
Disclaimer
This article is for general informational purposes only and does not constitute professional advice. Laws, prices and regulations vary by location and change over time. Consult a qualified professional for guidance on your specific situation.