Setting Up an Ice Fishing Shelter
Few things are as frustrating as wrestling with an ice fishing shelter on a blustery North Dakota morning, fumbling with frozen hands while your buddies are already dropping lines. It’s a common struggle, whether you're battling stiff poles or trying to get anchors to bite into rock-hard ice. This comprehensive guide is here to alleviate those setup headaches, walking you through everything you need to know to get your ice shelter up quickly, securely, and ready for a successful day on the ice.
Choosing the Right Shelter Type for North Dakota Conditions
North Dakota's ice fishing scene is as diverse as its landscapes, and so are the shelters you’ll see out on the ice. From the vast, windswept expanses of Lake Sakakawea to the frozen timber of Devils Lake, the conditions can be brutal. Picking the right shelter isn't just about comfort; it's about survival and maximizing your time fishing, not fighting the elements. Understanding the pros and cons of each type will help you make the best choice for your personal style of fishing.
Understanding Portable Hub Shelters
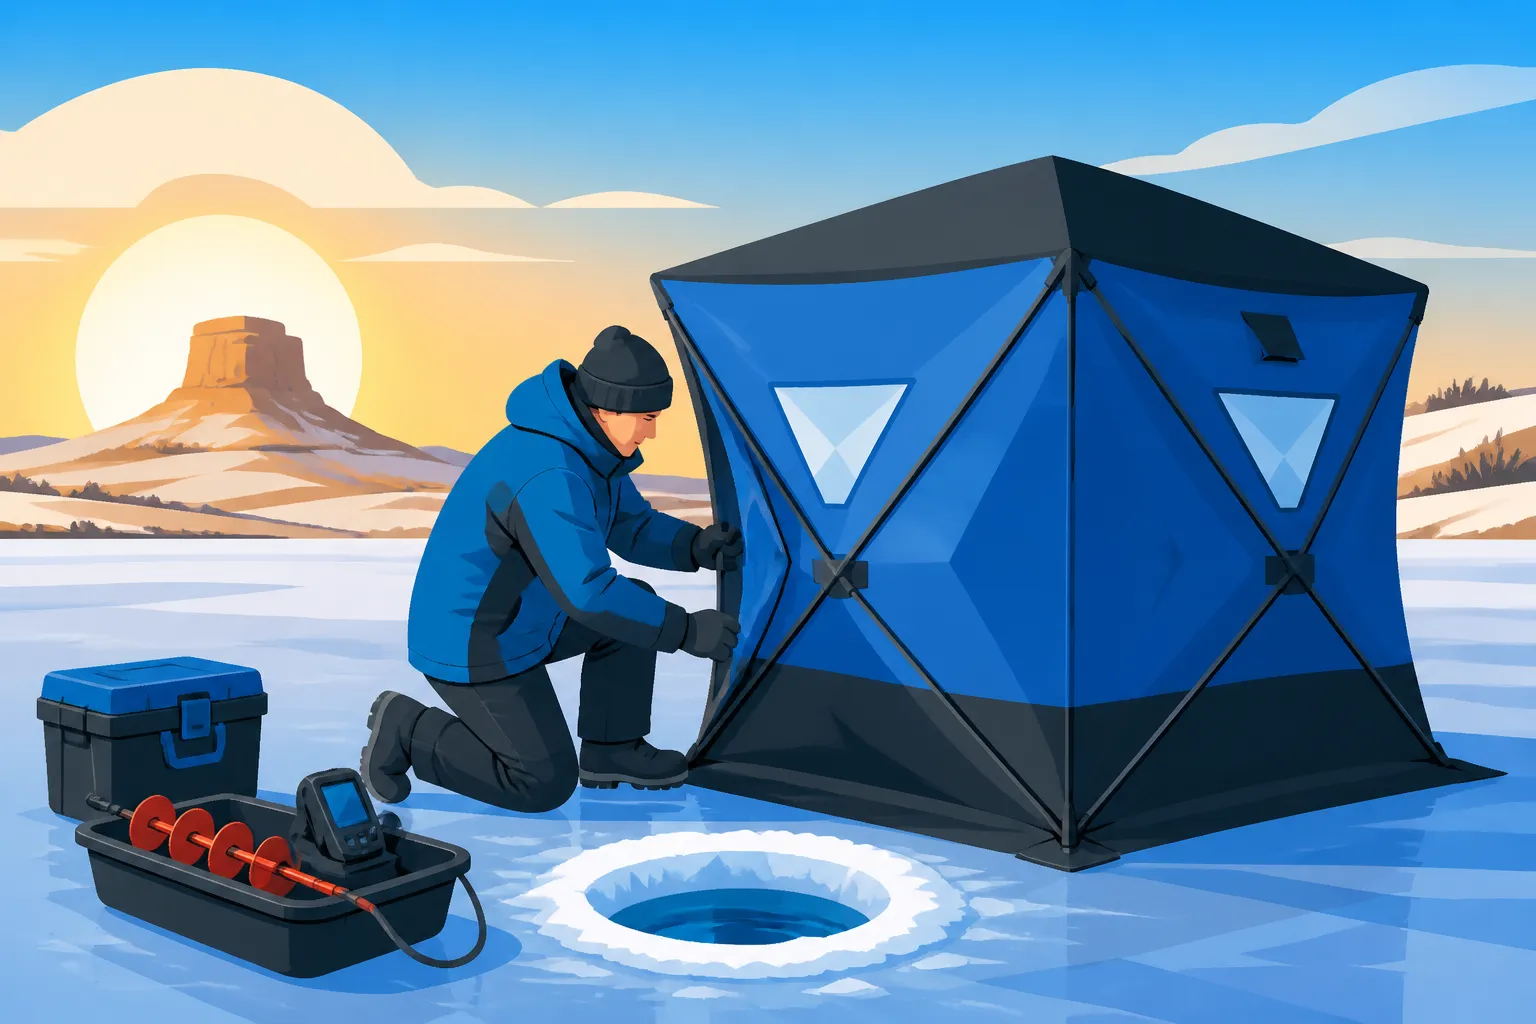
Portable hub shelters, often referred to simply as "hubs," are incredibly popular for their ease of transport and spacious interiors. These shelters typically collapse into a compact bag, making them easy to toss into a sled or the back of a pickup. Once you get to your spot, you simply pull out the hub, pop out the wall and roof hubs, and you have an instant fishing palace. They come in various sizes, from compact two-person models to expansive six-plus person versions.
The appeal of hub shelters, especially for groups or families, is the sheer amount of floor space they offer. You can spread out, set up multiple holes, and even bring a small table for cards or snacks. Brands like Eskimo, Clam, and Frabill are well-known for their durable hub designs, often featuring heavy-duty fabric and strong poles that stand up to North Dakota's infamous winds. However, setting them up can be a bit of a dance if it’s windy, requiring you to secure them quickly with ice anchors as you expand them. Despite this, their warmth, portability, and spaciousness make them a top choice for many anglers.
The Benefits of Flip-Over Shelters
Flip-over shelters are the workhorses of the ice fishing world, beloved by solo anglers and small groups for their quick deployment and integrated sled base. These shelters are designed to be towed directly onto the ice, typically by an ATV, snowmobile, or even by hand if you’re not too far from the access point. Once you reach your desired fishing spot, you simply "flip" the tent portion over, and you're ready to fish in a matter of seconds. Many models, like those from Clam or Otter, even come with seats already built into the sled, adding to their convenience.
The major advantage of flip-overs is their speed and mobility. If the fish aren't biting, you can quickly collapse the shelter, move to a new spot, and redeploy with minimal effort. The sled base provides excellent storage for all your gear, meaning you're not lugging multiple bags across the ice. The durable plastic sled also acts as a floor, keeping your feet a bit warmer off the ice, though you'll still want a mat. While they might offer less internal space than a hub for the same number of occupants, their efficiency and protection from the elements make them ideal for anglers who like to stay on the move. When considering the Best Ice Fishing Shelters for North Dakota, flip-overs are always high on the list.
Considerations for Hard-Sided Fish Houses
For the ultimate in comfort and long-term stays on the ice, nothing beats a hard-sided fish house. These are essentially tiny portable cabins, often mounted on skids or wheels, complete with insulated walls, windows, and sometimes even a small stove or bunk beds. You'll see these dotting the horizon on large lakes like Devils Lake or Lake Oahe during peak ice season. They require more significant effort to transport and set up, often needing a truck or even a specialized "ice rig" to move them, but once they're in place, they offer unparalleled warmth and amenities.
Hard-sided houses are a commitment, both in terms of cost and effort, but they transform ice fishing into a luxurious retreat. They offer superior protection from the brutal North Dakota wind and cold, allowing anglers to fish in shirtsleeves even when it's well below zero outside. Many also feature integrated holes with covers, making for a very clean and warm fishing experience. The biggest considerations are the rules regarding Fish House Registration Requirements in North Dakota and the specific regulations for how long shelters can be left on the ice, which vary by water body and time of year. While not for everyone, for those who spend extended periods on the ice, a hard-sided house can be a game-changer.
Essential Pre-Setup Checks and Safety
Before you even think about pulling out your ice shelter, there are some critical steps to take to ensure both your safety and a smooth setup process. The wild conditions of North Dakota's winter can turn a simple day on the ice into a serious situation if you're not prepared. Being proactive about safety and having the right tools on hand will save you headaches and keep you safe.
Scouting Your Location and Ice Safety
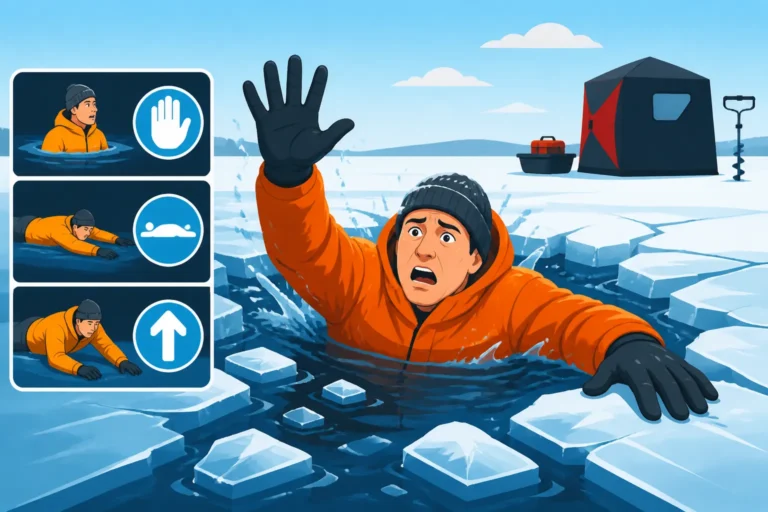
The very first and most crucial step is ensuring you're fishing on safe ice. Never assume a body of water is safe just because others are out there. Ice conditions can vary drastically even within a short distance. Always check the ice thickness with an auger as you travel. Generally, 4 inches of clear, new ice is considered safe for foot travel, but for an ice shelter, especially a larger one with gear and people, you want significantly more. Review a guide like How Thick Ice Needs to Be for Ice Fishing for detailed guidelines.
When scouting your location, consider wind direction and potential snowdrifts. Setting up your shelter in a low spot or behind a natural windbreak (if available and safe) can make a huge difference in comfort and setup ease. Look for areas with consistent ice thickness, avoiding inlets, outlets, pressure ridges, and areas with current, as these can have weaker ice. Having a plan for entry and exit, especially in deep snow, is also vital. Remember, Early Ice Fishing Safety Tips are paramount, as conditions are often most unpredictable at the start of the season.
Gathering Your Tools and Gear
Before you head out, double-check that you have all the necessary tools for setting up your shelter. For a portable hub or flip-over, this primarily means a quality set of ice anchors, an ice anchor drill adapter (a lifesaver!), and a cordless drill. Even if you plan to use an auger to pre-drill holes for your anchors, the drill adapter will make the process much faster and easier on your hands, especially when the ice is super hard.
Beyond anchors, bring a small shovel for clearing snow, a sturdy sled to haul your gear (and possibly the shelter itself), and any other personal safety items like ice picks, a rope, and a fully charged phone. Don't forget your heater and a fuel source for when the shelter is up. If you're using a hard-sided house, you'll need additional tools like a leveling jack, block, or cribbing, and possibly a means to clear heavy snow around it. A good headlamp is also non-negotiable, as daylight fades quickly in winter, and you might be setting up or tearing down in the dark.
Pre-Assembly Inspection and Cold Weather Tips
A quick inspection of your shelter before you leave home can prevent major headaches on the ice. Check the poles for cracks or bends, especially on portable hubs. Make sure all zippers operate smoothly – a frozen zipper can ruin a fishing trip. If you have a flip-over, ensure the tent fabric is securely attached to the sled and that the pivot points move freely. If anything feels stiff or sticky, address it in the warmth of your garage rather than trying to fix it with numb fingers in sub-zero temperatures.
When it comes to cold weather, storing your shelter in a warm place overnight before your trip can make it significantly easier to set up. Cold fabric and stiff poles are much harder to manipulate. Dress in layers, following advice on Best Cold Weather Gear for Ice Fishing. Wear warm gloves that still allow for dexterity, or bring a pair of thinner liner gloves for intricate tasks. Hand warmers tucked into pockets can also be a lifesaver. And don't forget to charge all your cordless drill batteries fully, as cold temperatures drain them much faster.
Step-by-Step Guide to Setting Up Portable Hub Shelters
Portable hub shelters are fantastic for their space and relatively light weight, but setting them up efficiently, especially in North Dakota's notorious winds, requires a bit of technique. Don't be that angler chasing your shelter across the ice! A systematic approach will ensure it goes up smoothly and stays put.
Unpacking and Expanding the Hub
First things first, find a relatively clear spot on the ice, free of major snowdrifts or large chunks of ice. If there's deep snow, shovel out a footprint slightly larger than your shelter's base. This creates a solid, flat surface. Unzip the carry bag and lay the collapsed hub shelter flat on the cleared ice. Identify the roof hub and the four (or more, depending on size) wall hubs.
Begin by pulling one of the wall hubs outwards, away from the center, until it "pops" and locks into place, forming one side of the shelter. Immediately step on the skirt of that wall to pin it to the ice. This is crucial if it's windy; it acts as a temporary anchor. Then, move to the opposite wall and repeat the process, pulling the hub out and stepping on the skirt. Work your way around the remaining walls, always stepping on the skirt as you go. Finally, pop out the roof hub. If it's particularly stiff, you might need to push from the inside. Once all hubs are extended, the shelter will stand on its own, but it's not truly secure until anchored.
Securing the Base and Walls
Now that the hub is standing, it’s time to get it anchored properly. Most hub shelters come with ice anchor points on the skirts, usually reinforced loops or grommets. These are where you'll insert your ice anchors. Using a cordless drill with an Best Ice Auger Brands for North Dakota ice anchor adapter, pre-drill pilot holes if the ice is exceptionally hard, then screw in your anchors through the skirt loops. Start with the corners, screwing them in snugly but not overtightening, as this can damage the fabric.
After securing the corners, work your way around the perimeter, adding more anchors as needed. On a windy day, you cannot have too many anchors. A good rule of thumb is to put an anchor on every available skirt loop. Make sure the skirts are pulled taut and flat against the ice as you anchor them. This not only secures the shelter but also helps seal it against drafts, making your interior warmer. Some anglers even pile snow around the base of the skirt once anchored to create an additional seal, which is a fantastic trick for staying toasty when the wind howls.
Attaching Tie-Down Ropes and Skirts
Once the base is anchored, most hub shelters also come with guy lines or tie-down ropes that attach to higher points on the shelter, usually near the top of the hubs. These are absolutely essential for stability, especially on windy North Dakota days. Extend these ropes away from the shelter at roughly a 45-degree angle and secure them to additional ice anchors. The further out you can place these anchors, the more stability they will provide.
When attaching the ropes, ensure they are taut but not overly strained. You want the shelter to feel solid, not pulled out of shape. Some anglers prefer to use spring-loaded rope tensioners (available on Amazon or at local sporting goods stores) to allow for a little give and take with wind gusts, which can prolong the life of your shelter. Once fully anchored and guyed out, your hub shelter should be able to withstand considerable wind. Taking the time to properly secure these ropes could prevent your shelter from collapsing or, worse, being blown away while you're fishing. When asking How to Anchor an Ice Shelter in Wind, these tie-downs are a key part of the answer.
Setting Up Flip-Over and Hard-Sided Shelters
While hubs require a bit more manual effort, flip-overs and hard-sided houses offer different setup procedures. Their inherent design simplifies some aspects while introducing new considerations, particularly for stability and weather sealing.
Deploying a Flip-Over Shelter
Setting up a flip-over shelter is generally quicker and simpler than a hub, making it a favorite for mobile anglers. First, position your sled where you want to fish, ensuring it's relatively flat. If you're on a slight incline, orient the sled so that the tent portion will flip uphill or across the incline, rather than downhill, which can make it harder to deploy. Clear any significant snow from the area where the tent will extend.
To deploy, simply grab the handle or frame of the tent portion and "flip" it over the top of the sled, away from you. The tent frame will extend, and the fabric will unfold. Once fully extended, you may need to lock the tent poles into place, usually with a pin or a spring-loaded button. Then, pull the fabric taut and ensure it covers all open areas. Most flip-overs don't require external guy lines in moderate conditions, but they do come with anchor points for windy days. Screw in ice anchors through the provided grommets at the corners of the sled or the bottom edge of the fabric. This keeps the sled from shifting and prevents wind from getting under the skirt.
Parking and Leveling Hard-Sided Houses
Hard-sided fish houses, whether wheeled or skid-mounted, require careful positioning. The first step is to drive or tow your house to your desired spot on the ice. Take care when driving onto the ice, adhering to all Ice Fishing Shelter Rules on North Dakota Lakes and safe ice thickness guidelines. Once positioned, the critical task is leveling the house. Most houses have leveling jacks or a crank system to lift them off their wheels or skids.
Use a small level to ensure the floor is as flat as possible. This makes for a much more comfortable experience and prevents items from rolling around. If your house is on skids, you might need to use blocks or shims under the corners. Once leveled, crank it down securely onto the ice, or if it's on skids, ensure it's sitting firmly. Some houses have an additional skirting system that deploys around the base to seal it off from the elements. This is crucial for warmth and to prevent drafts. Pile snow around the base once it's skirted and leveled to create a complete seal, insulating the floor and preventing cold air from seeping in.
Dealing with Skirting and Sealing Gaps
Whether you're using a flip-over or a hard-sided house, effectively sealing the base of your shelter is paramount for warmth and comfort in North Dakota's cold. The "skirt" of a portable hub or flip-over is the extra fabric around the bottom edges designed to lie flat on the ice. After anchoring, it's a good practice to shovel snow around this skirt. This simple act creates an insulating barrier that blocks drafts and helps retain heat inside the shelter. It’s like putting a blanket around the base of your house.
For hard-sided houses, skirting often involves specific panels that drop down to the ice, or a heavy-duty tarp system. Once these are down, shovel snow against them, packing it firmly. This isn't just about blocking wind; it creates an air pocket that acts as an insulator, significantly reducing heat loss through the floor and lower walls. Any gaps or cracks, even small ones, can allow precious heat to escape and cold air to rush in, making your heater work harder and your experience less enjoyable. Taking an extra 10-15 minutes to properly skirt and snow-pack your shelter will pay dividends in warmth and fuel efficiency throughout your fishing day.
Anchoring and Securing Your Shelter in Windy North Dakota
North Dakota is renowned for its strong winds, which can turn a fun day of ice fishing into a battle against the elements if your shelter isn't properly secured. A loose shelter isn't just inconvenient; it can be dangerous, leading to damaged gear or even injuries. Learning effective anchoring techniques is non-negotiable for any angler venturing onto the ice here.
The Importance of Proper Anchoring
Imagine setting up your beautiful new portable hub, only for a sudden gust of wind to pick it up and send it tumbling across the frozen lake. Not only is your shelter potentially ruined, but your day is, too. This isn't a hypothetical scenario; it happens all the time on big, open lakes like Sakakawea or Devils Lake. Proper anchoring is your first line of defense against North Dakota's relentless wind. It keeps your shelter stationary, prevents wear and tear from flapping, and most importantly, ensures your safety and the safety of those around you.
Beyond preventing your shelter from becoming a kite, good anchoring minimizes drafts, which directly impacts the efficiency of your heater. A well-anchored and skirted shelter holds heat much better, meaning you use less propane and stay warmer longer. It also provides a stable platform for your Ice Fishing Electronics and Fish Finders, preventing them from being knocked over. Never skimp on anchors, especially when the forecast calls for even moderate winds. When you learn How to Ice Fish in North Dakota, proper anchoring is one of the first lessons.
Types of Ice Anchors and Their Use
There are several types of ice anchors available, but the most common and effective for portable shelters are screw-in ice anchors. These are typically made of steel with a sharp point and aggressive threads, allowing them to bite securely into the ice. They often have a handle for manual screwing, but for real efficiency, invest in an ice anchor drill adapter (you can find these readily on Amazon). This adapter allows you to use a cordless drill to power them into the ice in seconds, saving your hands and precious time.
Another type of anchor, less common but useful for hard-packed snow or slush over ice, is a "deadman" anchor. This involves burying something (like a sandbag or a small board) in the snow or slush and tying your guy line to it. However, for sheer holding power in solid ice, screw-in anchors are king. For hard-sided houses, you'll often see specialized "ice augers" that are essentially giant screws drilled into the ice, or heavy-duty chains bolted to the ice to prevent the house from shifting. Always carry more anchors than you think you'll need; it's better to have too many than too few.
Advanced Anchoring for Extreme Winds
When the wind really picks up – we're talking 20-30 mph sustained with higher gusts, which is not uncommon in North Dakota – basic anchoring might not be enough. This is where advanced techniques come in. For portable shelters, consider using longer, heavy-duty screw-in anchors. Some brands offer extra-long anchors specifically for challenging conditions. If your shelter comes with multiple guy line attachment points, use them all, extending them as far out as safely possible. The wider the base of support, the more stable your shelter will be.
Another trick is to use a secondary set of ropes that run over the top of your hub shelter, forming an "X" pattern, and anchoring them down on the opposite sides. This creates a downward force that helps prevent the roof from collapsing inward or lifting off in severe gusts. Think of it like adding extra tension straps over a cargo load. Additionally, piling a significant amount of snow and packing it firmly around the entire base of the skirt, not just where the anchors are, creates a formidable windbreak and seal. For hard-sided houses, using heavy-duty straps over the roof and securing them to anchors drilled deep into the ice can add an extra layer of security. Always monitor weather conditions closely and be prepared to take down your shelter if conditions become too extreme. Looking up Best Portable Ice Shelters for Wind will also give you ideas for shelters specifically designed for these types of conditions.
Optimizing Your Interior Setup for Comfort and Efficiency
Once your shelter is securely in place, the real fun begins: making it your cozy fishing sanctuary. A well-organized and comfortable interior can make a huge difference in your enjoyment and productivity on the ice, transforming a cold, stark shelter into a true home away from home.
Heating Your Ice Shelter Safely
A reliable heater is absolutely essential for North Dakota ice fishing. Propane heaters are the most common choice, ranging from small, portable units like Mr. Heater's "Buddy" series to larger, more powerful catalytic heaters. Whichever you choose, safety is paramount. Always ensure your heater has a tip-over shut-off switch and an oxygen depletion sensor (ODS). Position the heater on a flat, stable surface, away from the fabric walls or any combustible materials.
Ventilation is another non-negotiable safety aspect. Even with an ODS, carbon monoxide can still build up. Always leave a small vent open, usually a zippered window or roof vent, to allow for fresh air exchange. Consider bringing a battery-operated carbon monoxide detector for an extra layer of safety. This is especially important for overnight stays. For more details on safe heating, check out Is It Safe to Use a Propane Heater in an Ice Shelter?. Keeping your shelter warm while staying safe is a delicate balance, but it’s entirely achievable with the right precautions and the right Best Portable Heater for an Ice Shelter.
Organizing Your Gear and Electronics
A cluttered shelter is an inefficient and frustrating one. Before you start drilling holes, take a moment to plan your layout. Position your seats or buckets so everyone has comfortable access to their holes. Create designated areas for specific gear. A small folding table can be invaluable for holding tackle, snacks, or a Best Fish Finders for Ice Fishing.
Utilize vertical space where possible. Many shelters have mesh pockets or gear hammocks built into the walls or ceiling, perfect for storing essentials like phones, gloves, or spare tackle. Keep your auger outside the shelter once your holes are drilled, or in a specific corner where it won't be a tripping hazard. For electronics, position your fish finder display where it's easily visible to you, and run transducer cables neatly to avoid tangles. If you're charging devices, consider a portable power station to keep everything juiced up throughout the day. A well-organized space means less fumbling and more focused fishing.
Lighting and Ventilation Strategies
Even on the brightest winter days, the interior of an ice shelter can be surprisingly dim, especially if it’s insulated with dark fabric. Good lighting is crucial, both for seeing your tackle and for safety. Battery-powered LED lanterns or light strips that attach to the shelter poles are excellent options. Many run for hours on a single set of batteries and provide ample, even light without the fire risk of a candle lantern. For focused tasks, a headlamp is indispensable.
As mentioned with heating, ventilation is key. Even without a heater, simply breathing can cause condensation to build up inside the shelter, leading to dampness and a colder environment. Keep at least one vent slightly open. If it’s not too cold, a cross-breeze through two opposite vents can really help circulate air and reduce condensation. In hard-sided houses, consider small exhaust fans, sometimes powered by a small solar panel, to ensure continuous airflow. Good lighting improves visibility, and proper ventilation keeps the air fresh, dry, and safe, making your ice fishing experience much more enjoyable.
Preparing for Pack-Up and Departure
Just as important as a smooth setup is an efficient and safe tear-down. When the bite slows or the day is done, the last thing you want is to be fumbling with frozen gear. Having a system for packing up your ice fishing shelter, especially in North Dakota's fickle weather, will save you time and discomfort.
Clearing Your Area and Checking for Lost Gear
Before you start collapsing your shelter, take a few minutes to clean up inside. Gather all your trash, making sure nothing is left behind on the ice. This includes any discarded bait containers, snack wrappers, or broken fishing line. Leaving litter on the ice is not only bad for the environment but can also be a hazard for wildlife and other anglers.
Once the trash is collected, do a thorough sweep for any forgotten gear. Check under seats, in corners, and especially around your fishing holes. It’s easy for a jig, a pair of pliers, or a glove to get kicked under a mat or tucked into a snowdrift. Make sure all your rods are stowed, your tackle is secured, and your electronics are properly packed away. Losing a favorite lure or a vital piece of equipment on the ice is a frustrating way to end the day. A quick visual check before you start collapsing helps prevent these unfortunate occurrences.
Defrosting and Collapsing Your Shelter
If you’ve been fishing in cold conditions, your shelter's fabric, especially the skirt, might be frozen to the ice. Do not try to rip it free! This can damage the fabric or tear out grommets. Instead, gently kick or tap along the base of the skirt to break it free from the ice. For hubs, unscrew all ice anchors. For flip-overs, ensure the tent frame is unlocked before attempting to collapse it.
When collapsing a hub, reverse the setup process. Push in the roof hub first, then systematically push in each wall hub. As you collapse each side, fold the fabric inward, trying to keep it as neat as possible to facilitate packing. If the fabric is wet or frosty, try to shake off as much moisture as you can before folding. For flip-overs, simply flip the tent frame back into the sled. If the fabric is very wet, try to allow some time for it to air dry partially before completely folding it, if conditions allow. This helps prevent mildew and preserves the life of your shelter.
Transporting and Storing Your Gear
Once your shelter is collapsed, pack it back into its carry bag (for hubs) or secure it in its sled (for flip-overs). Ensure all anchors and ropes are collected and stored neatly. Never leave anchors in the ice or ropes trailing, as they can be a hazard for others. Load all your gear back into your sled or vehicle, making sure everything is secured for transport across potentially bumpy ice or roads.
When you get home, if your shelter or any gear is wet, do not pack it away immediately. Open it up, hang it, or lay it out in a warm, dry area (a garage or basement works well) to thoroughly dry. This is especially important for the shelter fabric to prevent mold, mildew, and premature degradation of the material. If you can't dry it completely right away, at least air it out as much as possible, then make a note to fully dry it within a day or two. Proper storage will ensure your Best Ice Fishing Gear for North Dakota lasts for many seasons to come.
| Shelter Type | Key Features | Setup Speed | Portability | Ideal Conditions | Wind Stability |
|---|---|---|---|---|---|
| Hub Shelter | Pop-out walls, spacious interior | Moderate | High | Groups, stationary fishing, moderate moves | Good (with anchors) |
| Flip-Over Shelter | Integrated sled, attached seating | Very Fast | Medium | Mobile fishing, solo/duo, quick moves | Excellent |
| Hard-Sided House | Fully enclosed, insulated walls, amenities | Slow (requires transport/leveling) | Low | Extended stays, extreme cold, maximum comfort | Superior |
Disclaimer
Please remember that ice fishing can be inherently dangerous. This guide offers general advice for setting up an ice fishing shelter, but conditions on North Dakota lakes can change rapidly. Always prioritize safety, check ice conditions diligently, and be aware of all local regulations before venturing onto the ice. Your personal safety is your responsibility.