How to Tie a Fishing Knot for Beginners
Many an angler, especially those just starting out in North Dakota, has felt that heartbreaking slack in their line – the tell-tale sign of a knot failure. Losing a trophy walleye on Lake Sakakawea or a monster channel cat on the Red River because of a poorly tied knot is a rite of passage for some, but it doesn't have to be yours. There's nothing more frustrating than putting in the time, finding the fish, making the perfect cast, and then having your line snap at the knot. This guide will walk you through the essential fishing knots, ensuring your line holds strong against the tug of a North Dakota lunker.
The Hidden Truth About Fishing Knots: Why They Matter More Than You Think
It’s easy to get caught up in the excitement of choosing the perfect lure, finding the hot bite, or mastering your casting technique. But honestly, none of that matters if the connection between your line and your hook, or between two pieces of line, isn't solid. A fishing knot isn't just a formality; it's the most critical link in your entire setup, and it's often the weakest point. Ignoring good knot tying is like building a beautiful house on a shaky foundation – it's just a matter of time before it all comes crashing down.
The Angler's Nightmare: When Good Fish Go Bad (Because of a Bad Knot)
We've all been there, or at least heard the stories. Imagine you're out on the quiet waters of Lake Ashtabula, the sun is setting, and you finally feel that distinct "thump" of a good walleye. You set the hook, the rod bends, the reel sings, and you're battling what feels like a true lunker. You get it close to the boat, maybe even see its golden flanks flash in the water, and then… ping! The line goes slack. Your heart sinks right along with it. All that anticipation, all that fight, gone in an instant.
It’s not just the fish, either. Think about that brand-new, expensive crankbait you just picked up for a specific situation. If your knot fails, that lure is now at the bottom of the lake, a silent monument to a moment of poor knot craftsmanship. This kind of heartbreak is entirely preventable. Mastering a few key knots gives you the confidence to know that when you hook into a monster, your gear will hold up its end of the bargain. Knowing how to tie a good knot is as fundamental to fishing as understanding the North Dakota Fishing Season Calendar or knowing where the Best Places to Fish in North Dakota are.
Understanding Line Types and How Knots Affect Their Strength
Before we dive into the knots themselves, it’s worth a quick chat about fishing lines because different lines react differently to knots. You’ll typically encounter three main types:
- Monofilament (Mono): This is your classic, all-around fishing line. It's affordable, stretchy, easy to tie, and has good abrasion resistance. Because of its stretch, it's forgiving, but knots can sometimes slip if not tied correctly.
- Fluorocarbon (Fluoro): Often used as a leader material due to its near invisibility underwater, fluorocarbon has less stretch than mono and is more abrasion resistant. However, it can be a bit stiffer and requires more care when tying knots to prevent "burning" the line from friction, which can drastically weaken it.
- Braided Line: Incredibly strong for its diameter, with almost no stretch, braided line is fantastic for sensitivity and hook sets. It's also very abrasion resistant. The downside? Its slick, smooth surface means some knots designed for mono or fluoro might slip. You need specific knots that grip braided line effectively.
Here’s the thing about knots: every single knot you tie in a fishing line inherently weakens that line. It creates stress points where the line bends and cinches against itself. The goal isn't to tie a knot that doesn't weaken the line (that's impossible), but to tie one that minimizes that strength reduction as much as possible, ideally retaining 90% or more of the line’s original breaking strength. The knots we’re going to cover are chosen specifically because they offer excellent strength retention across various line types, making them perfect for the diverse fishing opportunities North Dakota offers.
Your North Dakota Knot Arsenal: Essential Knots for Every Situation
Don't let the sheer number of fishing knots out there overwhelm you. For beginners, you really only need to master a handful to cover 99% of your fishing needs. Think of these as your core tools – once you've got them down, you'll be ready for almost anything that swims in North Dakota's lakes and rivers.
The Improved Clinch Knot: A Versatile Workhorse for All-Around Fishing
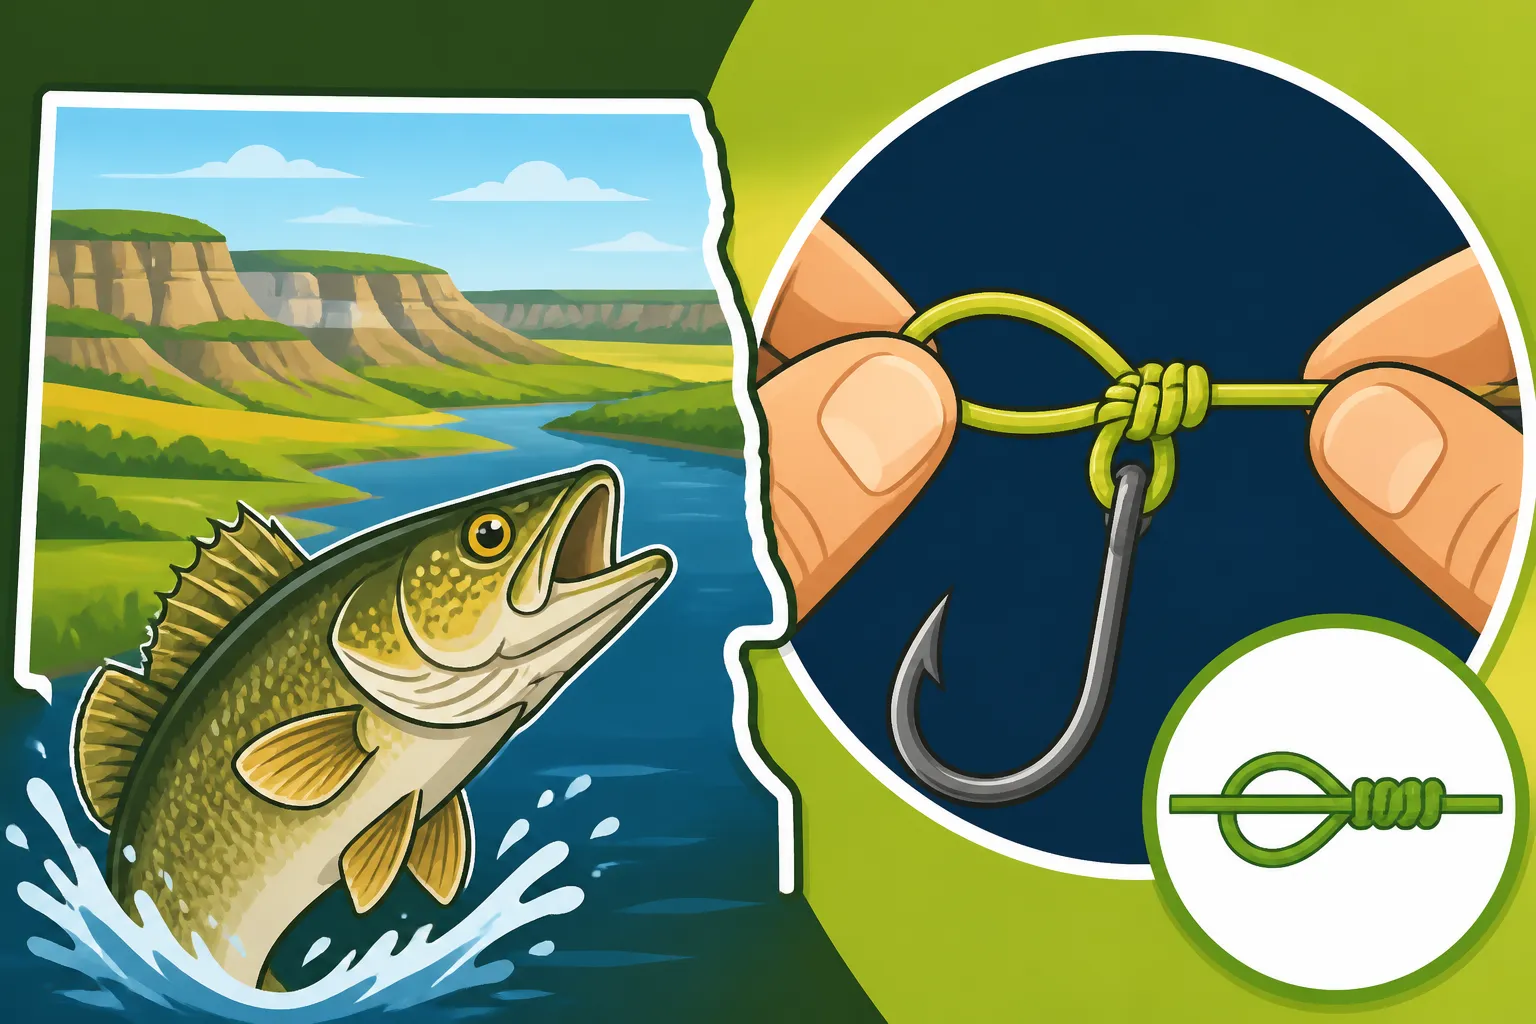
If you learn only one knot for tying terminal tackle (hooks, lures, swivels) directly to your line, make it the Improved Clinch Knot. It's incredibly versatile and reliable for monofilament and fluorocarbon lines, making it a go-to for many anglers chasing everything from panfish to walleye.
How to Tie the Improved Clinch Knot:
- Pass the Line: Thread the tag end of your fishing line through the eye of your hook, swivel, or lure. Then, thread it through a second time, creating a small loop. You should now have two strands of line passing through the eye.
- Twist It Up: Pinch the two strands near the eye with one hand. With your other hand, wrap the tag end around the standing line (the main line going back to your rod) 5-7 times. More wraps for lighter line, fewer for heavier line. For most lines you'll use for North Dakota Walleye Fishing Guide, 5-6 wraps is a good start.
- Insert the Tag End: Take the tag end and pass it back through the first small loop you created near the eye of the hook.
- One More Loop: Now, pass the tag end back through the large loop you just formed by completing step 3. This is the "improved" part, adding an extra cinch point that prevents slippage.
- Moisten and Cinch: Moisten the knot with saliva. This is crucial as it reduces friction and prevents the line from burning and weakening as it cinches down. Slowly pull the standing line while guiding the knot down to the eye, making sure the wraps lay neatly. Pull firmly until it’s tight.
- Trim: Trim the tag end, leaving about an eighth of an inch of line. Don't cut it too close!
This knot is perfect for tying on those jigs for perch on Devils Lake, or a shiny spoon for northern pike on Lake Sakakawea. It's a fundamental skill you'll use constantly.
The Palomar Knot: The King of Braided Line and Heavy Tackle
When it comes to braided line, the Palomar Knot reigns supreme. It’s incredibly strong, relatively simple to tie, and maintains much of the line's original strength, which is exactly what you need when you're targeting strong fish like a big pike or catfish. It also works very well with monofilament and fluorocarbon, making it another excellent all-rounder, though it's particularly celebrated for braid.
How to Tie the Palomar Knot:
- Double the Line: Double about six inches of your fishing line and pass the looped end through the eye of your hook, swivel, or lure. You should now have a loop sticking out one side and two tag ends on the other.
- Simple Overhand: Tie a simple overhand knot with the doubled line. Make sure the hook or lure hangs freely at the bottom of this overhand knot. Do not tighten this knot yet.
- Pass the Loop Over: Take the loop you created and pass it completely over the hook or lure. If you're tying a very large lure, you might need to thread the lure through the loop instead.
- Moisten and Cinch: Moisten all strands of the knot. Pull on the standing line and the two tag ends simultaneously and slowly. The loop will slide down and cinch tightly around the eye of the hook or lure. Make sure everything pulls down cleanly.
- Trim: Trim the excess tag end close to the knot.
This knot is robust and dependable, perfect for the heavy-duty applications often required for North Dakota Northern Pike Fishing Guide or if you're using heavier gear for monster Red River catfish. It provides an extremely strong connection that resists slipping, especially with braided lines.
The Surgeon's Knot (or Double Surgeon's Loop): For Leaders and Loops
Sometimes you need to create a strong loop at the end of your line, perhaps to attach a pre-tied leader with a loop-to-loop connection, or simply to have a strong, non-slip loop. The Surgeon's Loop is fantastic for this. There's also the Surgeon's Knot, which is essentially the same principle used to join two lines together, often when connecting a leader of a different material or pound test.
Let’s focus on the Surgeon’s Loop first, as it's a super useful loop for attaching quick-change tackle.
How to Tie the Surgeon's Loop:
- Form a Loop: At the very end of your main line, form a simple loop of the desired size. You'll be tying a knot around this loop.
- Overhand Knot: Take the tag end and wrap it around the standing line and the inside of the loop, passing it through the loop you just created. Do this twice (a double overhand knot).
- Moisten and Cinch: Moisten the knot and pull all four strands (the standing line, the two sides of the loop, and the tag end) slowly and evenly until the knot cinches down tightly.
- Trim: Trim the tag end close to the knot.
This creates a very strong, reliable loop. Now, let’s quickly look at the Double Surgeon’s Knot, which is for joining two lines, particularly good for connecting lines of different diameters or materials, like a braided main line to a fluorocarbon leader.
How to Tie the Double Surgeon's Knot:
- Overlap Lines: Lay the end of your main line and the end of your leader line parallel to each other, overlapping by about 6-8 inches.
- Form a Loop: With the two lines now acting as one, form a loop with both lines.
- Pass Through Twice: Take the tag end of the leader and the main line and pass both through the loop you just formed. Do this twice (hence "double").
- Moisten and Cinch: Moisten the knot thoroughly. Slowly pull on all four ends (the two standing lines and the two tag ends) until the knot slides together neatly and cinches down tight. It forms a compact, strong connection.
- Trim: Trim both tag ends close to the knot.
This is an excellent knot for adding a Best Fishing Line for North Dakota Lakes leader for stealth, especially when targeting wary fish like walleye in clear water.
The Double Uni Knot: Joining Two Lines with Confidence
The Double Uni Knot is another fantastic choice for connecting two lines, particularly when you need a smooth, strong splice that passes easily through your rod guides. It's especially popular for connecting braided main line to a monofilament or fluorocarbon leader, a common setup for many North Dakota anglers.
How to Tie the Double Uni Knot:
- Overlap Lines: Lay the end of your main line and the end of your leader line parallel to each other, overlapping by about 6-8 inches.
- First Uni Knot: Take the tag end of one line (let's say your main line) and make a loop over the leader line and the standing part of its own main line. Wrap the tag end around both lines inside this loop 5-6 times. Cinch this first "uni" knot down lightly, but don't tighten it completely yet.
- Second Uni Knot: Now, take the tag end of the other line (your leader) and make a loop over the main line and the standing part of its own leader line. Wrap this tag end around both lines inside this second loop 5-6 times. Cinch this second "uni" knot down lightly as well.
- Pull Together: Moisten both knots. Now, pull firmly on the two standing lines, slowly drawing the two uni knots together until they butt up against each other. Give a final hard pull to ensure both knots are tightly cinched.
- Trim: Trim both tag ends close to the knot.
The Double Uni Knot creates a compact, streamlined connection that is incredibly strong, making it ideal for when you're using different line types together. It's often used by anglers who want the sensitivity of braid but the invisibility of fluorocarbon for their North Dakota Walleye Fishing Guide adventures.
Mastering Your Knots: Pro Tips for Beginners (and a Few Gear Recommendations)
Learning to tie these knots is just the first step. To truly master them and ensure they hold when it counts, you need to incorporate a few key practices and consider some helpful tools. Don't be shy about needing a little extra help – even seasoned pros still practice their knots.
The Golden Rule: Practice, Practice, Practice
This isn't just a cliché; it's the absolute truth when it comes to knot tying. You can read instructions a hundred times, but until you get that line in your hands and actually go through the motions, it won't stick.
- Practice at Home: Don't wait until you're on the boat, shivering in the wind, with a huge fish biting to try a new knot. Grab some spare fishing line – even a thicker piece of rope or string will do for learning the basic movements – and practice in the comfort of your living room. The repetition builds muscle memory, so when you're out on the water, your fingers will know what to do without your brain having to overthink it. You can often find spools of inexpensive practice line on Amazon.
- Go Through the Motions Blindfolded: A good test of your mastery is if you can tie the knot without looking. This is incredibly valuable for those early morning trips or late-night catfishing sessions when light is scarce, or during the dead of winter when your fingers are numb from How to Ice Fish in North Dakota.
- Tie It Ten Times: A common recommendation is to tie each new knot ten times perfectly before you consider it mastered. Seriously, this works.
Wet It, Set It, Trim It: The Finishing Touches
Once you've got the wraps down, how you finish the knot is just as important as how you started it. These final steps can make the difference between a knot that holds and one that fails.
- Wet the Knot: This is non-negotiable for monofilament and fluorocarbon. Before you pull the knot tight, always moisten the line with saliva or water. This lubrication reduces friction as the coils cinch down. Without it, the line can generate enough heat to weaken itself, sometimes microscopically "burning" the line and reducing its strength significantly. For braided line, it's less critical for heat generation, but it still helps the wraps lay neatly.
- Cinch Slowly and Evenly: Don't just yank the lines tight. Pull slowly and steadily, making sure all the wraps slide into place properly. Watch the knot as it cinches – you want a neat, compact knot, not a messy tangle. A smooth, controlled pull ensures even pressure distribution and maximum strength retention.
- Trim Your Tag Ends Neatly: After the knot is cinched firmly, trim the excess "tag end" of the line. Leave about an eighth of an inch, or slightly more for braided line to prevent it from slipping back through. Cutting too close can lead to premature knot failure, especially under pressure. Having a good pair of sharp fishing line clippers or even a sharp pair of nail clippers (you can find multi-packs on Amazon) in your tackle box is essential for a clean cut that won't leave frayed edges.
Consider Knot-Tying Tools for Fussy Fingers
Let's be real: sometimes fingers get cold, wet, or just plain clumsy. Especially when you're out on a breezy day on Lake Sakakawea, trying to tie a tiny jig on with frozen fingers. This is where a knot-tying tool can be a real game-changer.
These simple devices are designed to hold your hook and line, providing leverage and making it easier to manipulate the line, especially with small hooks or heavy line. While they aren't strictly necessary, many anglers find them invaluable, particularly for specific knots or in challenging conditions. Look for basic, easy-to-use tools that assist with clinches or Palomars. They can be a great addition to your Essential Gear Checklist for North Dakota Fishing and are readily available from outdoor retailers or online marketplaces like Amazon.
No matter if you're chasing Yellow Perch and Panfish Daily Limits Explained or trying to get your North Dakota Fishing License Guide in order, knowing your knots is foundational to successful fishing.
Here’s a quick overview of the knots we've discussed:
| Knot Name | Best For | Ideal Line Types | Primary Use | Strength Retention | Ease of Tying (1-5, 5 being easiest) |
|---|---|---|---|---|---|
| Improved Clinch Knot | Hooks, Lures, Swivels | Monofilament, Fluorocarbon | Attaching terminal tackle | Excellent | 4 |
| Palomar Knot | Hooks, Lures, Swivels (especially with braid) | Braided, Monofilament, Fluorocarbon | Attaching terminal tackle (very strong) | Superior | 3 |
| Surgeon's Loop | Creating strong loops | All line types | Attaching leaders, quick-change rigs | Excellent | 5 |
| Double Surgeon's Knot | Joining two lines | All line types (esp. diff diameters) | Connecting main line to leader | Excellent | 4 |
| Double Uni Knot | Joining two lines | All line types (esp. braid to fluoro) | Connecting main line to leader (streamlined) | Excellent | 3 |
Armed with these essential knots and a bit of practice, you’ll be ready to face whatever North Dakota’s waters throw your way, confident that your knots will hold strong. Remember, a good knot isn't just a knot; it's the bridge between you and that fish of a lifetime.
Disclaimer
This article is for general informational purposes only and does not constitute professional advice. Laws, prices and regulations vary by location and change over time. Consult a qualified professional for guidance on your specific situation.