Best Early Ice Fishing Tips for North Dakota
The first hard water of the season can be absolutely exhilarating, but it also comes with a unique set of challenges and dangers. That initial freeze-up often leaves us itching to get out there, especially after a long open-water season, and the fish can be incredibly aggressive and cooperative. However, chasing those early ice bites without proper knowledge and precautions can turn a fantastic day into a dangerous ordeal. This comprehensive guide will walk you through the critical safety measures, fish-finding strategies, essential gear, and effective techniques to make your early ice fishing trips in North Dakota both successful and, most importantly, safe.
Understanding Early Ice Conditions and Safety First
The allure of early ice is undeniable. Fewer crowds, aggressive fish, and the crisp, quiet beauty of a newly frozen lake—it's truly magical. But this initial phase of the ice fishing season is also when the ice is most unpredictable. You simply can't treat it like mid-winter, rock-solid ice. Ignoring safety during this time is not just risky; it's foolish, and frankly, life-threatening.
The All-Important Ice Thickness
Let's be brutally honest: ice isn't just ice. Its strength can vary dramatically, not just from lake to lake, but even across different areas of the same body of water, and sometimes just a few feet apart. Factors like currents, springs, underwater structure, wind, and even snow cover can create thin spots that are virtually invisible from above. That patchy, dark ice you see might look strong, but it could be concealing a death trap.
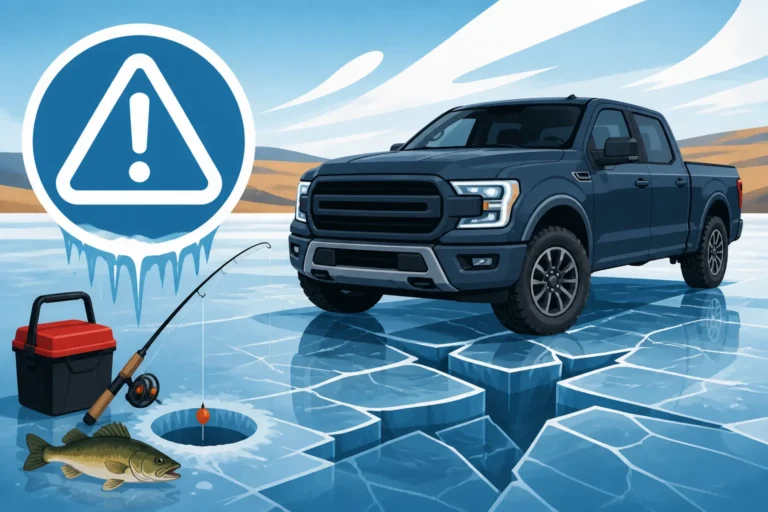
For early ice, you absolutely must err on the side of caution. A general rule of thumb for safe ice is usually around 4 inches for walking or ice fishing on foot. However, this is a minimum, and conditions can change rapidly. For snowmobiles, you're looking at 5-7 inches, and for a smaller car or truck, you need at least 8-12 inches of clear, solid ice. Never, ever assume. Always check. It's not worth the risk. The first few weeks of the season are notoriously dangerous precisely because anglers push the limits to get to those hot spots. Remember, safety always comes before the catch, and a few extra inches of ice can make all the difference. For a more detailed breakdown, check out our guide on How Thick Ice Needs to Be for Ice Fishing.
Essential Safety Gear You Can't Skip
When you're venturing out onto early ice, your backpack shouldn't just be full of tackle; it needs life-saving equipment. This isn't optional; it's a non-negotiable part of the early ice angler's kit.
First on the list are ice picks. These are simple, inexpensive tools that hang around your neck and are your best friend if you break through. They give you the grip you need to pull yourself back onto the ice. Without them, trying to claw your way out of icy water is nearly impossible. Seriously, don't leave home without them. Next, a spud bar or an ice chisel is crucial. This isn't just for making holes; it's your portable ice thickness detector. You should be constantly spudding the ice in front of you, especially as you move into new areas. A few solid thumps should be enough to tell you if the ice is thick. If it goes through in one or two jabs, back away immediately.
Beyond these, a throw rope is a fantastic piece of gear. If someone else goes through, you can toss them the rope while staying a safe distance away. And while some scoff at them, a personal flotation device (PFD) or even an inflatable life vest, especially when ice is marginal, is a smart choice. These lightweight options are far less cumbersome than traditional life vests and can buy you precious time if you find yourself in the water. You can find a great selection of reliable ice safety gear on Amazon, from high-quality ice picks to lightweight PFDs designed for active use. It's peace of mind that allows you to focus on the fishing, knowing you're prepared. Our guide on Should You Carry Ice Picks While Ice Fishing? delves deeper into why these items are so vital.
Checking Conditions Before You Go
Before you even load up your gear, you need to do your homework. Trusting your gut or someone else's Facebook post isn't enough. The most reliable sources of information come from local anglers, bait shops, and official channels.
Start by calling local bait shops in the area you plan to fish. They're often on the ice daily or talking to anglers who are. They'll know the specific lake conditions, where the good ice is, and where the treacherous spots are. The North Dakota Game and Fish Department (NDGFD) often provides ice safety guidelines and sometimes even reports, especially as the season progresses. However, these are general and can't cover every single cove or point. Use them as a starting point, but always verify on-site.
Talking to other anglers who have recently been on the ice can also be invaluable, but always cross-reference information. Remember that conditions can change overnight with fluctuating temperatures or heavy snowfalls, which can insulate ice and slow its growth. A beautiful sunny day might seem harmless, but if it follows a cold snap, those warm rays can soften the top layer, making it less stable than it appears. Always go with a buddy, share your float plan with someone at home, and carry a fully charged cell phone. Your safety depends on being informed and vigilant. Learn more about proactive checks in our article, How to Check Ice Thickness Safely.
Locating Fish on Early Ice in North Dakota
Once you've got your safety plan dialed in, it's time to think like a fish. Early ice presents unique opportunities because fish haven't yet settled into their deep-winter patterns. They're often still quite active and can be found in predictable, shallower locations.
Shallow Water is Key
When the ice first forms, many fish species, particularly walleye, northern pike, and yellow perch, tend to linger in shallower water. Why? For a few good reasons. First, these areas were often the last to freeze, and fish were already there, feeding on remaining insect larvae or small baitfish before the deep freeze set in. Second, shallow areas often have leftover green weeds or submerged vegetation that continues to produce oxygen, which is a major draw. These weeds also provide cover for ambush predators and food for smaller fish.
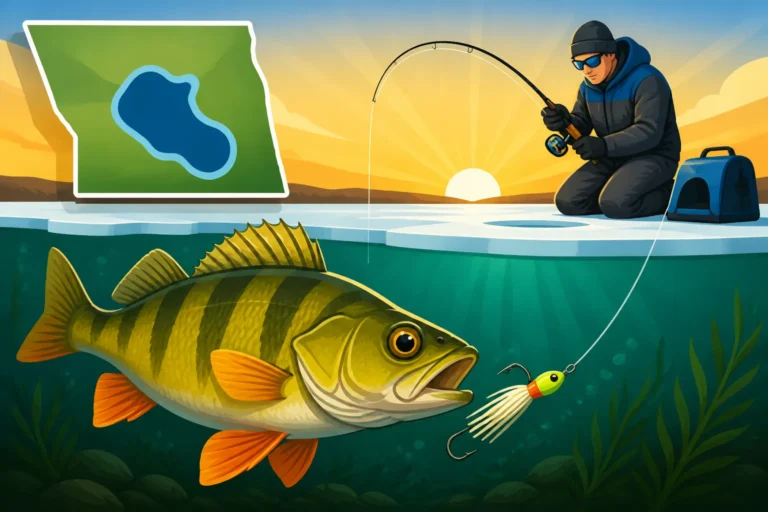
Think about shallow bays, points that taper off into deeper water, and the edges of weed beds. For walleye, those 8-15 foot depths where rocky structures or old weed lines meet a soft bottom can be dynamite. For perch, look for slightly deeper edges of those same weed beds, or even over soft bottom in 10-20 feet, especially if there's subtle structure. Northern pike will often be right in the green weeds themselves, waiting to ambush any unsuspecting prey. This shallow water accessibility makes early ice incredibly appealing, as you don't always need specialized deep-water electronics to find them. Finding a school of active perch can be a real treat, and our guide on How to Find Perch Schools Under the Ice has some excellent tips for just that.
Targeting Green Weeds and Structure
Green weeds are like gold on early ice. While many weeds have died back, finding patches of healthy, oxygen-rich green vegetation can be a fish magnet. These areas hold baitfish, provide cover, and offer a comfortable environment for game fish. Use your eyes to spot subtle differences in snow cover (often thinner over weeds due to insulation), or better yet, use your electronics.
A good fish finder or flasher is invaluable here. It will not only show you fish but also highlight the presence of weeds and changes in bottom composition. Focus on the edges where green weeds transition to open water or where hard bottom meets soft. These transition zones are often ambush points for predators like walleye and pike. Submerged humps, rock piles, and old creek channels in shallower bays also offer excellent early ice structure. Don't be afraid to drill plenty of holes and move until you locate these key features and, more importantly, the fish they're holding. Understanding how to use your electronics effectively can dramatically increase your success, and our article How to Read a Fish Finder for Ice Fishing provides a detailed overview.
Using Depth and Contour Maps
Modern technology has made finding fish much easier, even on early ice. High-definition lake contour maps are an angler's best friend. These maps reveal hidden underwater structure, depth changes, humps, points, and old river channels—all prime locations for fish.
Before you even step on the ice, spend time studying your target lake's map. Identify shallow bays with access to deeper water, prominent points, and submerged islands. Look for "inside turns" on contour lines, which are often overlooked but can hold schools of fish. Once you're on the ice, use a handheld GPS (many fish finders have this built-in) to navigate directly to these promising spots. Don't just drill one hole; drill a series of holes along a contour line or across a point to effectively "grid search" an area. Fish might be holding in a very specific depth range, and by drilling multiple holes, you increase your chances of finding that sweet spot. Remember, the fish aren't going to come to you; you have to find them. Utilizing mapping can save you a tremendous amount of time and effort. For more on this, consult our guide on How to Find Walleye Structure With a Map.
Best Techniques and Baits for Early Ice Success
Once you've safely found a promising area, it's time to present your offerings. Early ice fish are often aggressive and willing to bite, but certain techniques and baits will consistently outperform others.
Active Jigging for Hungry Fish
On early ice, fish are often still quite active and not yet lethargic from the deep winter chill. This means active jigging can be incredibly effective. For yellow perch and smaller walleye, small tungsten jigs tipped with wax worms, maggots, or a piece of plastic are deadly. Aggressively jig your bait a few inches off the bottom, then pause, letting the bait flutter. Many bites come on the fall or during the pause. Don't be afraid to experiment with different jigging cadences—some days they want a rapid-fire presentation, other days a slow, methodical lift and drop.
For larger walleye and northern pike, heavier spoons like a Swedish Pimple or Kastmaster, or even vertical jigs like a Rapala Jigging Rap or Salmo Chubby Darter, can be incredibly effective. Tip these with a minnow head or a whole minnow to add scent and appeal. Aggressive jigging with these baits can draw fish in from a distance, then subtly working the bait can entice a strike. The key is to impart action. Don't just set your bait and wait; keep it moving, mimic a wounded baitfish, and react quickly to any taps or changes in your line. If you're targeting perch, knowing the right jig size makes a huge difference, so check out Best Jig Size for Perch Through the Ice.
The Power of Live Bait
While artificials can be fantastic, it's hard to beat the drawing power of live bait, especially on early ice. Minnows are king for walleye and northern pike. A lively fathead, shiner, or sucker minnow suspended under a bobber or fished on a plain hook a few feet off the bottom can be irresistible. Consider using a small trebled hook through the dorsal fin or a single hook through the lip for best action.
For perch, wax worms and spikes (maggots) are incredibly effective when fished on small jigs or tiny spoons. The natural scent and subtle movement of live bait can be the difference-maker on days when fish are a bit more finicky, or when you're trying to coax a bite from a less aggressive fish. Make sure your live bait is kept fresh and lively, especially in cold temperatures. Portable aerated bait containers, easily found on Amazon, are perfect for this. When it comes to walleye, live bait in the early season is often unmatched, and our article on Best Live Bait for Early Season Walleye shares more insights.
Tip-Ups for Northern Pike
While jigging is great for active fish, early ice is also a fantastic time to use tip-ups, especially for targeting bigger northern pike. These predatory fish are often cruising the shallow weed lines and points, and a large sucker or shiner minnow under a tip-up is a perfect offering.
Set your tip-ups along the edges of known weed beds or across shallow points where pike are likely to patrol. Use heavier leader material to prevent bite-offs from their razor-sharp teeth. The beauty of tip-ups is that you can cover a wider area, setting multiple lines (within legal limits, of course) while you actively jig for other species. When that flag goes up, the adrenaline rush is instantaneous. Just remember to let the pike run for a few seconds before setting the hook to ensure it has fully taken the bait. Setting up your tip-ups correctly can make a big difference in your success, so be sure to read our guide on How to Rig a Tip-Up for Northern Pike.
Essential Gear and Comfort for Early Ice Anglers
Early ice conditions aren't just about fish location; they're also about enduring the elements. Being prepared with the right gear ensures your comfort and ability to stay out longer, increasing your chances of success.
Portable Shelters and Heaters
On early ice, mobility is often crucial. Fish can be spread out, or they might move quickly. This is where portable ice shelters shine. Flip-over style shelters or hub-style pop-ups offer quick setup and takedown, allowing you to follow the bite without much hassle. Brands like Clam, Eskimo, and Shappell make excellent options. They also provide much-needed protection from the wind and biting cold, which can be relentless on open North Dakota lakes.
Pair your shelter with a safe, portable heater. Propane heaters like those from Mr. Heater are popular and effective, providing enough warmth to keep your hands nimble and your spirit high. Always ensure proper ventilation, even in an ice shelter, to avoid carbon monoxide buildup. These shelters and heaters transform a potentially miserable day into a cozy and enjoyable experience, allowing you to focus on the fishing rather than shivering. For guidance on selecting a shelter, check out Best Portable Ice Shelter for Windy Conditions.
Augers for Cutting Clean Holes
You'll be drilling a lot of holes on early ice, especially when searching for fish or checking ice thickness. A reliable auger is a non-negotiable piece of equipment. Electric augers have become incredibly popular, offering quiet, exhaust-free operation and impressive power. Brands like ION and Strikemaster Lithium dominate this space. They're great for early ice when you're often walking to spots and appreciate the lighter weight.
Gas and propane augers, from brands like Eskimo or Jiffy, are still workhorses, offering robust power, though they are louder and heavier. For early ice, a 6- or 8-inch auger is usually sufficient. A smaller hole (6-inch) is often easier to drill and is perfect for perch and walleye. If you're targeting big pike, an 8-inch or even 10-inch auger might be preferred, but remember, the larger the hole, the more effort required. Consider what kind of fish you're after and how much power you want. You can research and compare different auger types and models on Amazon to find one that fits your needs and budget. Our article Best Auger Size for North Dakota Ice Fishing offers more specific advice.
Staying Warm and Dry
The cold is no joke in North Dakota, especially on early ice when temperatures can fluctuate wildly. Dressing in layers is paramount. Start with a moisture-wicking base layer against your skin to pull sweat away. Add insulating mid-layers like fleece or wool to trap warmth. Your outer layer should be waterproof and windproof, protecting you from the elements. A good ice fishing suit, complete with flotation capabilities, is an excellent investment for both warmth and safety.
Don't forget your extremities! Warm, insulated boots are critical. Your feet will be spending hours on cold ice. Waterproof gloves or mittens that allow for dexterity when handling lines and fish are also essential. A warm hat that covers your ears will prevent significant heat loss. There's nothing worse than having to cut a fishing trip short because you're freezing. Investing in quality cold-weather gear, much of which you can find on Amazon, makes all the difference in your comfort and enjoyment. To learn more about layering, refer to our guide on What to Wear Ice Fishing in North Dakota.
Early Ice Fishing Safety Guidelines
| Activity | Minimum Clear, New Ice Thickness | Critical Safety Considerations |
|---|---|---|
| Walking/Ice Fishing (Foot) | 4 inches | Always check ice thickness with a spud bar every few steps. Avoid areas with currents, springs, or heavy snow cover. Go with a buddy. |
| Snowmobile/ATV | 5-7 inches | Always verify thickness before crossing new areas. Slow down in unfamiliar territory. Never travel in a large group too closely. Stay on marked paths if available. |
| Small Car/Light Truck | 8-12 inches | Extremely risky on early ice. Requires clear, consistent ice. Drive slowly. Keep windows down and doors unlocked. Have an exit strategy. Avoid driving over questionable areas. |
| Medium Truck/Fish House | 12-15+ inches | Highly discouraged on early ice. This thickness is usually only achieved later in the season. Never attempt on early ice. Consult local authorities and reports for extremely stable ice conditions. |
| General Rule | Always Verify | No ice is 100% safe. Always check current conditions, go with a partner, carry safety gear (picks, rope, spud bar), and tell someone your plans. Early ice is the most volatile and dangerous period. |
There you have it, folks – a comprehensive look at how to tackle early ice fishing in North Dakota. It's a time of year that truly tests your preparation and patience, but the rewards can be incredible. By prioritizing safety, understanding fish behavior in colder waters, honing your techniques, and equipping yourself with the right gear, you're setting yourself up for a fantastic start to the ice fishing season. So, get out there, be smart, and enjoy the magical stillness that only early ice can offer.
Disclaimer
This article is for general informational purposes only and does not constitute professional advice. Laws, prices and regulations vary by location and change over time. Consult a qualified professional for guidance on your specific situation.