Best Fish Finders for North Dakota Lakes
There's nothing quite like the vast, often unpredictable waters of North Dakota when you're out fishing. From the sprawling expanse of Lake Sakakawea to the timber-filled labyrinths of Devils Lake, anglers face unique challenges in locating those elusive walleye, northern pike, and perch. This comprehensive guide is here to unravel the mystery of fish finders, helping you understand how these incredible pieces of technology can transform your North Dakota fishing experience, ensuring you spend less time searching and more time reeling in your next big catch.
The Indispensable Role of a Fish Finder in North Dakota Fishing
Imagine spending hours on a big lake, drifting aimlessly, casting into what feels like a boundless abyss. It's a common frustration, especially on North Dakota's larger bodies of water. A fish finder isn't just a fancy gadget; it's practically a necessity here, offering a window into the underwater world that profoundly impacts your success. It takes the guesswork out of locating fish, showing you where they are, what kind of structure they're holding to, and even the depth of the water you're navigating.
Why ND Lakes Demand Advanced Sonar
North Dakota's lakes and reservoirs, like Lake Sakakawea, Lake Oahe, and Devils Lake, aren't your typical small ponds. They are vast, deep, and often feature complex underwater topography. You'll encounter everything from submerged creek channels and rock piles to expansive flats and flooded timber. Without a clear understanding of what lies beneath your boat, you're essentially fishing blind. A quality fish finder, especially one with advanced sonar capabilities, allows you to "see" these hidden features, identifying drop-offs where walleye ambush bait or sunken humps that perch might be schooling around. It's the difference between hoping for a bite and strategically targeting fish in their prime habitat. On big water, wind can churn things up, and current can change the game, making a fish finder's real-time data absolutely crucial for adapting your strategy.
Consider a spring day on Lake Sakakawea when the walleye are moving into shallower bays after ice-out. Without a fish finder, you'd be guessing which depths they're holding at. With sonar, you can quickly identify the thermocline, track baitfish, and spot individual fish arches, helping you pinpoint their exact location. This level of precision saves time, fuel, and, most importantly, vastly improves your chances of a successful outing. Even for targeting specific species like North Dakota Walleye Fishing Guide or North Dakota Northern Pike Fishing Guide, understanding their preferred structure and depth through a fish finder is paramount.
Beyond Just "Finding Fish"
While the name "fish finder" suggests its primary purpose, these devices do so much more than just show you fish. Think of them as sophisticated underwater mapping tools. They reveal depth contours, allowing you to follow specific depth lines where fish might be congregating. They expose hidden cover like submerged trees (especially useful on Devils Lake's famous flooded timber) or rock piles, which are notorious fish magnets. The ability to see these features in real-time is a tremendous advantage, allowing you to present your lure directly to where the fish are hiding.
Moreover, many modern fish finders integrate powerful GPS capabilities. This isn't just about knowing where you are on the lake; it's about marking those productive spots. Imagine finding a hot bite on a small hump that's barely visible on a traditional map. With a GPS-enabled fish finder, you can drop a waypoint directly on that spot, ensuring you can return to it again and again, even in different conditions or on future trips. This mapping functionality is invaluable for navigating large bodies of water, avoiding hazards, and effectively patterning fish movements throughout the seasons.
The Learning Curve and Long-Term Benefits
Let's be real, a high-tech fish finder can look a bit intimidating at first glance with all its buttons and settings. There's definitely a learning curve involved in understanding the different sonar views, interpreting arches, and mastering the GPS functions. It's not a "plug and play" device that guarantees instant success without any effort. However, the investment of time to learn your unit will pay dividends far beyond your initial expectations. Many units come with user-friendly interfaces and detailed manuals, and there's a wealth of online tutorials and forums from fellow anglers willing to share their knowledge.
The long-term benefits are undeniable. Once you're proficient with your fish finder, you'll gain an unparalleled understanding of the underwater environments you fish. You'll develop a keen eye for subtle changes in bottom composition, recognize baitfish schools, and be able to differentiate between game fish and smaller panfish. This accumulated knowledge doesn't just help you catch more fish on your current trip; it fundamentally improves your overall angling instincts and makes you a more effective and adaptable fisherman on any body of water, year after year. It's an investment in your fishing future.
Demystifying Fish Finder Technology: Types and How They Work
Walking into a Bass Pro Shops or browsing online on Amazon for fish finders can feel overwhelming with all the different technologies on offer. Traditional 2D sonar, Down Imaging, Side Imaging, and now Forward-Facing Sonar – what does it all mean for fishing North Dakota's lakes? Understanding the basics of each technology will help you make an informed decision based on your fishing style and budget.
Traditional 2D Sonar: The Reliable Workhorse
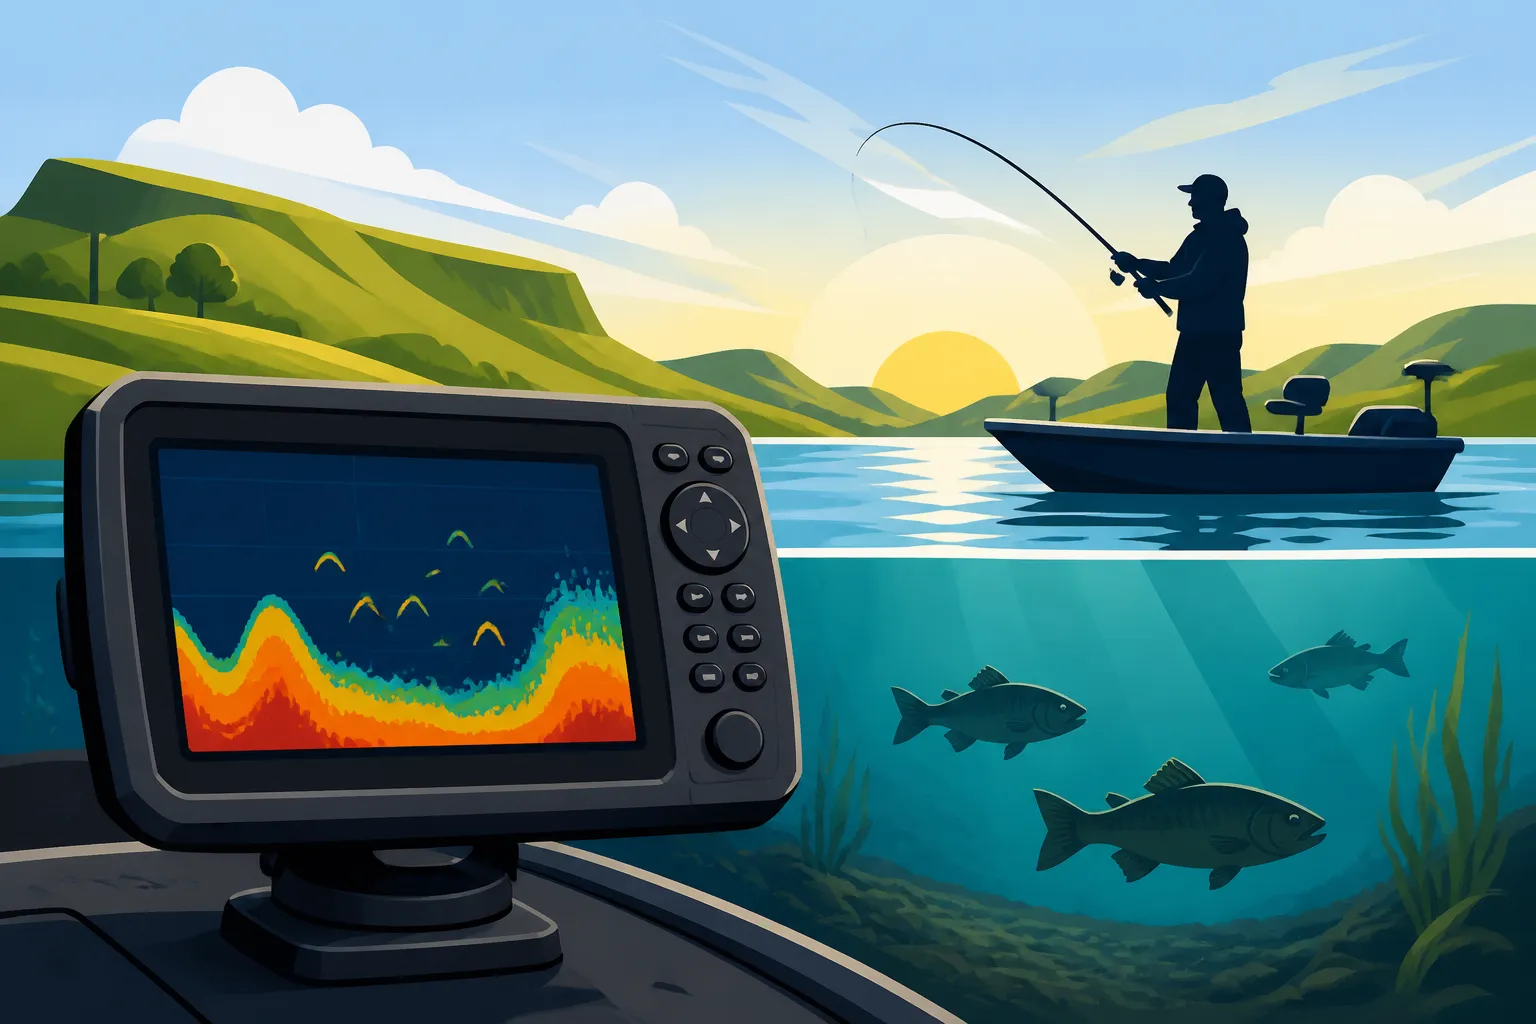
Traditional 2D sonar is the classic "fish arch" view that most anglers are familiar with. It works by sending sound waves straight down from your transducer, which then bounce off objects (like fish, the bottom, or structure) and return to the transducer. The unit interprets these echoes and displays them as images on your screen. Stronger echoes and longer return times mean deeper or larger objects. Fish appear as arches because of the conical shape of the sonar beam; as a fish enters, passes through, and exits the cone, the distance to it changes, creating the arch shape.
This technology is the foundation of almost all fish finders and remains incredibly effective for finding fish directly beneath your boat. It's excellent for identifying depth changes, seeing the bottom composition (harder bottoms show thicker lines, softer bottoms thinner), and spotting baitfish schools. For many anglers, especially those just starting out or working with a tighter budget, a good quality 2D sonar is more than sufficient for finding fish on lakes like Jamestown Reservoir or Lake Audubon. It's robust, reliable, and provides essential information for a wide range of fishing situations, from vertical jigging to slow trolling.
Down Imaging and Side Imaging: Seeing Below and Around
Where traditional 2D sonar gives you a general overview, Down Imaging and Side Imaging offer photo-like clarity and a much wider view of the underwater world.
Down Imaging also sends a narrow beam directly beneath your boat, but instead of a cone, it's more like a very thin slice. This technology produces incredibly detailed, almost photographic images of what's directly below. You can clearly see individual branches of a submerged tree, distinct rocks, or even discern the type of cover fish are relating to. This is particularly useful for fishing complex structure, as it allows you to precisely drop your lure onto a specific target you see on the screen. It helps to confirm what those ambiguous 2D arches might actually be.
Side Imaging takes it a step further. It sends sonar beams out horizontally from both sides of your boat, covering a huge area up to several hundred feet to each side. This means you can scan vast areas quickly, locating structure, weed lines, or schools of fish that aren't directly underneath you. Imagine patrolling the extensive shallow bays of Lake Sakakawea for pike, or cruising along a river channel on the Missouri River looking for walleye. Side Imaging allows you to pinpoint these features at a distance, then mark them with a waypoint and go investigate. It's a massive time-saver for searching large bodies of water and identifying key holding areas before you even get close enough to disturb them. This technology is a game-changer for covering water efficiently and revealing hidden hotspots that traditional sonar might miss entirely.
Forward-Facing Sonar: The Game Changer
Forward-facing sonar, often referred to by brand names like Garmin LiveScope, Humminbird Mega Live, or Lowrance ActiveTarget, is perhaps the most revolutionary fish finder technology to emerge in recent years. Instead of looking down or to the sides, this sonar system looks forward in real-time, displaying what's happening in front of your boat. It's like having an underwater camera that transmits live video. You can see your lure falling, watch fish react to it, and even observe them follow or strike your bait.
This technology has fundamentally changed how many anglers approach fishing, especially for species like walleye or bass. On a lake like Devils Lake, where fish often suspend in flooded timber, forward-facing sonar allows you to cast to specific fish, watch their behavior, and adjust your presentation in real-time. It's incredibly dynamic and provides immediate feedback, allowing for hyper-targeted fishing. While these units are typically at the higher end of the price spectrum, their ability to provide such a direct view of fish activity is unparalleled, making them increasingly popular among serious anglers and tournament competitors looking for a distinct advantage.
Essential Features to Prioritize for North Dakota's Diverse Waters
When you're sifting through all the different models available at a retailer like Bass Pro Shops or browsing countless options on Amazon, it's easy to get lost in a sea of specifications. But for North Dakota fishing, certain features move beyond "nice-to-have" and become absolutely essential for success on our unique waters.
Screen Size and Resolution: Clarity is King
You might think a bigger screen is just for show, but on a boat battling the glare of a bright North Dakota sun or the spray from choppy waters, a clear, readable display is paramount. A larger screen size allows you to view multiple sonar panels at once (e.g., 2D, Down Imaging, and GPS map) without sacrificing detail. This multi-pane view is incredibly helpful for simultaneously tracking fish, observing structure, and navigating. Resolution, measured in pixels, determines the sharpness and clarity of the image. A higher resolution means more detailed images, making it easier to distinguish fish from structure, interpret bottom hardness, and read subtle contours.
Imagine you're trolling for walleye on Lake Oahe, and your screen is displaying a faint arch near the bottom. On a low-resolution screen, it might just look like clutter. On a high-resolution display, you might clearly see it's a distinct fish arch hugging a small rock pile, giving you the confidence to drop a jig or adjust your crankbait. For deciphering complex underwater environments like those found in the Turtle Mountains lakes or the deeper sections of the Missouri River, a crisp, clear image can be the difference between a successful pattern and a frustrating day of guesswork. Don't skimp on screen quality if you want to get the most out of your sonar data.
GPS and Chartplotting: Navigating the Vastness
For North Dakota's expansive and often featureless waters, integrated GPS with robust chartplotting capabilities is non-negotiable. Our major lakes like Sakakawea and Devils Lake are huge, and knowing your precise location and having detailed mapping is crucial for both safety and fishing success.
GPS functionality allows you to mark waypoints on specific fishing spots – that brush pile, that productive humps, or even where you last hooked a fish. It enables you to create and follow routes, navigate back to the boat ramp in a fog, or safely explore unfamiliar areas. Chartplotting, on the other hand, utilizes pre-loaded or downloadable maps (often called "charts") that display detailed depth contours, navigation aids, and points of interest. These charts are invaluable for understanding the lake's topography before you even launch your boat. You can identify potential fishing spots, plan your drifts, and avoid hazardous shallow areas. For instance, knowing the Best Places to Fish in North Dakota often involves studying detailed contour maps.
Without a reliable GPS/chartplotter, you're essentially driving blind on big water, making it incredibly difficult to return to a productive spot or navigate safely. Look for units that support high-definition mapping cards from reputable providers, as these offer the most detailed and accurate representations of North Dakota's underwater terrain.
Transducer Power and Frequencies: Reaching the Depths
The transducer is the "eye" of your fish finder, sending and receiving the sonar signals. Its power and the frequencies it uses directly impact how well your unit performs, particularly in varying depths and water conditions.
Transducer power (wattage) dictates how deep your sonar can penetrate and how effectively it can distinguish objects. Higher wattage generally means better performance in deep water or in situations with more interference. For fishing deep water reservoirs like Lake Sakakawea or Lake Oahe, where fish might hold at 50 feet or deeper, a powerful transducer is a significant advantage. It ensures you get clear readings even at substantial depths, rather than a fuzzy, indistinct screen.
Frequencies determine the beam's width and detail. Lower frequencies (e.g., 50 kHz) provide a wider cone, covering a larger area, which is great for searching large sections of water, but with less detail. Higher frequencies (e.g., 200 kHz, 455/800 kHz, or Mega/Gigahertz) offer a narrower, more focused beam with much higher detail, ideal for pinpointing fish and discerning structure directly beneath your boat. Many modern transducers are dual-frequency or even multi-frequency, allowing you to switch between broad coverage and high detail depending on the situation. For versatile North Dakota fishing, which can involve everything from shallow casting for pike to deep jigging for walleye, a transducer that offers multiple frequency options is highly recommended. This allows you to adapt your sonar view to the specific depth and species you're targeting.
Ice Fishing Capabilities: Adapting to Winter Conditions
North Dakota winters are long, and ice fishing is a cherished tradition. If you plan to extend your fishing season onto the hard water, ensure your fish finder has ice fishing specific capabilities. Many popular open-water units can be adapted for ice fishing with a special ice transducer and a portable carrying case or shuttle.
An ideal ice fishing setup includes a "flasher" mode, which provides a real-time, circular display of what's happening directly beneath your hole. This is incredibly effective for vertical jigging, as you can see your lure, any fish approaching it, and their reaction to your presentation instantly. Look for units that offer a bright, clear display for visibility in varying light conditions, and robust cold-weather performance. Portability is also key, as you'll be drilling multiple holes and moving your gear around. Investing in a unit that pulls double duty for both open water and ice fishing is often a wise choice for North Dakota anglers, allowing you to get maximum value from your investment year-round. Understanding How to Ice Fish in North Dakota is made much easier with the right equipment.
Choosing the Right Fish Finder for Your North Dakota Angling Style
Just like choosing the right rod and reel, selecting a fish finder needs to align with your personal fishing habits, goals, and, of course, your budget. Not everyone needs the most expensive, feature-packed unit, but understanding what's out there can help you get the most bang for your buck, whether you're a casual weekend warrior or a dedicated tournament angler.
Budget-Friendly Options for Casual Anglers
If you're primarily a casual angler who enjoys occasional trips to smaller local lakes or the calmer sections of larger reservoirs, a budget-friendly fish finder can be a fantastic entry point. These units typically focus on reliable 2D sonar and basic GPS capabilities without all the bells and whistles. You won't get hyper-detailed Side Imaging or real-time forward views, but you will get crucial information like depth, bottom contours, and the presence of fish directly beneath your boat.
Models from brands like Humminbird, Lowrance, and Garmin offer solid basic units often under a few hundred dollars. They're usually easy to operate, have smaller screens, and come with a transom-mount transducer that's straightforward to install. For someone who mainly fishes from a smaller boat, kayak, or even from shore with a portable unit, these are perfect. They provide the essential data needed to identify productive areas, find drop-offs, and locate schools of fish without breaking the bank. You can often find great deals on these kinds of units online at retailers like Amazon or during sales events at stores like Bass Pro Shops.
Mid-Range Models for Dedicated Weekend Warriors
For the angler who's out on the water almost every weekend, tackling a variety of North Dakota lakes and species, a mid-range fish finder offers a significant step up in capability without venturing into professional-grade prices. These units typically incorporate Down Imaging and often Side Imaging, giving you much clearer, photo-like views of structure and a wider scanning area. They also boast more advanced GPS features, better screen resolution, and more powerful transducers capable of handling deeper water.
A mid-range unit provides the versatility needed to effectively fish everything from the vastness of Lake Sakakawea to the timber-filled challenges of Devils Lake. You'll be able to quickly scout large areas with Side Imaging, pinpoint fish relating to structure with Down Imaging, and precisely navigate back to hot spots with improved GPS mapping. These units represent an excellent balance of features, performance, and cost, making them a popular choice for dedicated anglers who want to take their fishing to the next level without investing in the absolute top-tier technology.
High-End Units for Tournament and Serious Anglers
When fishing is a serious passion, perhaps even involving tournaments or guide services, a high-end fish finder system becomes a critical competitive edge. These units feature the largest, highest-resolution screens, cutting-edge sonar technologies like Forward-Facing Sonar, and incredibly powerful, multi-frequency transducers. They typically come with advanced networking capabilities, allowing you to link multiple units, share transducers, and integrate with trolling motors or other boat electronics.
For the serious North Dakota angler chasing trophy walleye on Lake Oahe or targeting monster pike on Lake Sakakawea, these units offer unparalleled detail and real-time information. Forward-Facing Sonar, for example, allows you to watch fish react to your bait, making precise casts and presentations possible, which can be the difference between a weigh-in and an empty livewell. While the investment is substantial, the advanced capabilities and insights provided by these systems can dramatically increase your efficiency, success, and overall enjoyment on the water. They are designed for those who demand the absolute best in marine electronics and rely on every possible advantage.
Considering Your Primary Target Species
Believe it or not, the fish you primarily target in North Dakota can influence the best fish finder for you.
- Walleye: These elusive fish often relate to specific bottom transitions, humps, or structure. Clear 2D sonar for arches, and especially Down Imaging for distinguishing subtle structure, are very important. GPS and detailed mapping are crucial for marking and returning to walleye haunts. On big lakes, Side Imaging helps you quickly find those humps and points.
- Northern Pike: Pike love weed lines, submerged timber, and shallow cover. Side Imaging really shines here, allowing you to quickly scan vast areas for submerged vegetation and cover where these ambush predators lie in wait. A good GPS helps you map those extensive weed beds.
- Yellow Perch: Perch are often found in large schools, sometimes suspended or relating to subtle bottom features. Good 2D sonar with high sensitivity can help identify these schools. For ice fishing perch, a flasher or traditional 2D sonar in vertical mode is key for seeing individual fish and your bait. Yellow Perch Habitat on Devils Lake is a perfect example where good sonar helps.
- Channel Catfish: In rivers like the Red River, catfish often relate to deeper holes, current seams, and submerged logs. A powerful 2D sonar helps identify these deep spots and structure. Side Imaging can also be useful for scanning river bends for hidden snags where cats might be holding. Red River Catfish Fishing Spots in North Dakota can be greatly enhanced with proper sonar use.
By aligning your fish finder choice with your target species, you ensure you're investing in the technology that will provide the most relevant and actionable information for your specific fishing pursuits.
Installation and Setup: Getting Your Fish Finder Ready for Action
You've picked out the perfect fish finder, perhaps after hours of research on Amazon or a trip to Bass Pro Shops. Now comes the crucial step: installation and setup. Done correctly, your unit will perform flawlessly. Rushed or improper installation can lead to frustratingly bad readings and wasted time on the water. While some higher-end units might benefit from professional installation, many anglers can tackle the job themselves with a bit of patience and the right tools.
Transducer Mounting Options for Boats
The transducer is the heart of your sonar system, and its placement is critical for optimal performance. There are several common mounting options for boats, each with its own advantages and considerations:
- Transom Mount: This is the most common and easiest type of installation. The transducer is mounted on the outside of the boat's transom, typically on the starboard side, slightly below the waterline. It's important to ensure it's free from obstructions that might create turbulent water ("dirty water") around it, which can interfere with the sonar signal. It also needs to be positioned so it doesn't spray water into the boat at speed. This is a great choice for most small to medium-sized boats and is usually included with most consumer-grade fish finders. Take your time to get the angle just right to ensure a clear, consistent signal.
- Thru-Hull Mount: For boats with inboard engines or those that want a clean, external-free installation, a thru-hull transducer is drilled directly through the hull of the boat. This provides the best, cleanest signal, as it's always in direct contact with undisturbed water. However, it requires drilling a hole in your boat, which can be daunting, and often requires professional installation for proper sealing and placement.
- In-Hull (Shoot-Thru) Mount: This option involves gluing the transducer inside the hull, usually in the bilge, allowing it to shoot the sonar signal right through the fiberglass. It's a popular choice for fiberglass boats as it doesn't require drilling through the hull, protecting the transducer from damage. The downside is some loss of signal strength, and it's generally not recommended for boats with cored hulls (wood or foam between layers of fiberglass) or aluminum hulls.
- Trolling Motor Mount: Many anglers, particularly those using electric trolling motors, opt for a transducer mounted directly on the trolling motor's lower unit. This is excellent for slow-speed fishing, as it places the transducer directly in undisturbed water and allows it to point in the direction the trolling motor is facing. It's especially common for units with Forward-Facing Sonar, which benefit from being steerable. However, it usually won't provide good readings at high speeds, so many boats will have a separate transom-mount transducer for use while running.
Regardless of the mounting style, proper cable routing is essential. Keep sonar cables away from other electrical wires (especially engine wiring) to minimize interference. Secure all cables to prevent snags and damage.
Powering Your Unit: Battery Considerations
A fish finder needs a clean, consistent power supply to operate effectively. Most units run on 12V DC power, typically from a marine deep-cycle battery.
- Dedicated Battery: For optimal performance and to avoid interference from other electronics, it's highly recommended to power your fish finder (and other sensitive electronics) from a dedicated deep-cycle marine battery separate from your boat's starting battery. This ensures a stable power source and minimizes voltage drops that can occur when starting a large engine or running other high-draw accessories.
- Battery Size and Life: The size of your battery (rated in amp-hours, Ah) will determine how long your fish finder can run. Consider your typical fishing trip length and the power draw of your unit (check its specifications). If you're running multiple units, a large screen, or Forward-Facing Sonar, you'll need a higher capacity battery. For ice fishing, portability and cold-weather performance of your battery are paramount.
- Wiring: Use appropriately gauged marine-grade wiring for your power connections. Run positive and negative wires directly from the battery to the fish finder's power cable, ideally with an in-line fuse close to the battery for protection. Avoid splicing into existing wiring harnesses if possible, as this can introduce electrical noise and degrade performance.
Basic Setup and Initial Calibrations
Once the hardware is installed, it's time to fire up your fish finder and perform some initial calibrations. Don't just turn it on and go; a few minutes spent here will make a huge difference:
- Software Updates: First, check if there are any available software updates for your unit. Manufacturers frequently release updates that improve performance, add features, and fix bugs. You can usually download these from the manufacturer's website and load them onto your unit via an SD card.
- Transducer Type Selection: In the settings menu, make sure you've selected the correct transducer type that's connected to your unit. This tells the fish finder how to interpret the signals it's receiving.
- Keel Offset/Waterline Offset: If your transducer isn't perfectly at the waterline, you might need to adjust a keel offset setting. This tells the unit how much to add or subtract to its depth reading to show the true depth from the surface of the water or your boat's keel. This is a small but important detail for accurate depth readings.
- GPS Setup: Ensure your GPS antenna has a clear view of the sky. Let the unit acquire satellites and then confirm your position on the map. If you're using pre-loaded maps or a map card, ensure it's recognized and displaying correctly.
- Initial Sonar Settings: Start with default or "auto" settings for sensitivity and depth range. Once you're on the water, you can fine-tune these to optimize performance for the specific conditions you're in. This initial setup is vital for getting accurate readings from the start.
Mastering Your Fish Finder: Tips and Techniques for North Dakota Success
Having a top-of-the-line fish finder is one thing; knowing how to use it effectively to put fish in the boat is another. It takes practice, experimentation, and a good understanding of what you're seeing on the screen. Here are some tips to help you master your unit on North Dakota's diverse waters.
Interpreting Sonar Readings: Arches, Bait Balls, and Structure
Understanding what the various shapes and patterns on your screen represent is fundamental to using a fish finder successfully.
- Fish Arches: On traditional 2D sonar, fish typically appear as arches. A full, strong arch indicates a fish that passed through the center of your sonar cone. Half-arches or partial arches mean the fish passed through the edge. The thickness of the arch can often indicate the size of the fish – larger fish often create thicker arches. Don't expect perfect arches all the time; speed of the boat, fish movement, and bottom hardness all play a role. Look for distinct arches separated from the bottom, or those relating to structure.
- Bait Balls: These appear as dense clouds or clumps on your sonar screen. They indicate concentrations of baitfish, which are often a magnet for larger predatory species like walleye, pike, and salmon. Finding bait balls is a huge step toward finding game fish.
- Bottom and Structure: The bottom typically appears as a solid line across the bottom of your screen. The thickness and intensity of this line can tell you about bottom hardness – a thick, bright line usually means a hard bottom (rock, gravel), while a thinner, fuzzier line suggests a softer bottom (mud, silt). Structures like submerged trees, rock piles, humps, and drop-offs will appear as variations in the bottom line or distinct shapes rising from it. Down Imaging is especially useful here for getting a photo-like view of these features. Deep Water Structure Fishing Techniques are entirely reliant on correctly interpreting these readings.
- Weed Lines: On traditional sonar, weed lines will show as fuzzy, vertical lines rising from the bottom. On Side Imaging, they appear as distinct dark lines or textures stretching horizontally. Understanding Fishing Weed Lines for Northern Pike is made incredibly easy when you can clearly identify these on your screen.
Practice is key. Spend time just idling around, observing how different things appear on your screen, and correlating them with what you might know about the lake.
Maximizing GPS Features for Waypoints and Tracks
Your fish finder's GPS is more than just a navigation tool; it's a powerful data management system for your fishing spots.
- Marking Waypoints: Every time you catch a fish, see a promising piece of structure, or find a large school of bait, immediately mark a waypoint. Give it a descriptive name (e.g., "Walleye Hump 1," "Pike Weeds," "Perch School 50ft"). Over time, you'll build a comprehensive library of productive spots.
- Tracking Your Path: Always use the track feature. This leaves a breadcrumb trail of where your boat has been. It's invaluable for repeating successful drifts, understanding how wind and current affect your boat, or simply retracing your steps to avoid hazards or return to the ramp. On big, featureless lakes like Lake Sakakawea, having a track of your movement is incredibly reassuring.
- Creating Routes: Before a trip, use your chartplotting features to create routes to promising areas. This helps you efficiently navigate and avoid wasting time getting lost. You can also use routes to systematically search an area, like following a specific depth contour.
- Community Maps/User Data: Some fish finder brands allow you to upload your sonar logs to create more detailed maps (e.g., Humminbird's AutoChart Live, Lowrance's Genesis Live). This crowdsourced data can greatly enhance your mapping, especially on smaller, less-charted North Dakota lakes.
Adjusting Settings for Different Conditions (Wind, Depth, Clarity)
A "set it and forget it" approach won't cut it with a fish finder. Conditions on North Dakota lakes change constantly, and adjusting your settings will optimize performance.
- Sensitivity (Gain): This controls how much detail your sonar displays. Too low, and you'll miss faint echoes (like smaller fish or soft bottom). Too high, and your screen will be cluttered with noise. On clear, calm days, you might run higher sensitivity. In windy conditions or dirty water, you might need to dial it back. The goal is to see clear fish arches and structure without excessive clutter.
- Depth Range: While many units have an auto-depth setting, manually setting your depth range (e.g., 0-50 feet if you're fishing in 30 feet of water) often provides a clearer, more zoomed-in view of the bottom and fish. This is especially useful for targeting fish that are hugging the bottom.
- Scroll Speed (Chart Speed): This dictates how fast the sonar history scrolls across your screen. A faster scroll speed gives you a more real-time view, which is good for identifying individual fish or following a jig. A slower speed compresses the history, which can be useful for spotting subtle bottom changes over a longer distance. Adjust this based on your boat speed and what you're trying to observe.
- Noise Rejection/Surface Clarity: These settings help filter out interference from engine noise, electrical interference, or surface clutter (waves, air bubbles). Play with these settings to clean up your screen without filtering out actual fish or structure.
Using Your Fish Finder for Ice Fishing
The principles of fish finding apply equally to hard water, and a good unit can be your best friend when ice fishing.
- Flasher Mode: As mentioned, flasher mode is invaluable. It gives you a real-time, circular display of what's happening directly beneath your hole. You'll see your jig, the bottom, and any fish that come into view. This allows you to react instantly to fish movements, adjusting your jigging presentation to entice a bite. You can identify Best Jig Size for Perch Through the Ice by seeing its exact response.
- Traditional 2D Sonar (Vertical): Many units also have a vertical 2D display for ice fishing. This provides a traditional scroll-across view, showing history as fish enter and leave your cone. It can be useful for spotting fish that might have just passed through before you drop your jig.
- Portable Setups: Most ice fishing specific fish finders (or ice-capable open water units) come in a portable shuttle with a battery and ice transducer. This makes them easy to carry from hole to hole.
- Gain/Sensitivity in Cold Water: Cold water often transmits sonar signals more efficiently, so you might need to adjust your gain downwards compared to open water fishing to avoid too much clutter.
- Finding Structure Under the Ice: Use your GPS maps to locate known structure (humps, drop-offs, points) from your open water fishing, then drill holes over those areas. Your fish finder will confirm the depth and bottom content. For example, finding Devils Lake Perch Bite Locations This Winter heavily relies on knowing the lake's structure and finding bait.
Maintenance and Care: Protecting Your Investment
Your fish finder is a significant investment, and like any piece of sensitive electronics, it requires proper care and maintenance to ensure it performs reliably for years to come. Neglecting it can lead to premature failure, poor performance, and a lot of frustration.
Post-Trip Cleaning and Storage
After every fishing trip, especially on North Dakota's dusty gravel roads or if you've been in murky water, take a few minutes to clean your unit.
- Wipe Down the Unit: Use a soft, damp cloth to gently wipe down the screen and control panel. Avoid harsh chemicals or abrasive cleaners that can damage the screen coating or plastics. If you got mud or grime on it, a mild soap solution can be used, but make sure to rinse thoroughly with clean water afterward.
- Clean the Transducer: The transducer can accumulate algae, slime, or even fishing line during a day on the water. Gently wipe it clean with a soft cloth. Never use sharp objects or abrasive pads, as this can scratch the transducer face and impair its ability to send and receive sonar signals clearly. A clean transducer is essential for good readings.
- Dry Completely: Before putting your unit away, ensure it is completely dry to prevent water spots or, more importantly, moisture from seeping into connections and causing corrosion.
- Protect the Screen: If your unit came with a protective cover, use it! This shields the screen from scratches, dust, and UV damage during storage and transport.
- Disconnect Power: Always disconnect the power cable from your fish finder when not in use, especially for longer storage periods. This prevents parasitic battery drain and protects the unit from potential electrical surges.
Software Updates and Troubleshooting
Keeping your fish finder's software up to date is crucial for optimal performance.
- Regular Updates: Check the manufacturer's website periodically for software updates. These often include performance enhancements, bug fixes, new features, and compatibility improvements with other devices. Downloading and installing them (usually via an SD card) is a straightforward process and can make a noticeable difference in your unit's functionality.
- Troubleshooting Common Issues: If you encounter issues like fuzzy screens, intermittent readings, or GPS signal loss, start with basic troubleshooting:
- Check all connections: Ensure power and transducer cables are securely plugged in and free of corrosion.
- Inspect the transducer: Look for physical damage, marine growth, or obstructions on the transducer face.
- Check battery voltage: Low voltage can cause erratic performance.
- Perform a factory reset: As a last resort, a factory reset can sometimes resolve persistent software glitches, but remember it will erase all your custom settings and waypoints (so back them up first!).
- Consult the Manual/Online Resources: Your unit's manual and the manufacturer's online support pages are excellent resources for diagnosing and solving problems. Many online forums are also full of experienced users willing to offer advice.
Winterizing Your Unit for the Off-Season
When North Dakota's open water fishing season winds down and the ice begins to form, proper winterization of your fish finder (and boat) is essential.
- Remove from Boat (if possible): For units that are easy to detach, it's best to remove them from the boat for the winter. This protects them from extreme cold, moisture, and potential theft. Store them in a climate-controlled environment, such as your home.
- Store in a Dry Place: Ensure the unit is completely dry before storage. Place it in a clean, dry, and temperature-stable environment, away from direct sunlight.
- Battery Care: If you have a dedicated battery for your fish finder, make sure it's fully charged before storing it for the winter. Consider using a smart trickle charger to maintain its charge over the long off-season. Cold temperatures can damage discharged batteries.
- Transducer Protection: If your transducer remains on the boat, ensure it's clean and protected. If it's a transom-mount, make sure it's not exposed to potential impact from snow, ice, or other objects. Some boat covers can rub against transducers, causing damage.
- Backup Waypoints: Before putting everything away for the winter, make it a habit to back up all your waypoints, tracks, and routes onto an SD card or directly to your computer. Technology can be fickle, and losing years of carefully marked fishing spots would be a heartbreaker. This way, you're ready to upload them to a new unit or reinstall them on your existing one come spring. For a comprehensive guide on How to Winterize Fishing Gear After the Season, check out our other articles.
By following these maintenance tips, you'll ensure your fish finder is ready to perform at its best when you hit the water, year after year, helping you discover those hidden gems in North Dakota's fantastic fishing landscape.
Disclaimer
This article is for general informational purposes only and does not constitute professional advice. Laws, prices and regulations vary by location and change over time. Consult a qualified professional for guidance on your specific situation.